Overview
This device is mainly used for industrial use, if you have industrial device with old Monitor, but the monitor is already broken, then what is the best way to get the industrial device to work? replace the new system?
NO! the industrial device costs tens of thousands(or possible millions) of dollars at least, you just need to purchase this and then connect to LCD monitor, the problem would be solved! With only US $200!
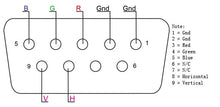
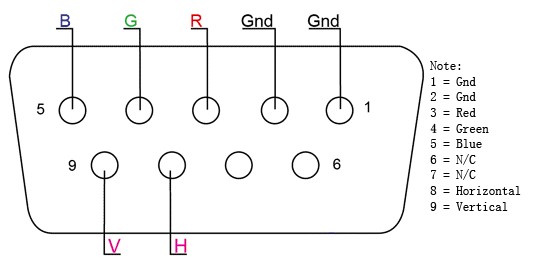
Most of your Device would have D-sub 9 or Honda pin connector as below:


the best part is: we provide “tech support”, so if you don’t know how to connect or not sure if it would work. you can just send us :
- picture of your monitor connector ( required)
- your monitor model.( preferred but optional)
- your industrial machine model ( preferred but optional)
and then email to : sales@sintron.co.uk
we will check and get back to you how to make it to work with easy instruction.
please also check all the tested models (but not limited) at the end of this page.
PS. if yours is an arcade game monitor instead of industrial device ( CNC etc..), please use arcade game video converter instead.
Description
Most of the Industrial Machine might use Monochrome or CGA/EGA CRT monitor. because they were developed in early times. and the Machine still works good. while the monitor might not anymore.
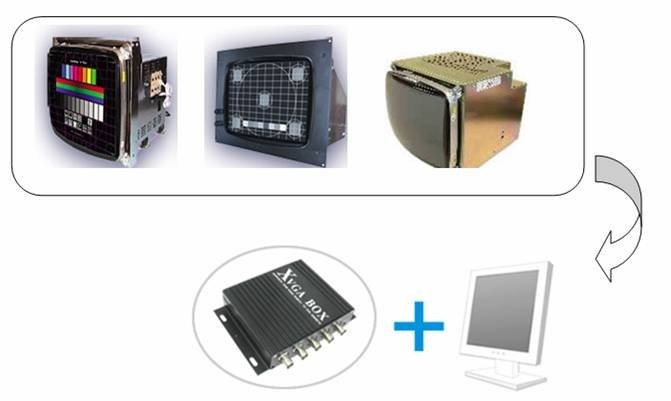
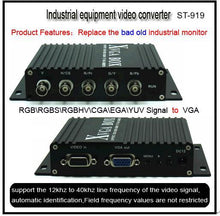
ST-919 is mainly designed for this purpose to replace the old industrial CRT monitor with the new LCD monitor. therefore you don’t have to go back to the original manufacturer and get a heavy big & expensive ( thousands of dollars ) CRT monitor
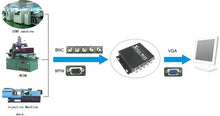
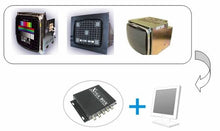
below picture shows the concept how ST-919 make it to work.
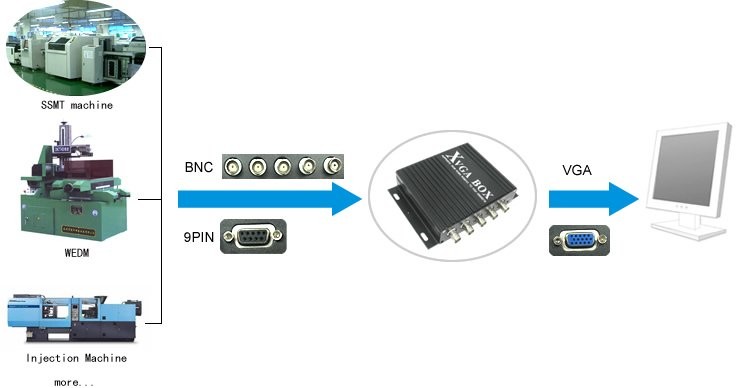
the concept is to convert the old CRT video signal via Sintron ST-919 and then connect to New LCD monitor with VGA input. so that you can replace/repair and make it to work again!
Specificaitons

Features
- YPbPr = YUV
- Input Horizontal Frequency Rate 12kHz to 40kHz automatically recognized.
- Support RGB and YPbPr.
- Support Interlaced Scanning and Line by Line Scanning.
- Support Vertical Resolution from line 200 to line 600 automatically recognized.
- Support variable Horizontal Resolution automatically recognized?
- Support RGBHV (separate sync), RGBS (composite sync), automatically recognized.
- Output resolution: 800*600/60Hz standard VGA or custom-resolution.
User Guide
Connection Image:

*Note: 9 Pin and BNC input signal, you can choose one of them.
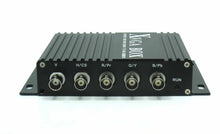
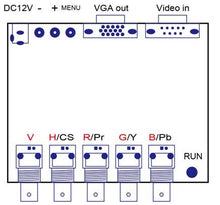
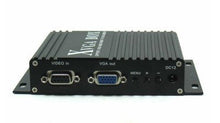
Quick reference for Sintron ST-919 interface: Definition for I/O interface
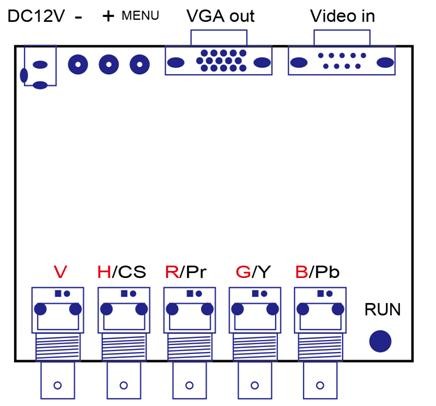
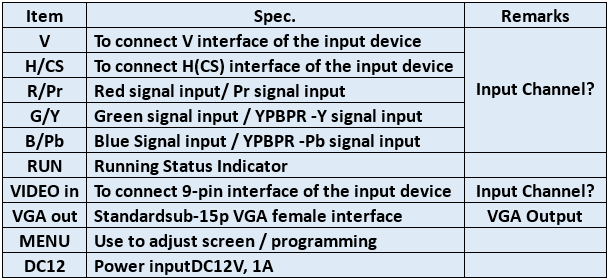
9 Pin D-SUB Reference: Definition for Input Channel II
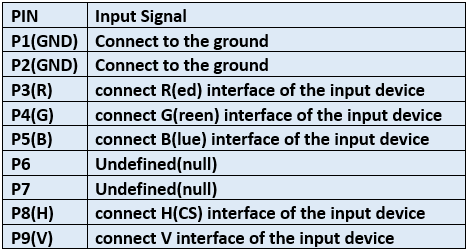
Application for this converter: Definition for Input Channel I
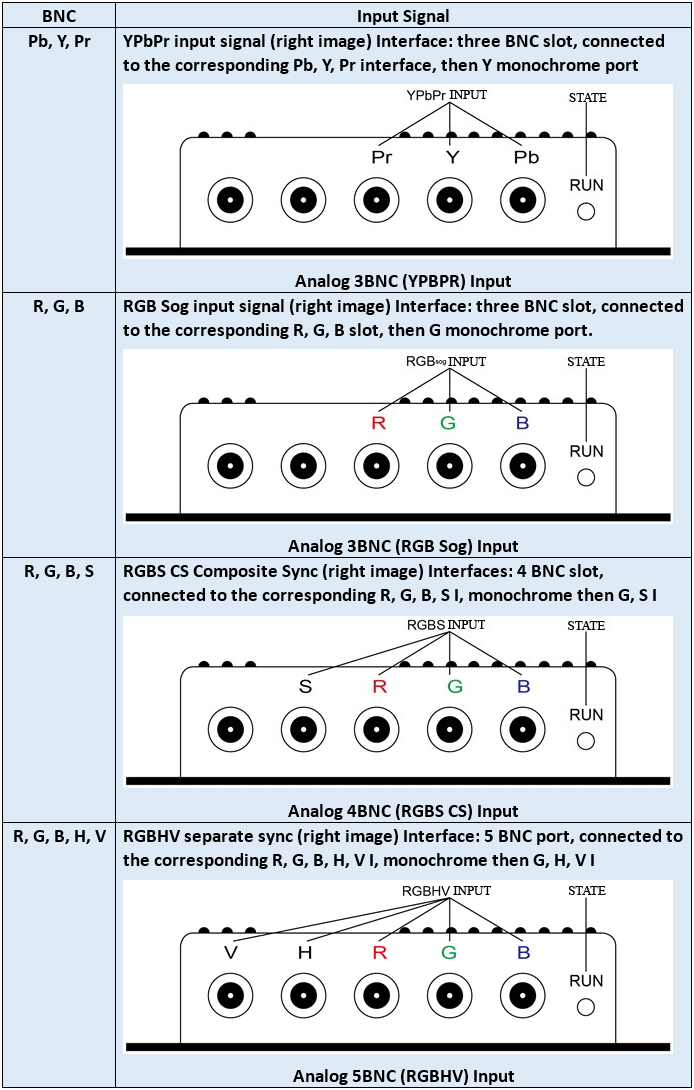
Operation Menu:
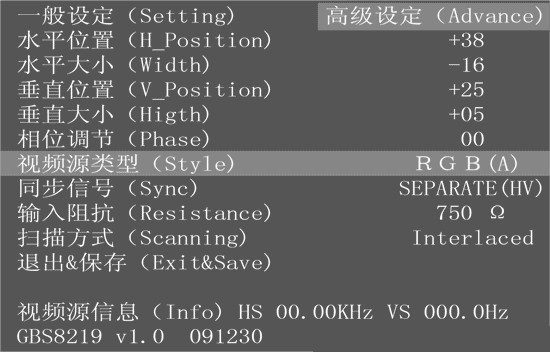
- H_Position: Moves the position of the display area on the screen.
- Width: adjust the width of the menu.
- V_Position: Moves the position of the display area on the screen vertically.
- Higth: adjust the height of the menu.
- Phase: adjust the phase of the menu.
- Style: Signal style, RGB(A) Analog,RGB(D) Digital TTL,YUV?
- Sync: Signal Sync mode, Separate(HV), Composite(S), SOG, SOY. Automatic recognition of video input sync, or custom of video input sync.
- Resistance: 75 ohm or 750 ohm.
- Scanning: Interlaced or Progressive.
- Exit & Save: Save and Exit.
- Automatically save and exit: 15 seconds, don't press any key, the menu automatically save and exit. (No signal input, the OSD menu will display)
- ST-919 Advance menu: Turn on the ST-919 power, Press and hold the Menu buttons simultaneously until the ST-919 Advance menu display, about 5 to 8 seconds.
- Restore the factory defaults for ST-919: Turn off the ST-919 power, Press and hold the Menu buttons simultaneously until the ST-919 power on, about 3 to 5 seconds.
Control buttons:

Using the Screen Adjustment Menu
(OSD: On Screen Display)
STEP 1
Connected to signal, no display or display color is not correct, adjust the Signal style ( RGB(A) Analog/RGB(D) Digital TTL/YUV ).
STEP 2ST-919 can automatically identify the sync signal, if the display distortions that need to manually adjust the sync signal ( Separate(HV)/Composite(S)/SOG,SOY ).
STEP 3If the screen shows elongated, and the overflow to the bottom of the screen, choose the scanning mode adjusted: Progressive; or screen display is still only half of the monitor, choose the scanning mode to adjust to: interlaced.
STEP 4Adjust the horizontal position, horizontal size, vertical position, vertical size of the item, adjust the monitor to display properly.
STEP 5Input impedance: Select the correct input impedance.
STEP 6Adjustment the phase until the display clearly.
STEP 7Save and exit
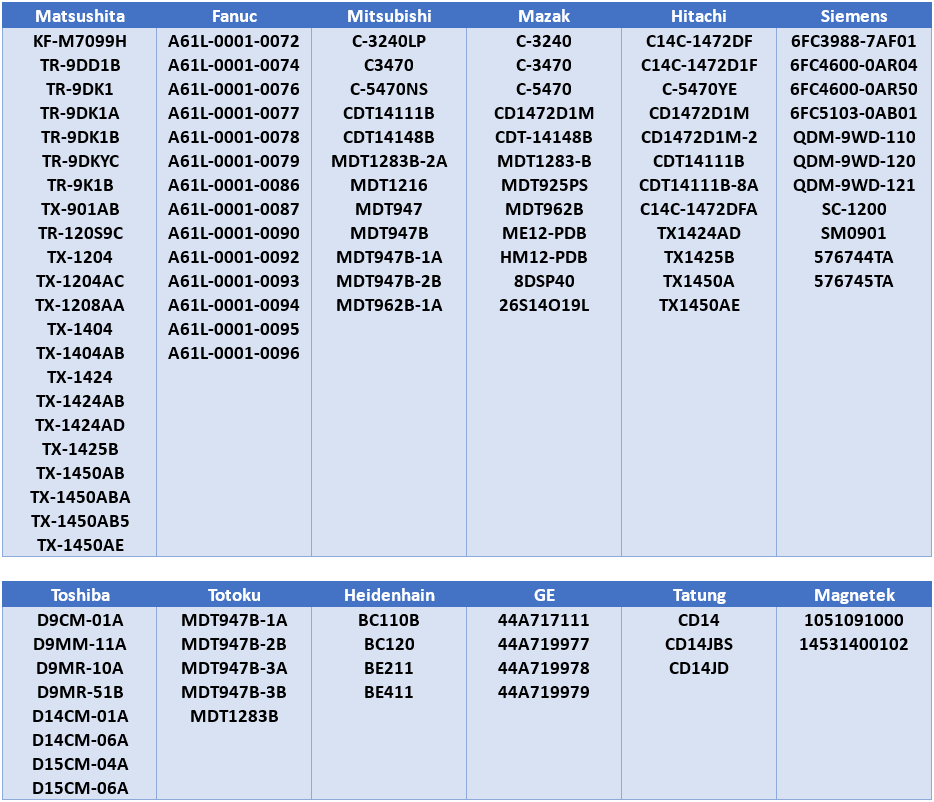
The upgrading replacement for old CNC crt monitor as follows: replaceable model list
