Sintron ST-004/ST-005 Mobile & Coin operated Timer box instruction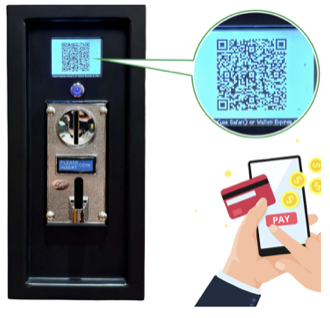
The Sintron ST-004/ST-005 is an upgraded version of our renowned model, the ST-002/ST-003. Equipped with an LCD and Mobile Payment functionality, it serves as a power timer control for seamless operation. This timer box allows you to effortlessly connect your machine, enabling users to make payments through Apple Pay, Google Pay, Paypal, Venmo, Debit & Credit Cards…(not limited), or Coins. Enjoy the flexibility of setting up time, price, and text displayed on LCD Screen. It is particularly well-suited for 110V~240V Washer & dryers, as well as any machines requiring a timer.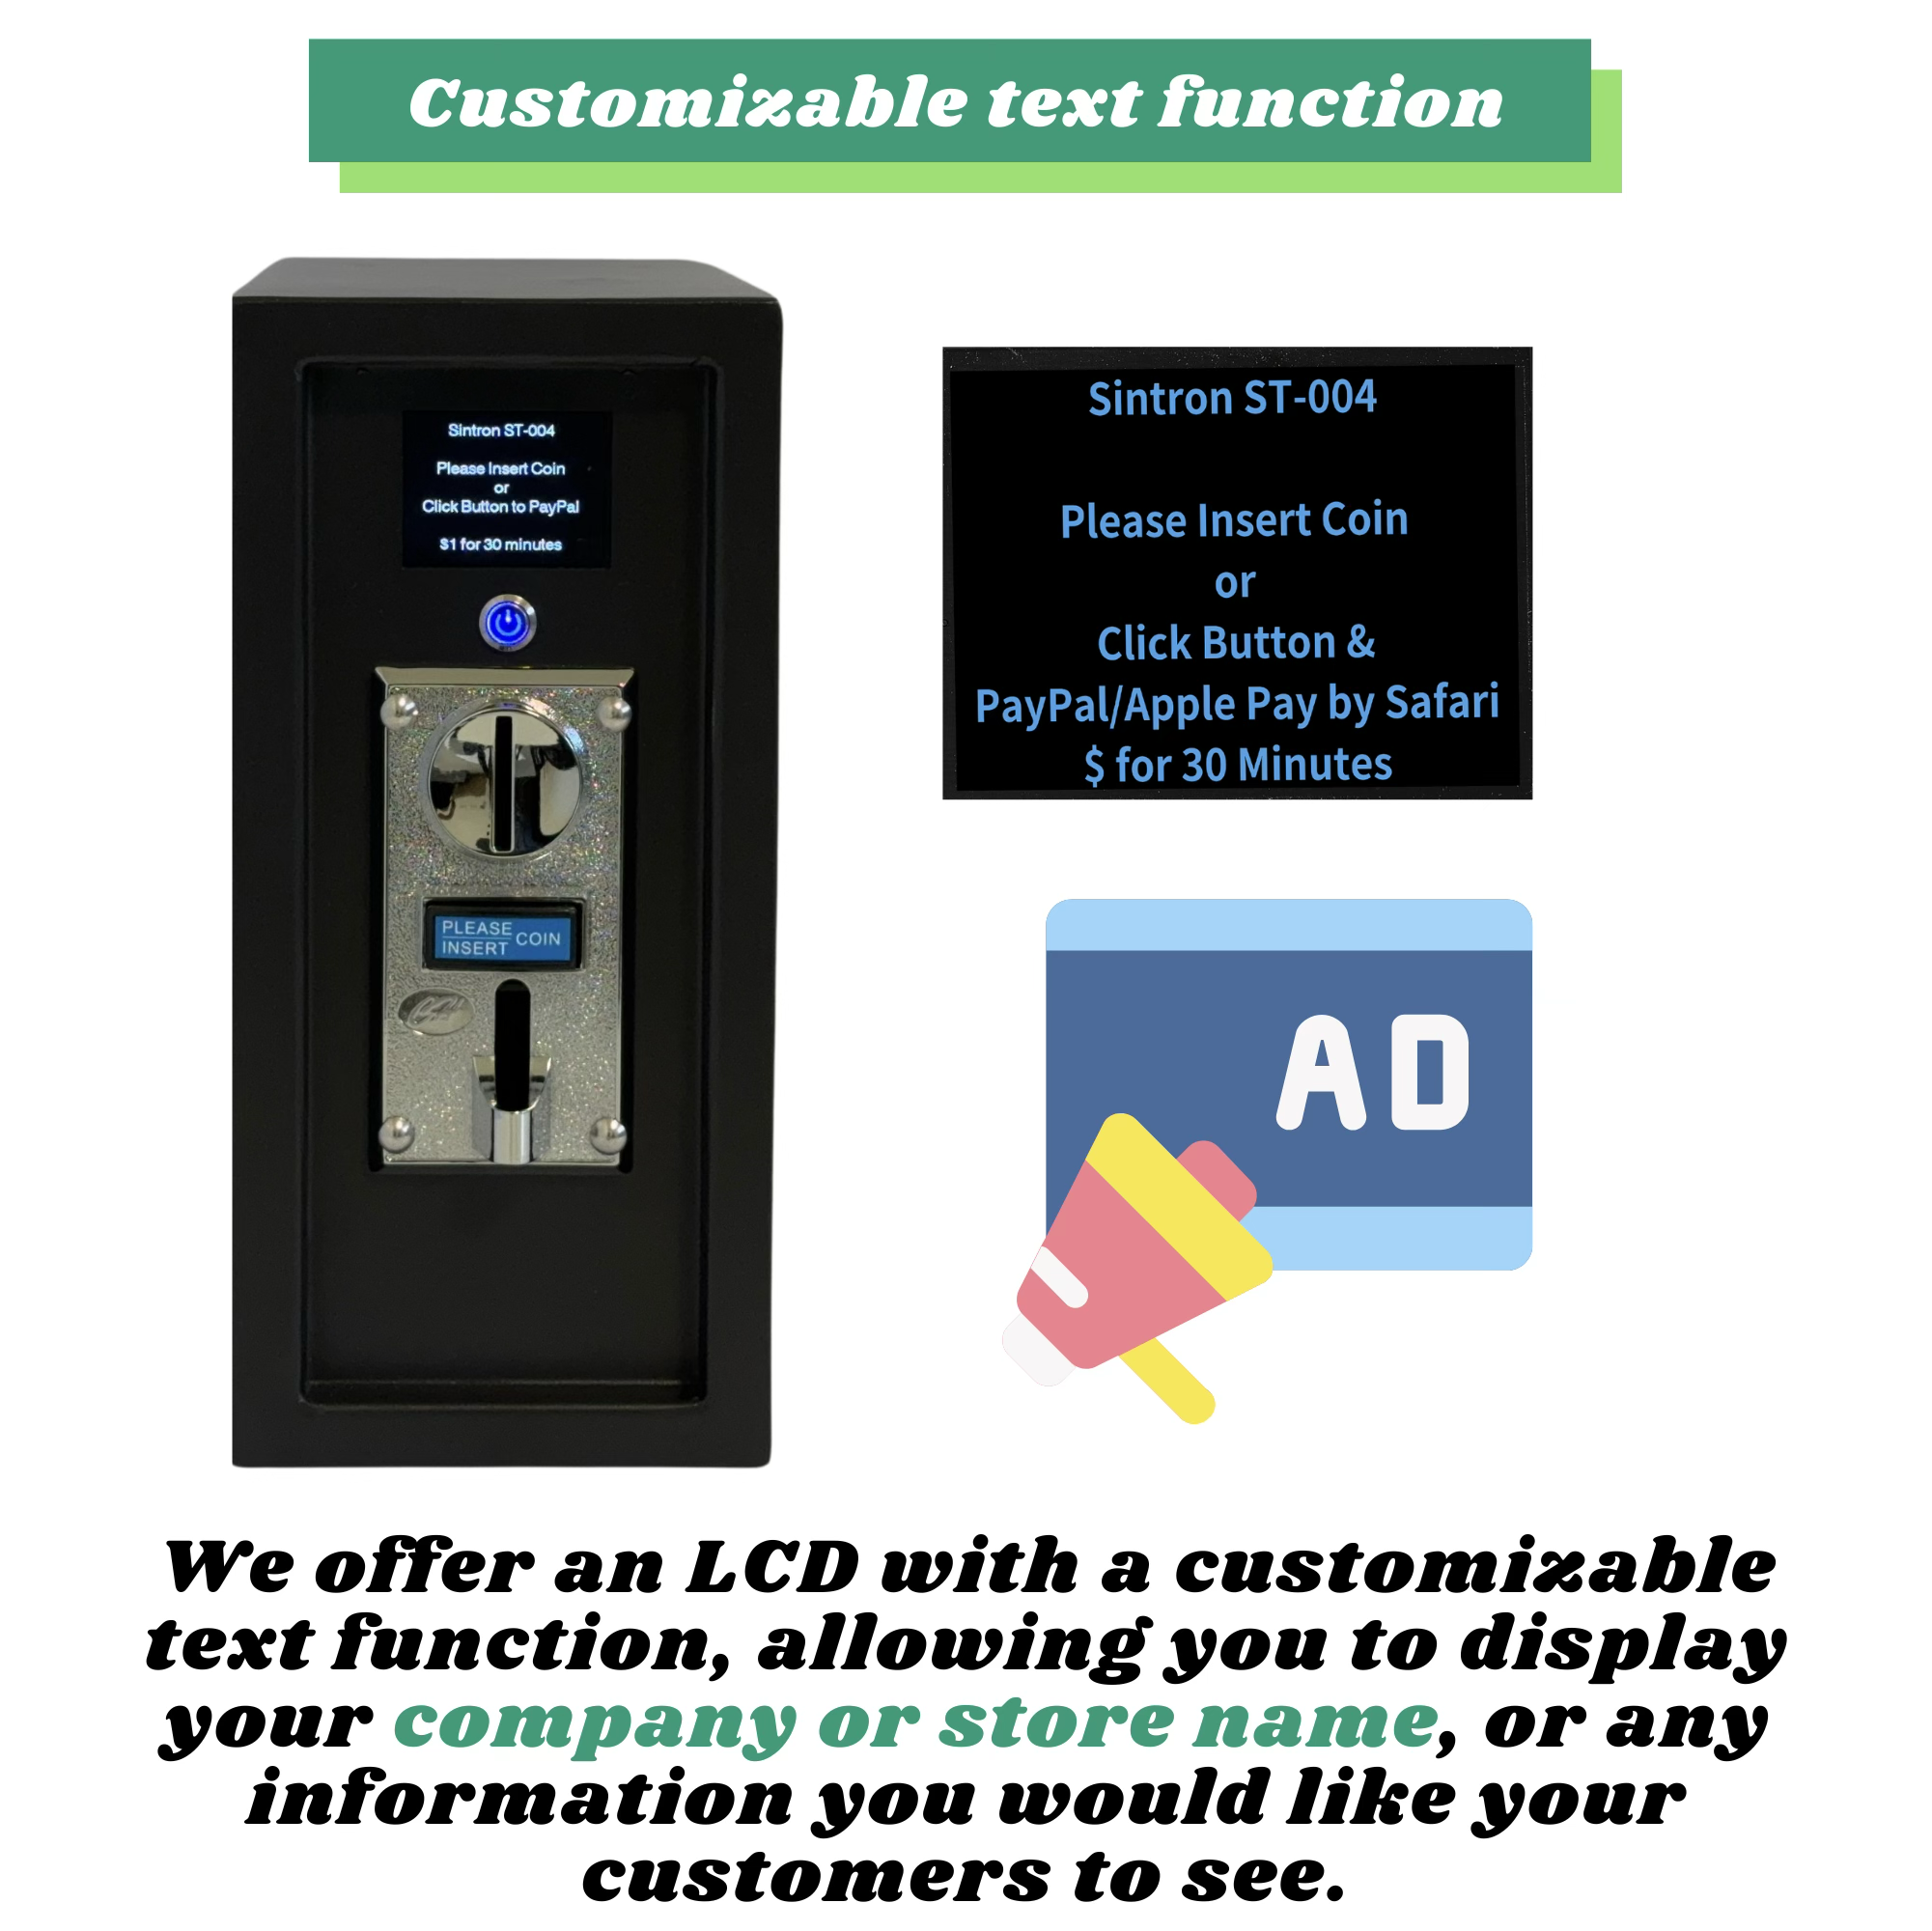
Specification
- Dimension: 26 cm*28 cm* 13 cm for ST-004 34.5 cm*28 cm* 13 cm for ST-005
- The Maximum Accumulative Time:999:99
- The Maximum Setting Time: 99:99
- Timer Mode: Hour:Minute or Minute:Second
- Plug Type:NEMA 5-15 (US)/UK/EU/AU Plug for ST-004,NEMA 10-30 or NEMA 14-30 for ST-005
- Voltage Range:AC 100V ~ 240V (wide voltage)
- Maximum Load Current: ST-004: 16A & ST-005: 30A
Manual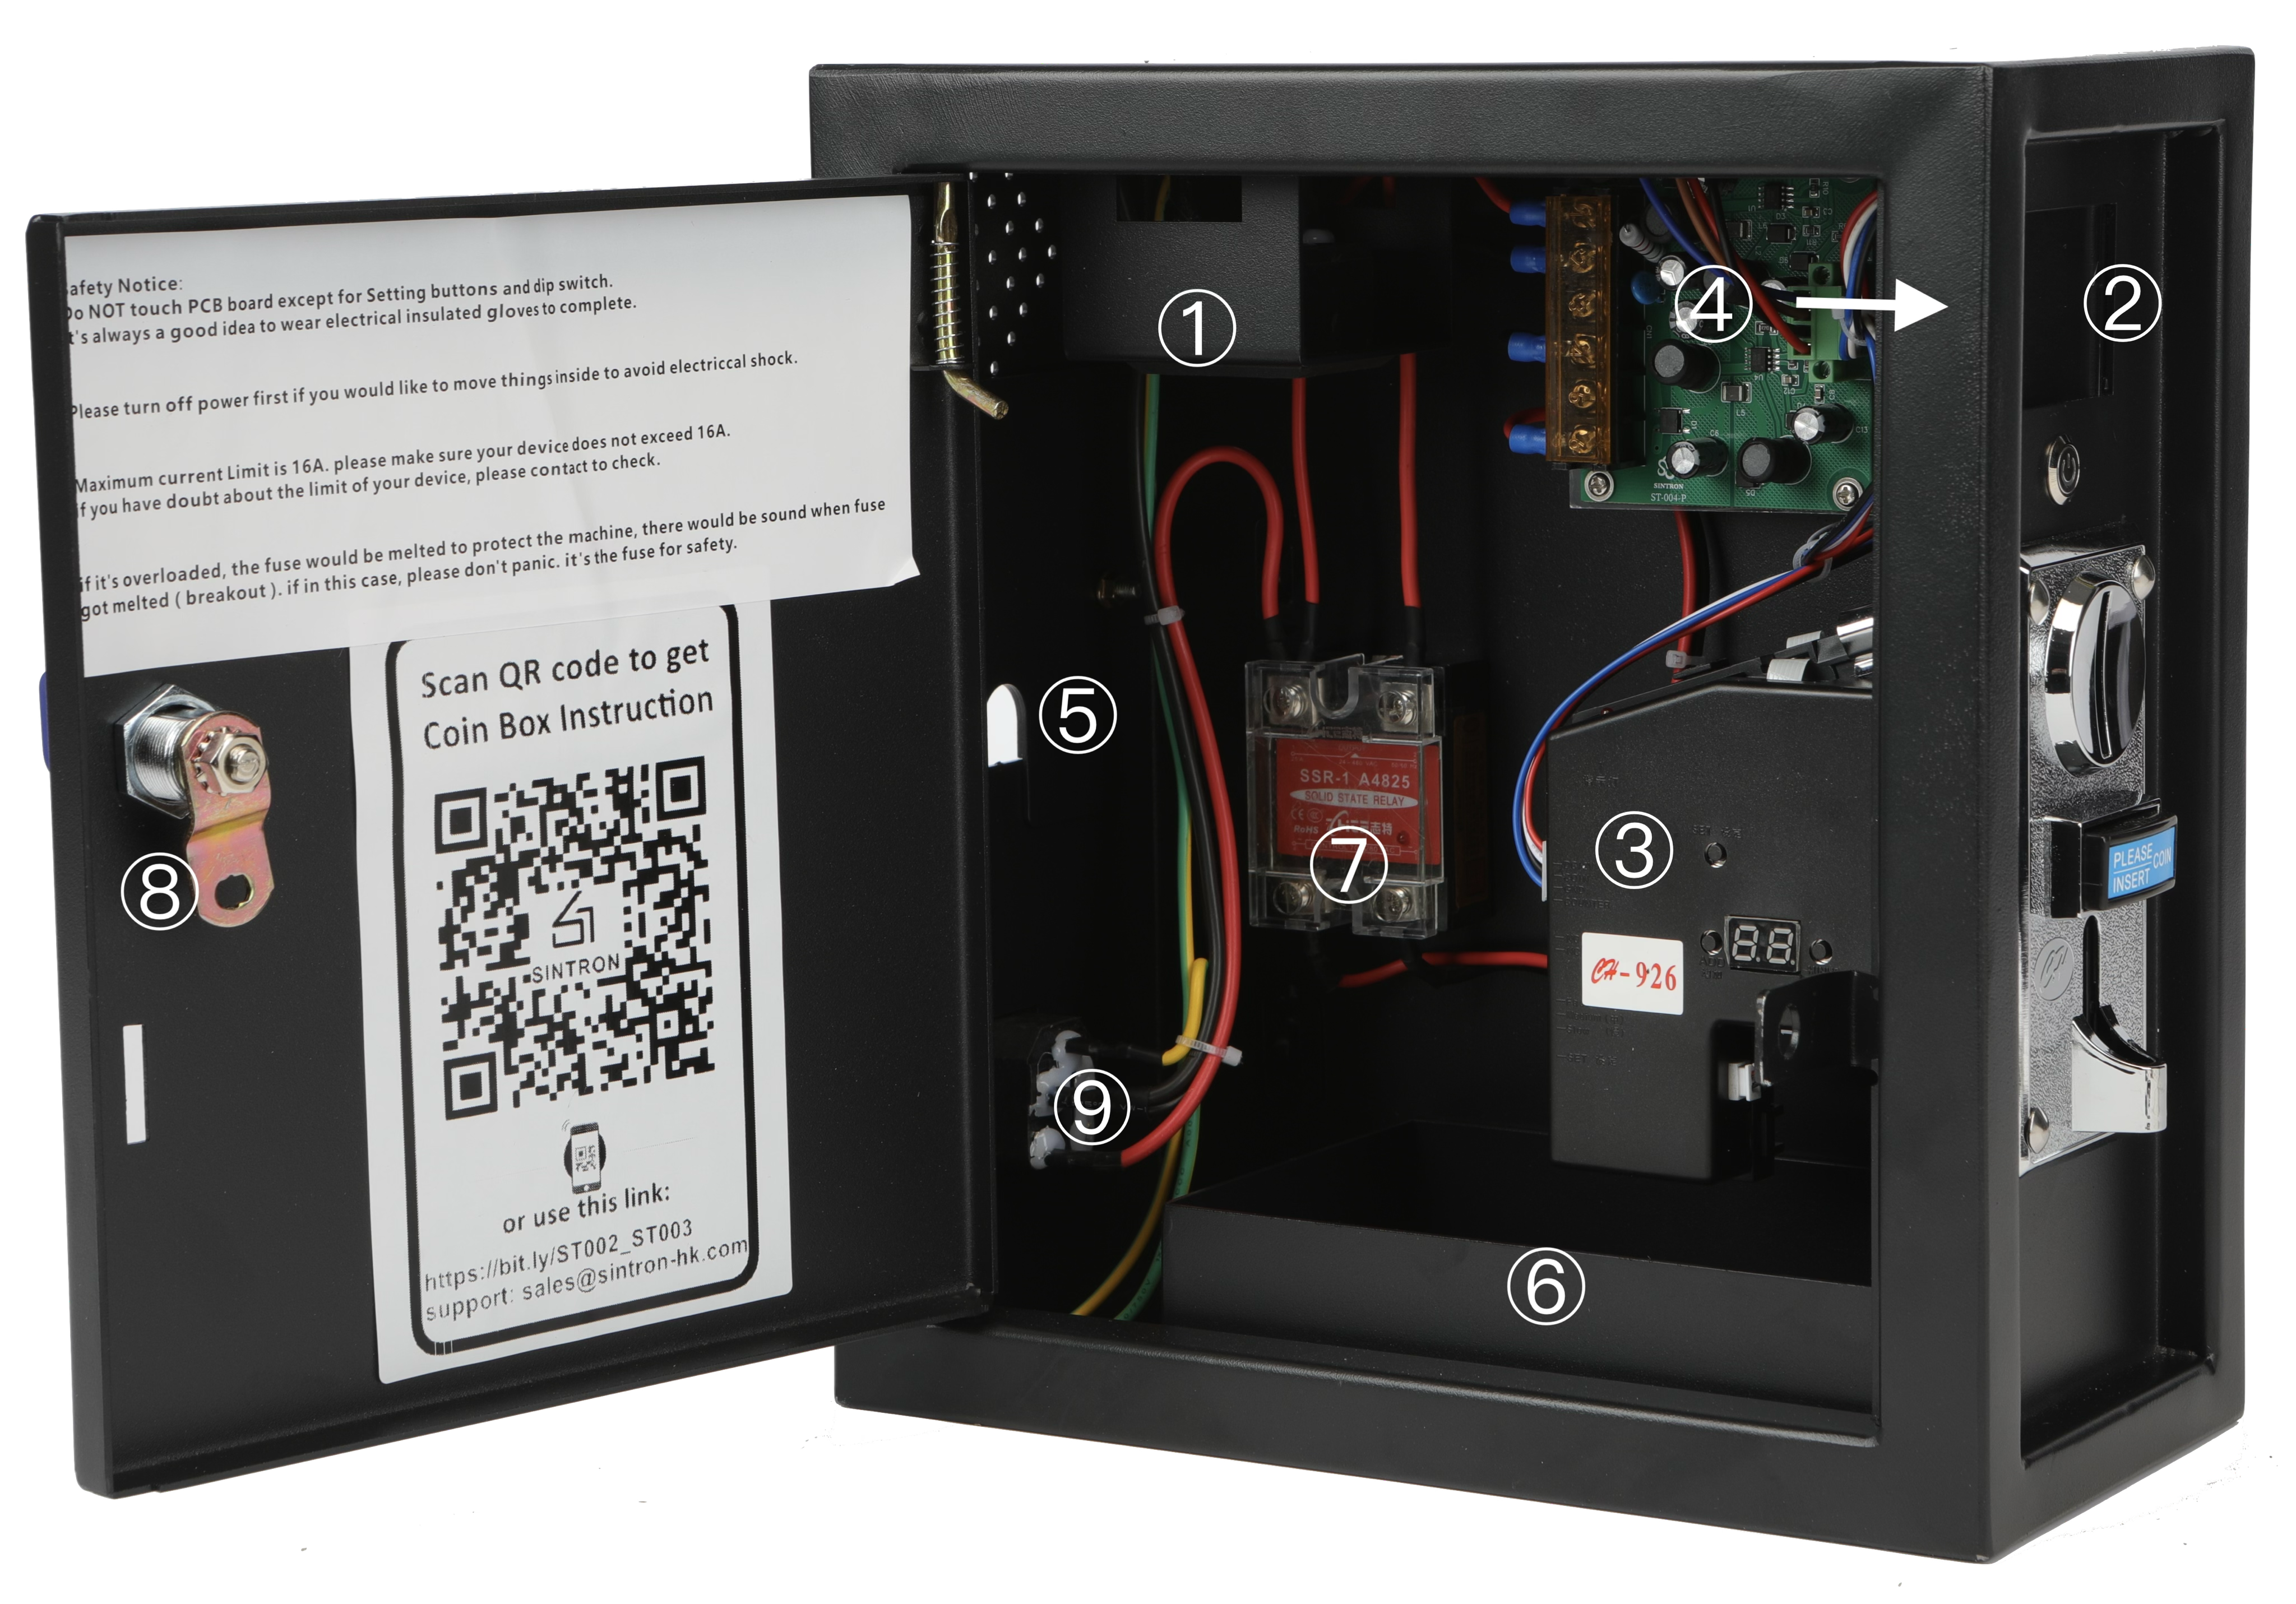
- Plug power cord into Receptacle (with fuse) (No. 9) to AC 100V~240V. LCD (No.2) should light up with text.
- Please set up coin acceptor (No. 3) based on Part 2.
- Set up time, price and mode on timer (No.4) based on Part 2 & Part 3.
- Please try to insert coins. You should see the timer running. if not, please double check step 2 and 3.
- Please power off & insert the power cord of your device through (No. 5) into the receptacle (No. 1). Note: It may require some force; a snug fit is recommended for safety.
- Then your device should be running after payments.
Settings
Tech Support: sales@sintron-hk.com contact: Chen Chih Feng
Note: Now you can extend the warranty 1 more year = 2 years. For details, please apply with this google form ( need Google Account logged in) Sintron_Warranty_Request_form
When you receive ST-004, you'll need to configure 4 settings:
Part 1: Coin and Timer settings. (You can skip Parts 2 and 3 when using coins only).
Part 2: Mobile Payment settings. (Optional)
Part 3: PayPal/Stripe/Square Payment Gateway (Optional, using WIFI Or App).
Part 4: Extra Function (Optional).
⚠️ Do not allow the ST-004/ST-005 coin box to come into contact with your washer or dryer to prevent damage caused by machine vibrations.
⚠️ Important notice for the ST-005 30A: As this high current will generate significant heat, ensure it is placed in a well-ventilated area and kept away from heat sources, such as a dryer.
Part 1: Coin acceptor and Timer settings.
Note:
|
US customers using quarters only: coin acceptor is pre-configured. Go to Section 1.3 Canadian customers using $0.25, $1, and $2 coins: also pre-configured. Go to Section 1.3 |
|
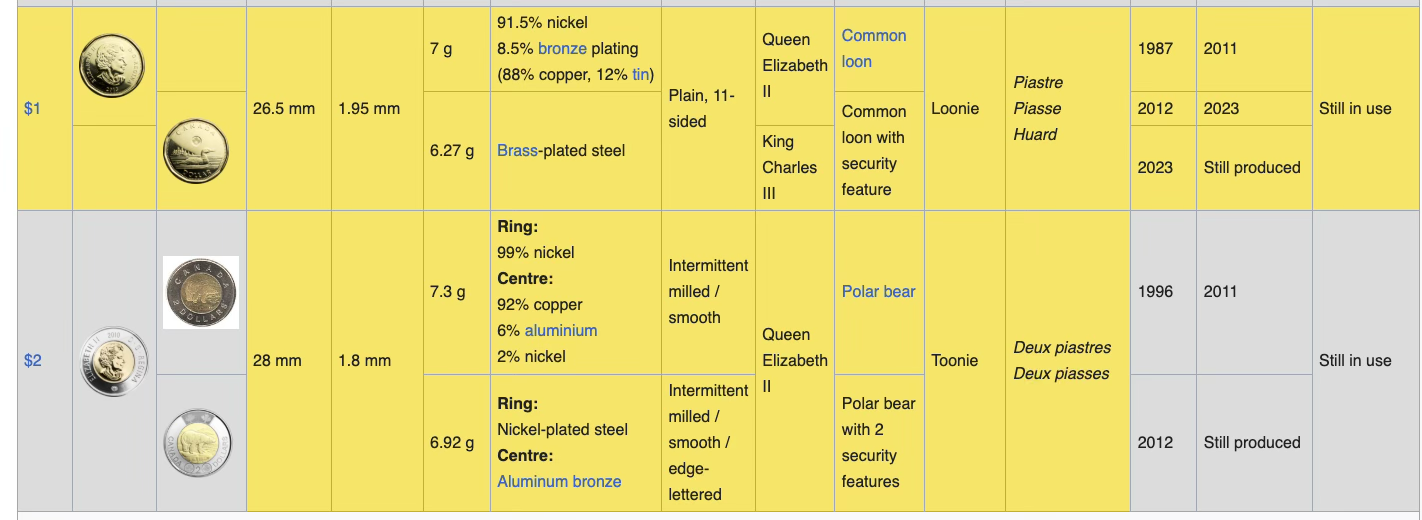
⚠️ Canadian Coin Note – Read If Using $1 or $2 Coins $1 and $2 coins minted before and after 2011 have different physical characteristics. We have pre-configured them as separate coin channels: • L1: $0.25 coins • L2: $1 coins minted in 2011 or earlier • L3: $1 coins minted after 2011 • L4: $2 coins minted in 2011 or earlier • L5: $2 coins minted after 2011 You can set the Value to 0 to disable the settings, check Section 1.2 |
💡 Tip for using Tokens: Check More details
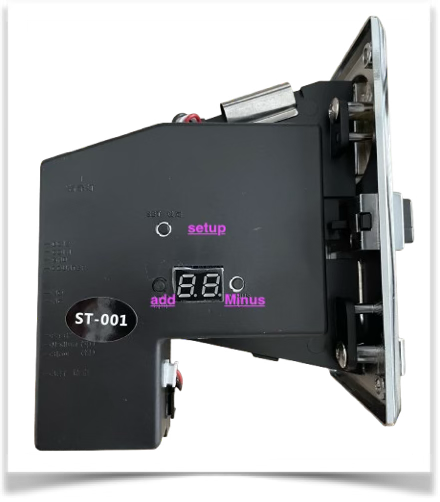
Sintron ST-001 Coin Setup
Sintron ST-001 is a multi coin selector, can accept up to 8 kinds of different coins simultaneously. This type of coin selector is widely used in Vending machine, Message chair, and other self–management system.
You will use 3 buttons, please identify them as below: setup, add, minus buttons.
Coin Setup Work Flow
Step 1.1: do the "Learning Process" for ST-001 to learn the coins you will use.
Step 1.2: Set the value for the coin.
Step 1.3 Set the timer
Click to Check Video setup. for Steps 1.1 ~1.3 note:if the acceptor takes coins that it shouldn’t, this means the sensitivity is set incorrectly. Adjust the sensitivity until only the correct coins are accepted.
Check how to Adjust Sensitivity Video.
Note: Factory reset when holding "setup" button for over 5 seconds.
Part 2. Mobile Payment Settings.
Locate the 3 buttons behind LCD (No.2). Please wear a glove before pressing buttons.
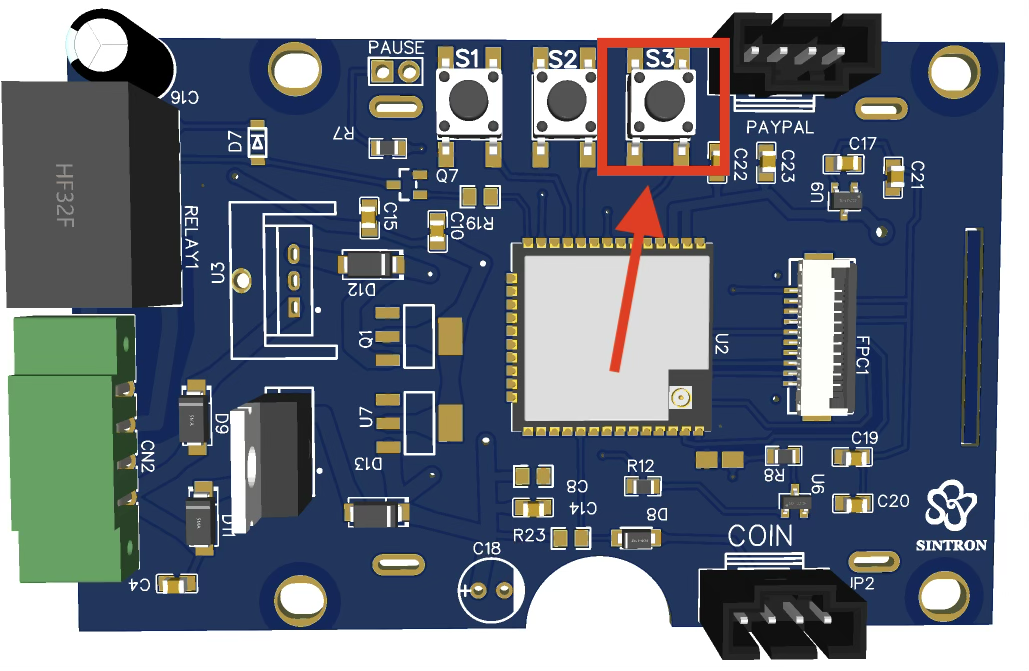
Please Press S3 Button to (from ②) enter setup mode - and you would see the setup Instruction.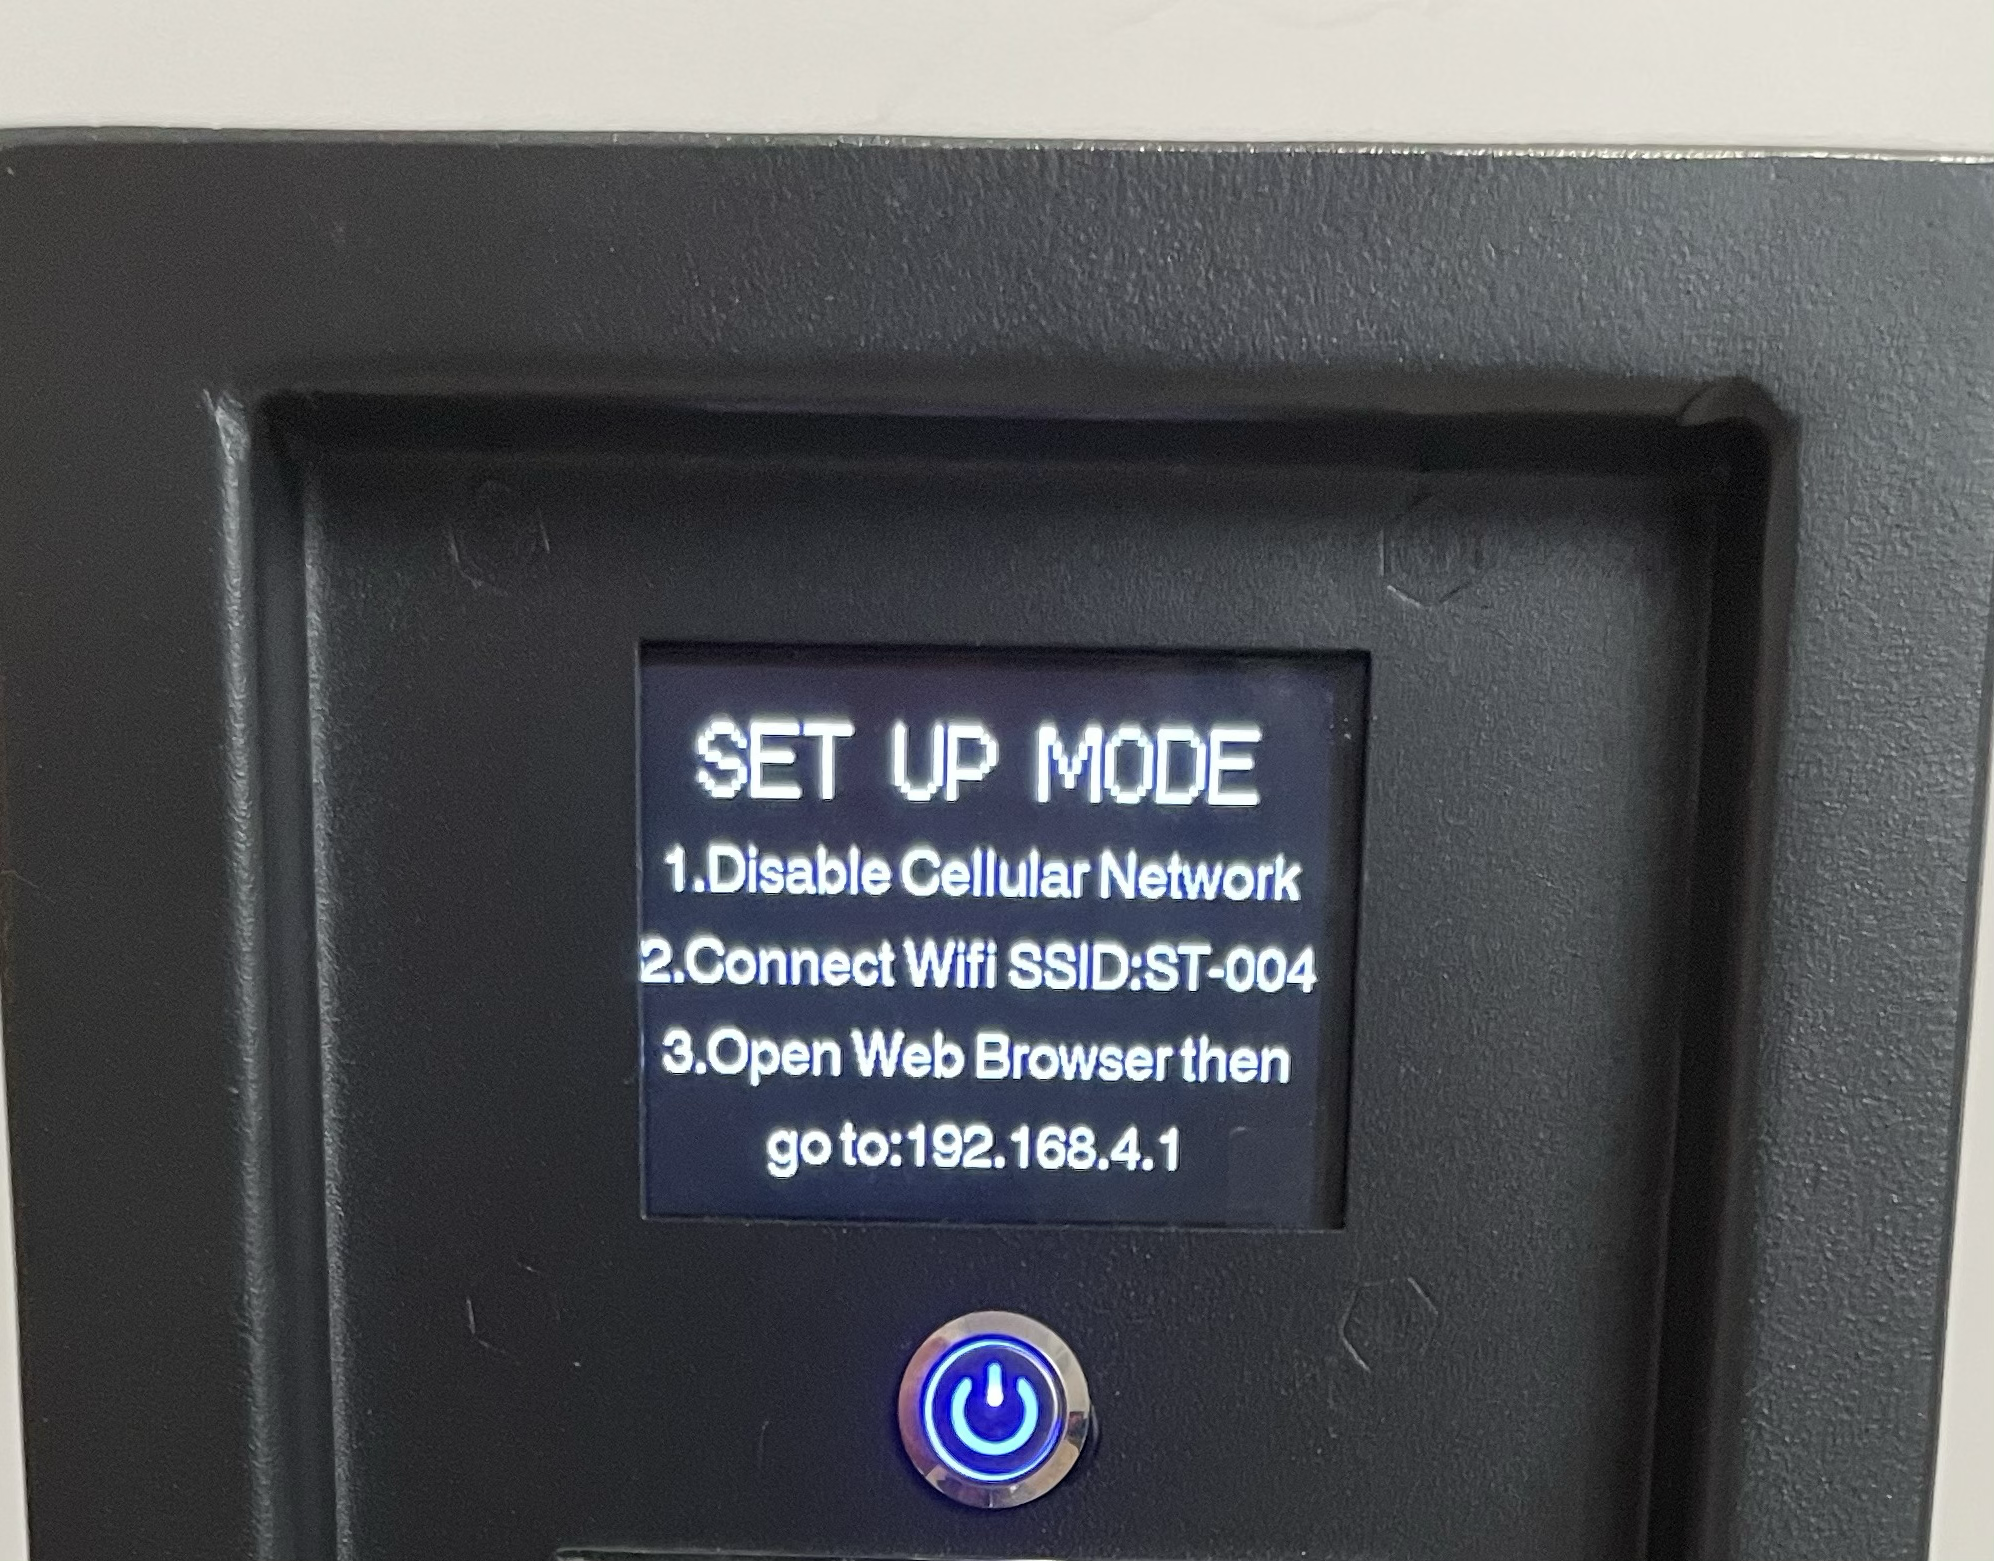 Follow the instruction to get to settings by Browser. Then click save. Then it is done!
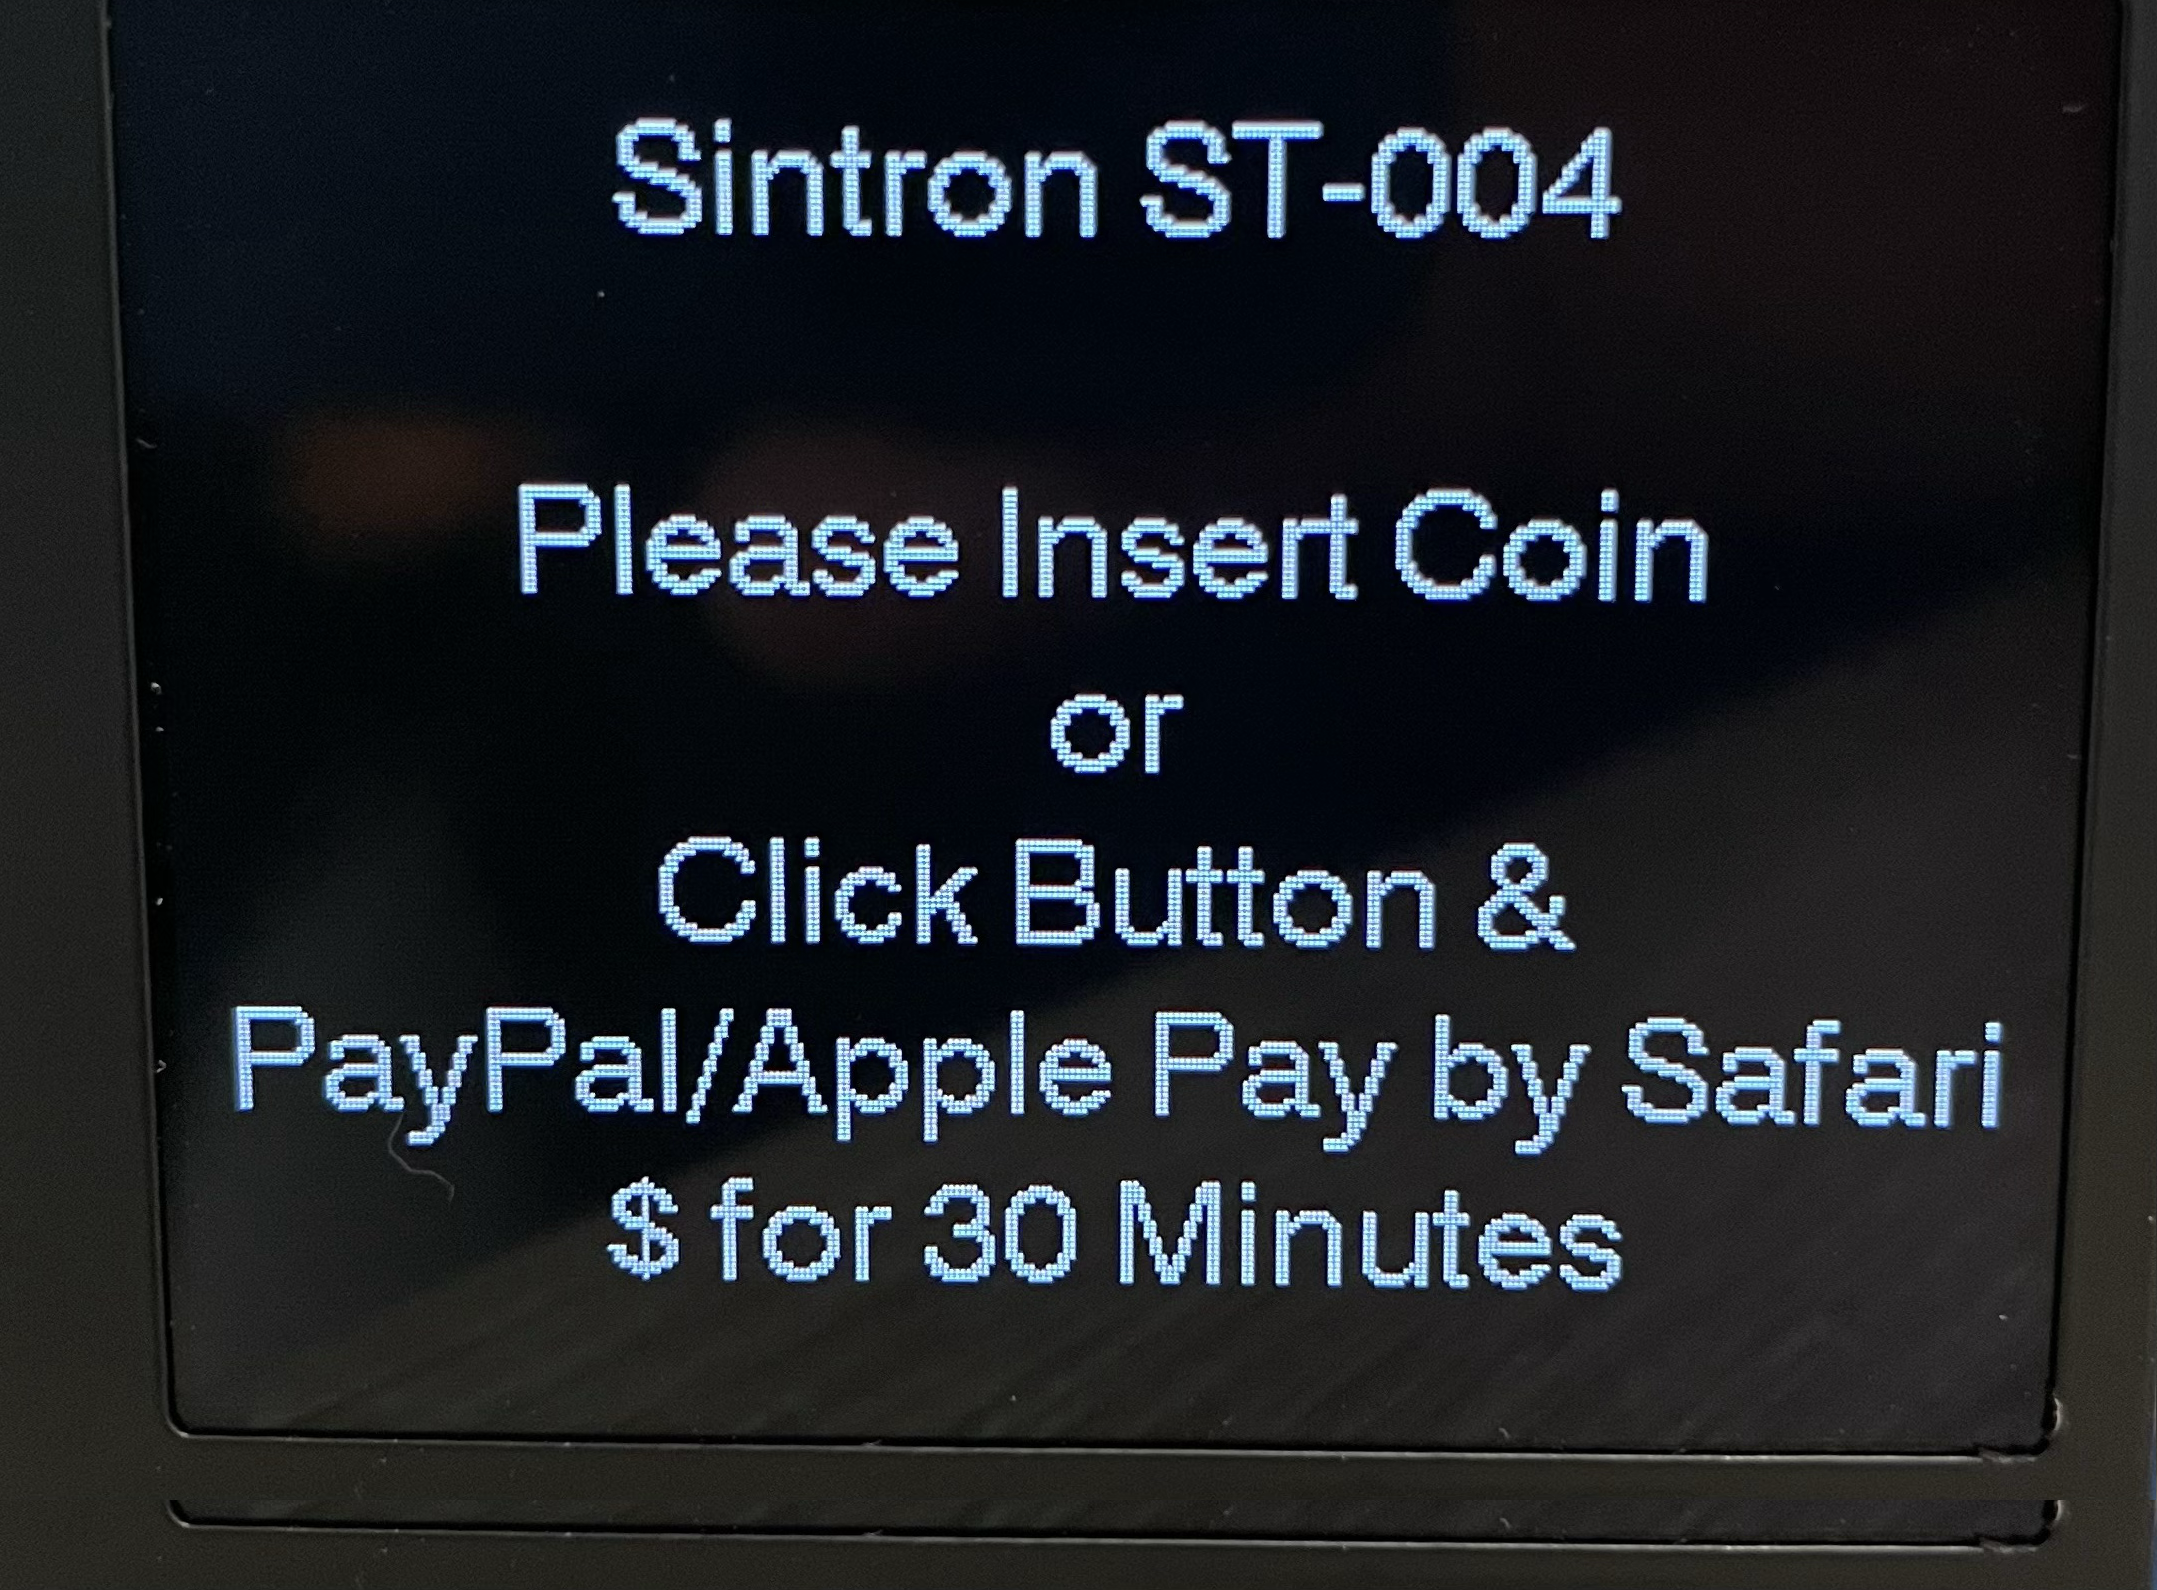
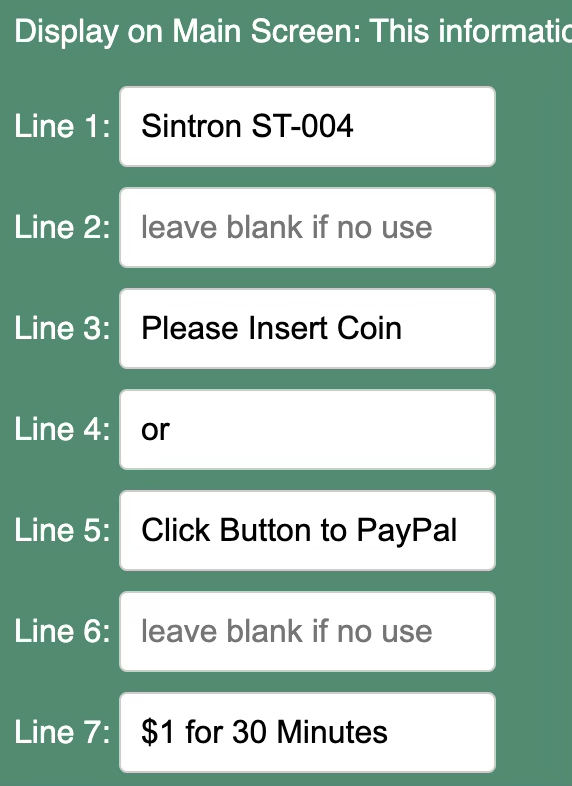
PS. You can customize the text displayed to show your Business info etc..
Part 2.1 WI-FI and Bluetooth
After you enter setup page, if you want to use mobile payment You can choose to enable WI-FI connection or Bluetooth (for APP).

|
⚠️ Firmware Version Notice If your unit is running firmware V4.0 or V4.1, do NOT enable both Wi-Fi and Bluetooth (BLE) at the same time. To use both simultaneously, contact support to upgrade to firmware V4.51 or above. Email: sales@sintron-hk.com |
You can connect the device to your payment network in two ways:
- Wi-Fi (recommended): If your installation location has internet access, use Wi-Fi. Customers do not need to download any app – they simply scan the QR code and pay.
- Bluetooth / ScanPay App: If there is no internet access at the location, use the ScanPay app via Bluetooth. Download from the Apple App Store or Google Play Store by searching "ScanPay".
You can also enable both Wi-Fi and Bluetooth if you wish to support both options.
Please download APP below. or you can search ScanPay on Apple Store or Google Play store.


Video - Using WI-FI Mobile Payment Demo.
Video - Using APP - Mobile Payment Demo.
|
Note: You must complete Part 3 (Payment Gateway Settings) before mobile payments will work. The videos above demonstrate the difference between the two connection options only. |
Part 3: Payment Gateway Settings (Optional, Need WI-FI internet or Use APP).
Info for you (Owner). The 1st step is to decide what Payment Gateway you would like to use. then 2nd step you can check the payment method supported accordingly.
Payment Gateway is the platform you (owner) use to receive money when users pay with Apple Pay/Google Pay/Paypal/Venmo etc…
Update:2026-03-24 we have supported payment gateway: Paypal, Stripe, Square,Revolut,mypos
Contact sales@sintron-hk.com if you need a gateway not listed above – the firmware can be updated to add support if the payment gateway would be used by many other users too.
we will list how to setup for each payment gateway below:
| Payment Gateway | Payment Methods Supported | Transaction Fees | Micropayment Rate | International Transactions | Chargeback Fee | Monthly Fee |
|---|---|---|---|---|---|---|
| PayPal | Credit/debit cards, PayPal account, Venmo, Apple Pay, Google Pay | Varies by country and transaction type | 5% + $0.05 per transaction (for payments < $10 USD) | Supported, with currency conversion fees | $20 per chargeback | None (for standard payments) |
| Stripe | Credit/debit cards, various payment methods (check more), Apple Pay, Google Pay | 2.6% + $0.30 per transaction (US pricing) (pricing) | Not applicable | Supported, multi-currency support | $15 per chargeback | None (for standard payments) |
| Square | Credit/debit cards, Apple Pay, Google Pay, gift cards (check more) | 2.6% + $0.30 per transaction (US pricing) (pricing) | Not applicable | Limited international support, USD only | $0 (Square covers the cost) | None (for standard payments) |
Part 3-1: How to Set up Paypal
⚠️ PayPal Requirements
- You must have a PayPal Business account. You do NOT need a registered company or business licence to do this – any individual can upgrade a personal PayPal account to a Business account for free.
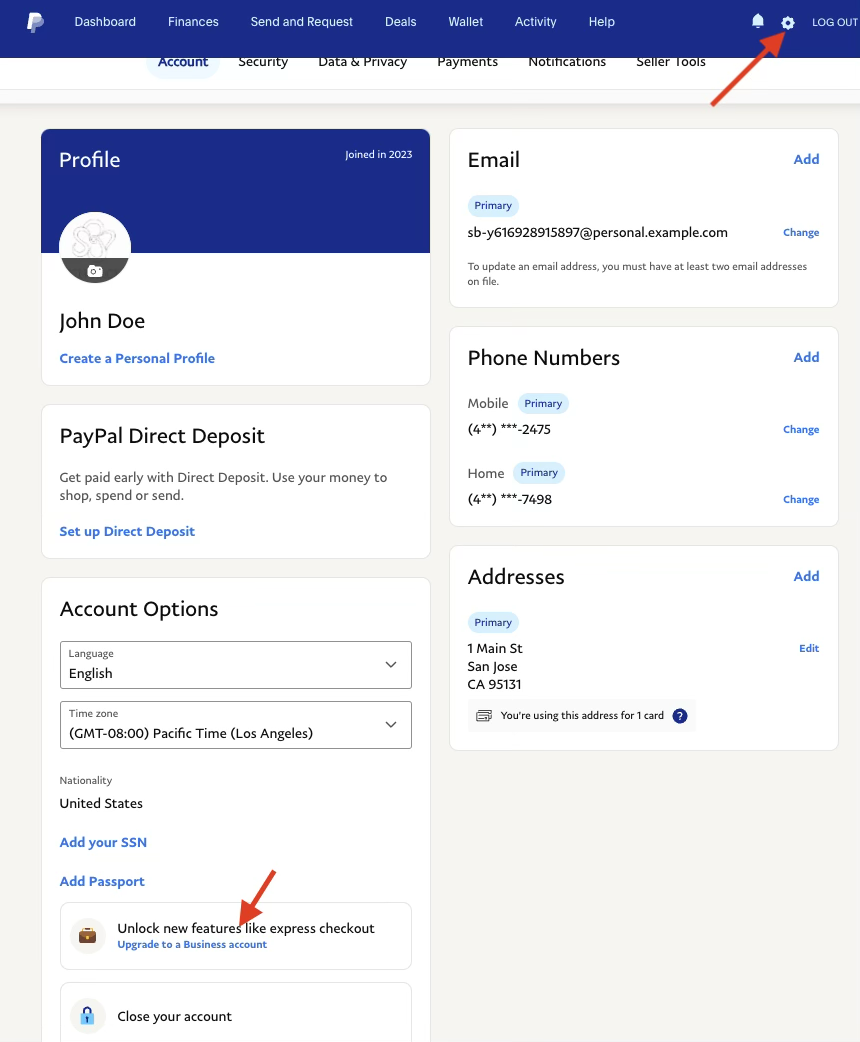
To upgrade: go to your PayPal account settings → select 'Upgrade Account Type' → choose 'Business' → follow the steps (takes about 2 minutes). - For payments under $10 USD, contact PayPal customer support to request micropayment fees (5% + $0.05 per transaction). This rate is not applied automatically – you must request it.
Reference: https://www.paypal.com/webapps/mpp/merchant-fees
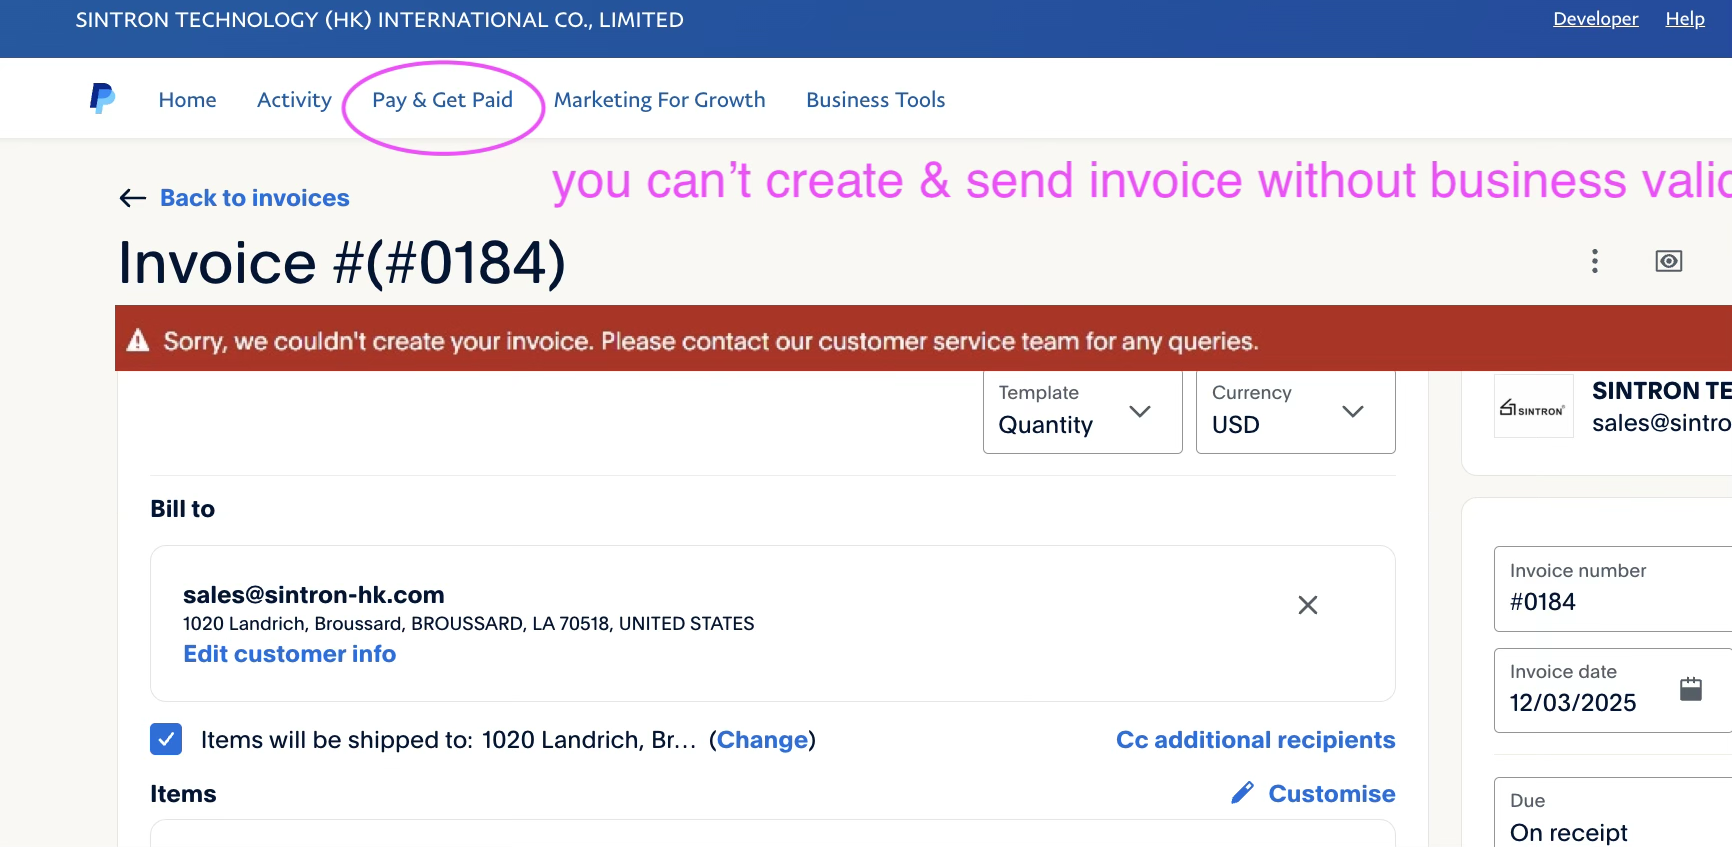
Log in to your PayPal Business account and verify that you can manually create an invoice. If you cannot, your account is not yet verified – complete verification before proceeding.
▶ Video guide: How to check if you can create a PayPal invoice
How To Get Your Paypal Client ID and Secret.
Watch Video
Note: Make Sure it’s in "Live" Environment. (green color).

Note: On the last page, as shown in the screenshot below, it is advisable to only check "Vault" & "invoicing." This would be a safer option, ensuring that no other permissions are granted to the application.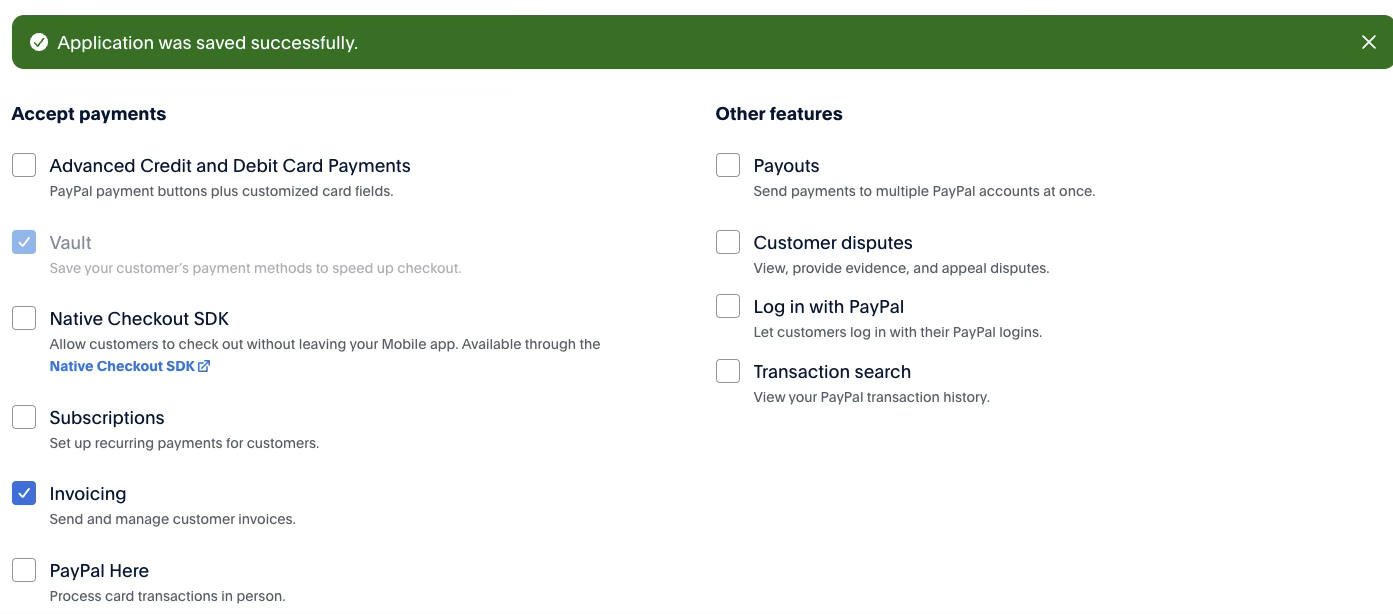
Then you can copy and paste to Paypal Client ID and Secret from Part 1 Timer settings.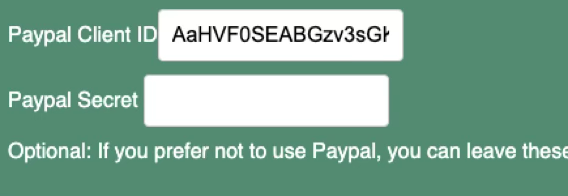
after that you can start to test by clicking the Payment button.
If the QR code is displayed, then it is working!
Final Test
Watch Paypal & Coin Payment Test Video.
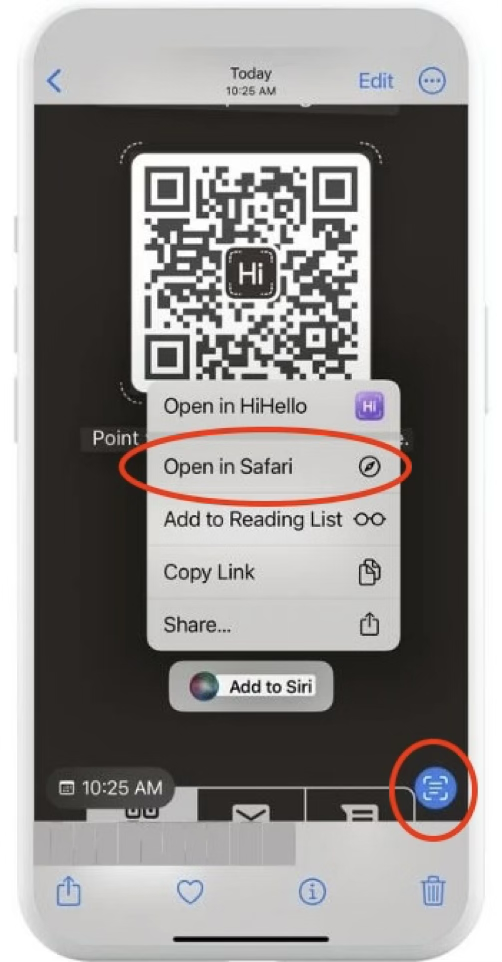
PS: Apple Pay requires the use of an iPhone with the Safari browser and cannot be used with Chrome or any other browsers.
PayPal Troubleshooting
- QR code only shows up for 1 second and then disappears.
Cause: Your PayPal Business account verification is not complete. The account cannot issue invoices for customers to pay.
Solution: Complete PayPal Business verification, then retry.
▶ Video guide: How to complete PayPal Business verification
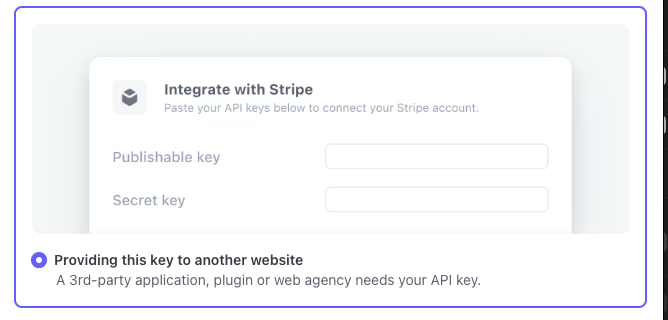
Part 3-2: How to Set up Stripe
1. Log in to: https://dashboard.stripe.com & click "Developer"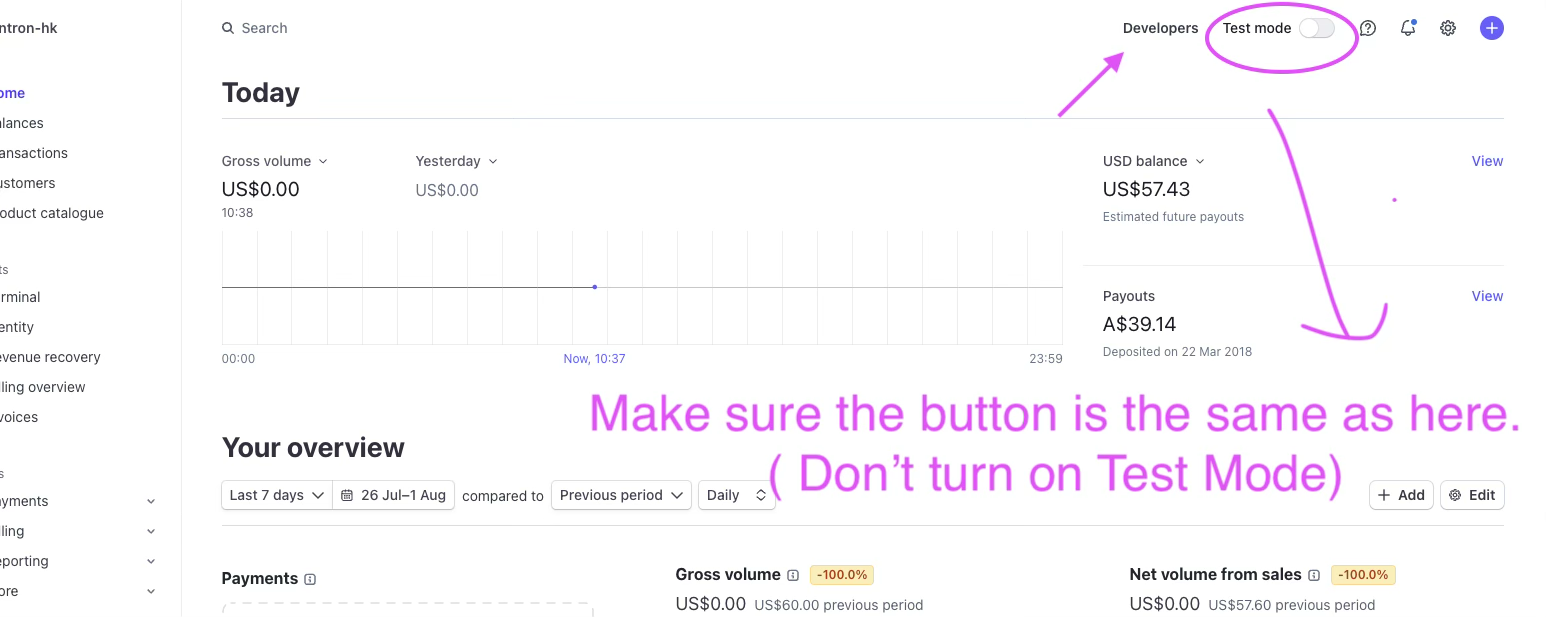 2. Click API Key tab & then Create Secret. You would be prompted with verification. You can choose the one you prefer. ( Touch ID is recommended)
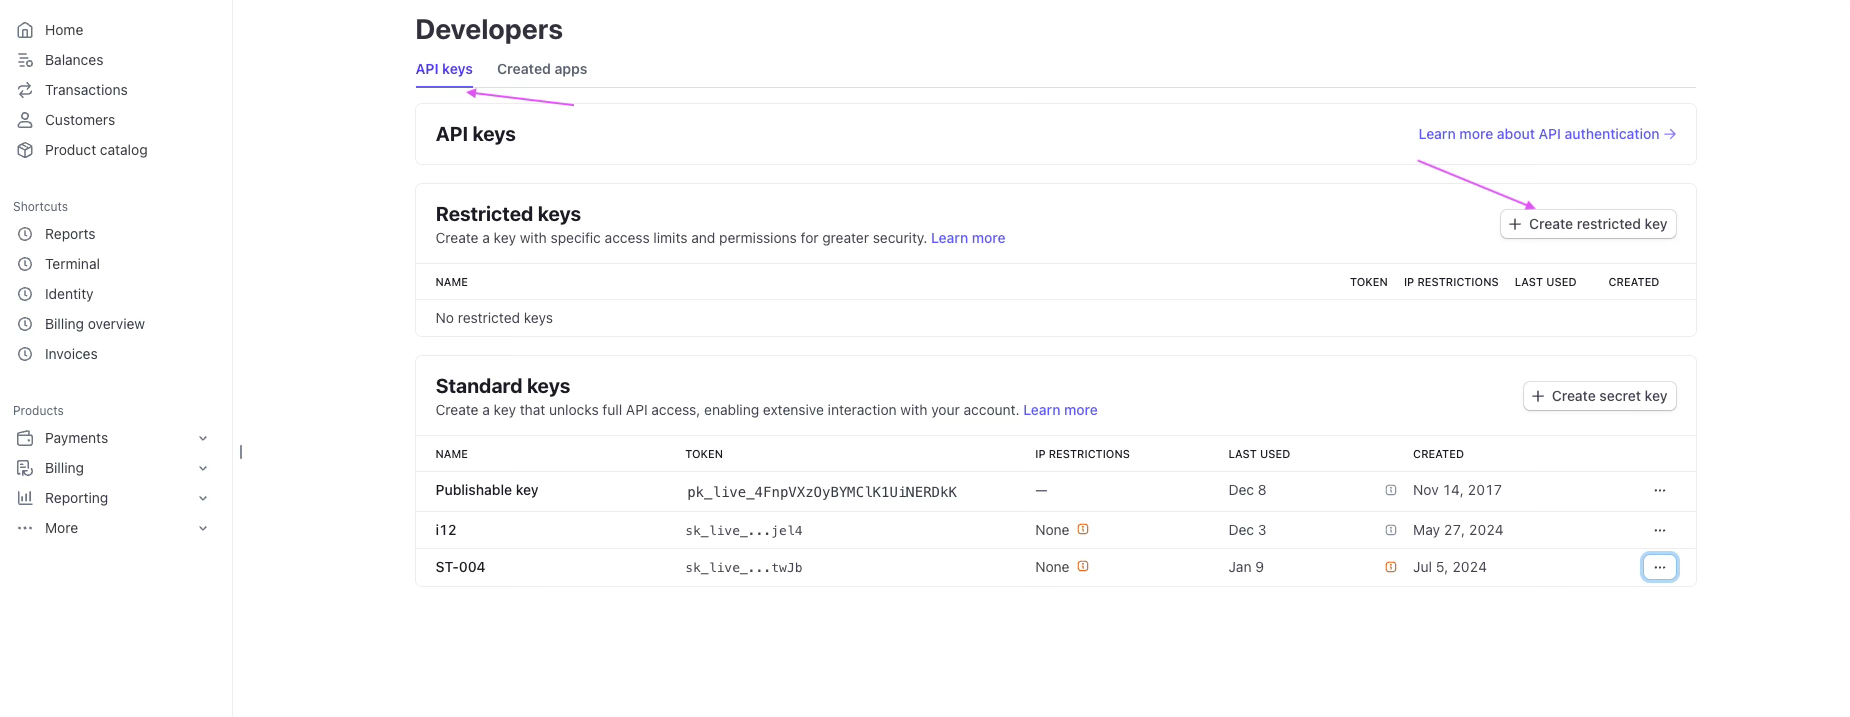
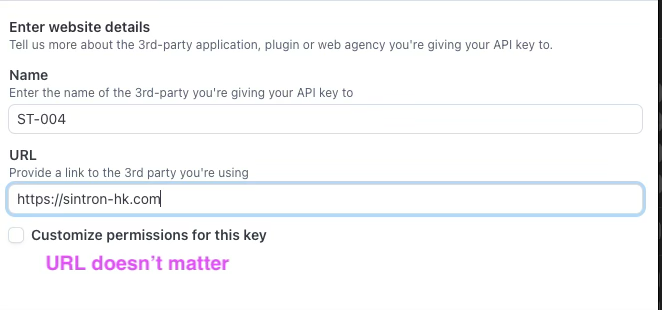
3. Fill the API Name and URL as you wish, for example: ST-004 & https://sintron-hk.com (URL doesn’t matter)
4. Then you would get the API KEY!copy and save it.
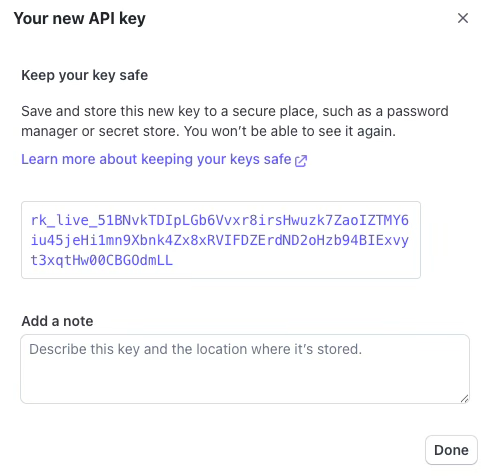
Watch Video - Get Stripe API Key
Then you can copy and paste to the Stripe API Key from Part 1 Timer settings.

after that you can start to test by clicking the Payment button.
If the QR code is displayed, then it is working!
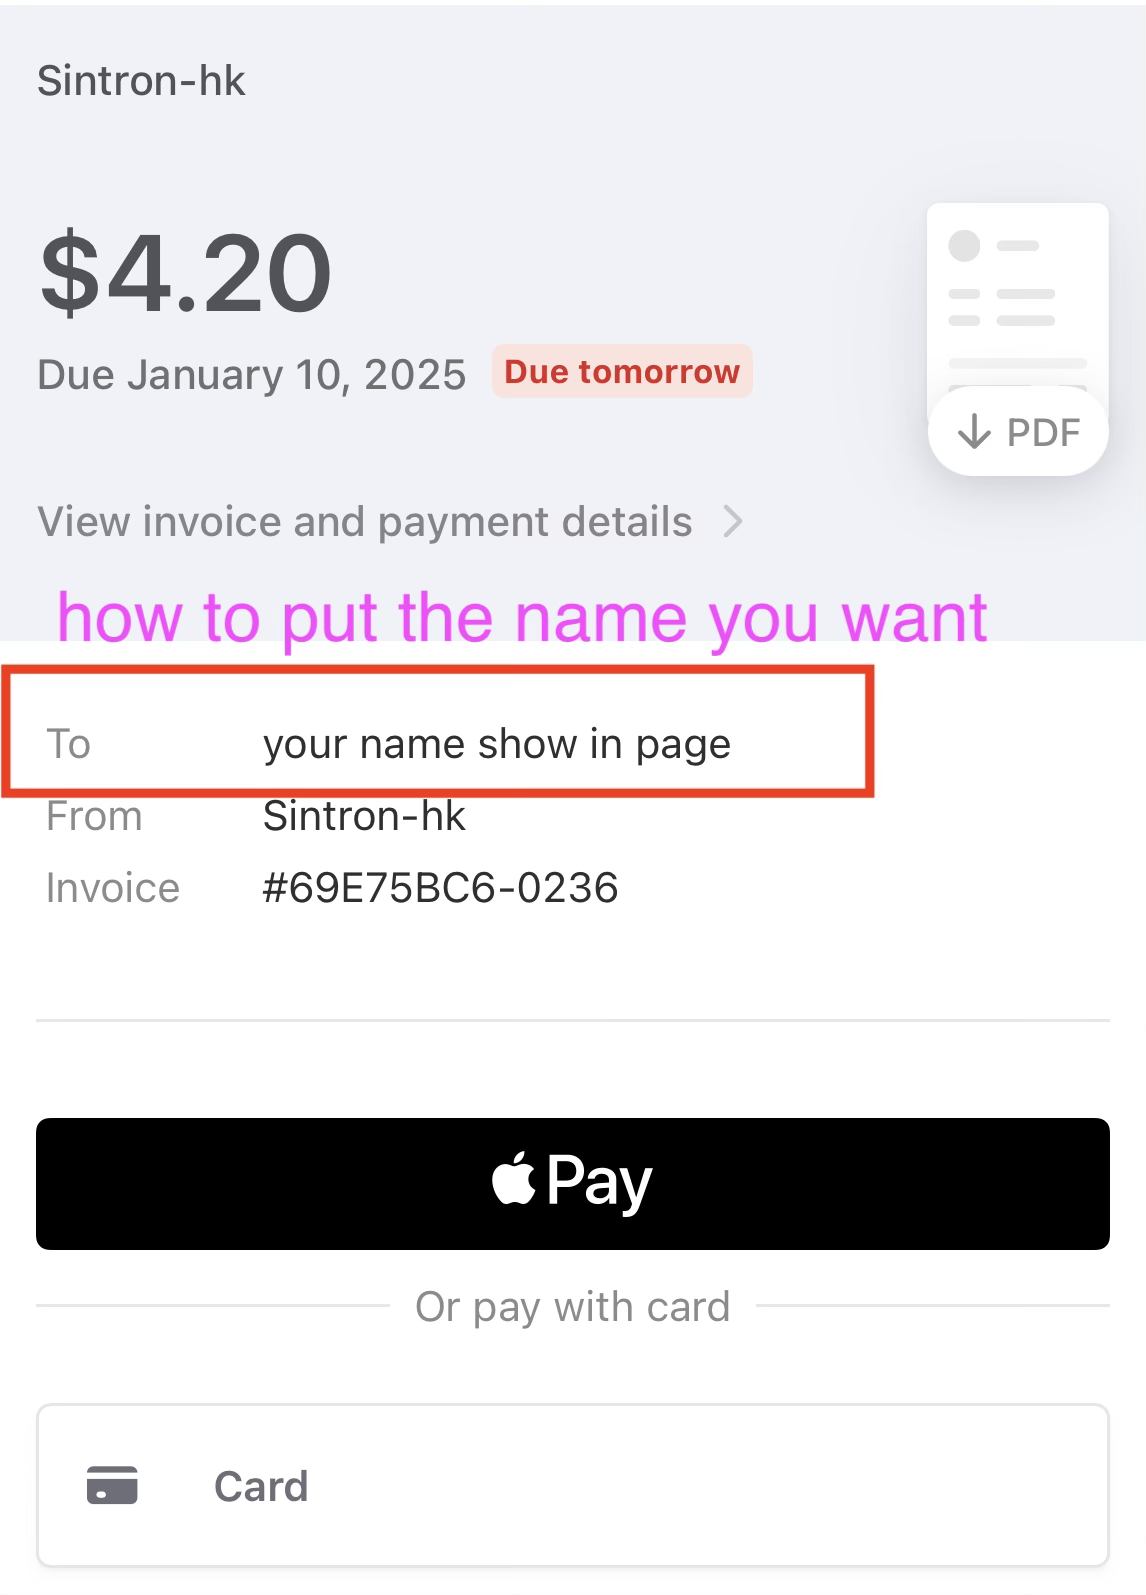
Tip: if you would like to revise the name shown on page. You can check this video.
Part 3-3: How to Set up Square
Note: Square API only works in US,UK,Canada,Australia,Japan,Ireland,France,Spain.
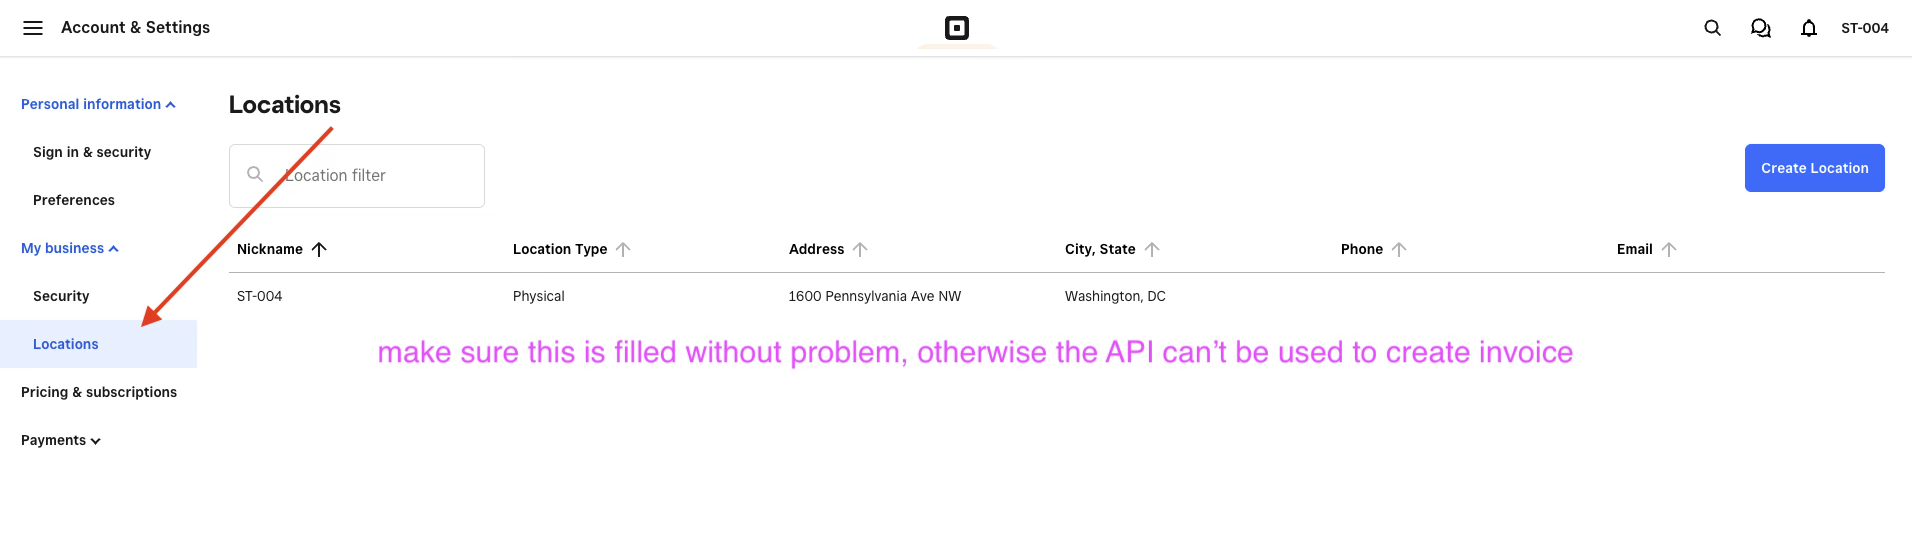
Before you start, please make sure to go to Account $ Settings to add Locations as below screenshots. If there’s no Location indicated, Square would forbid the use.
1st, add Location.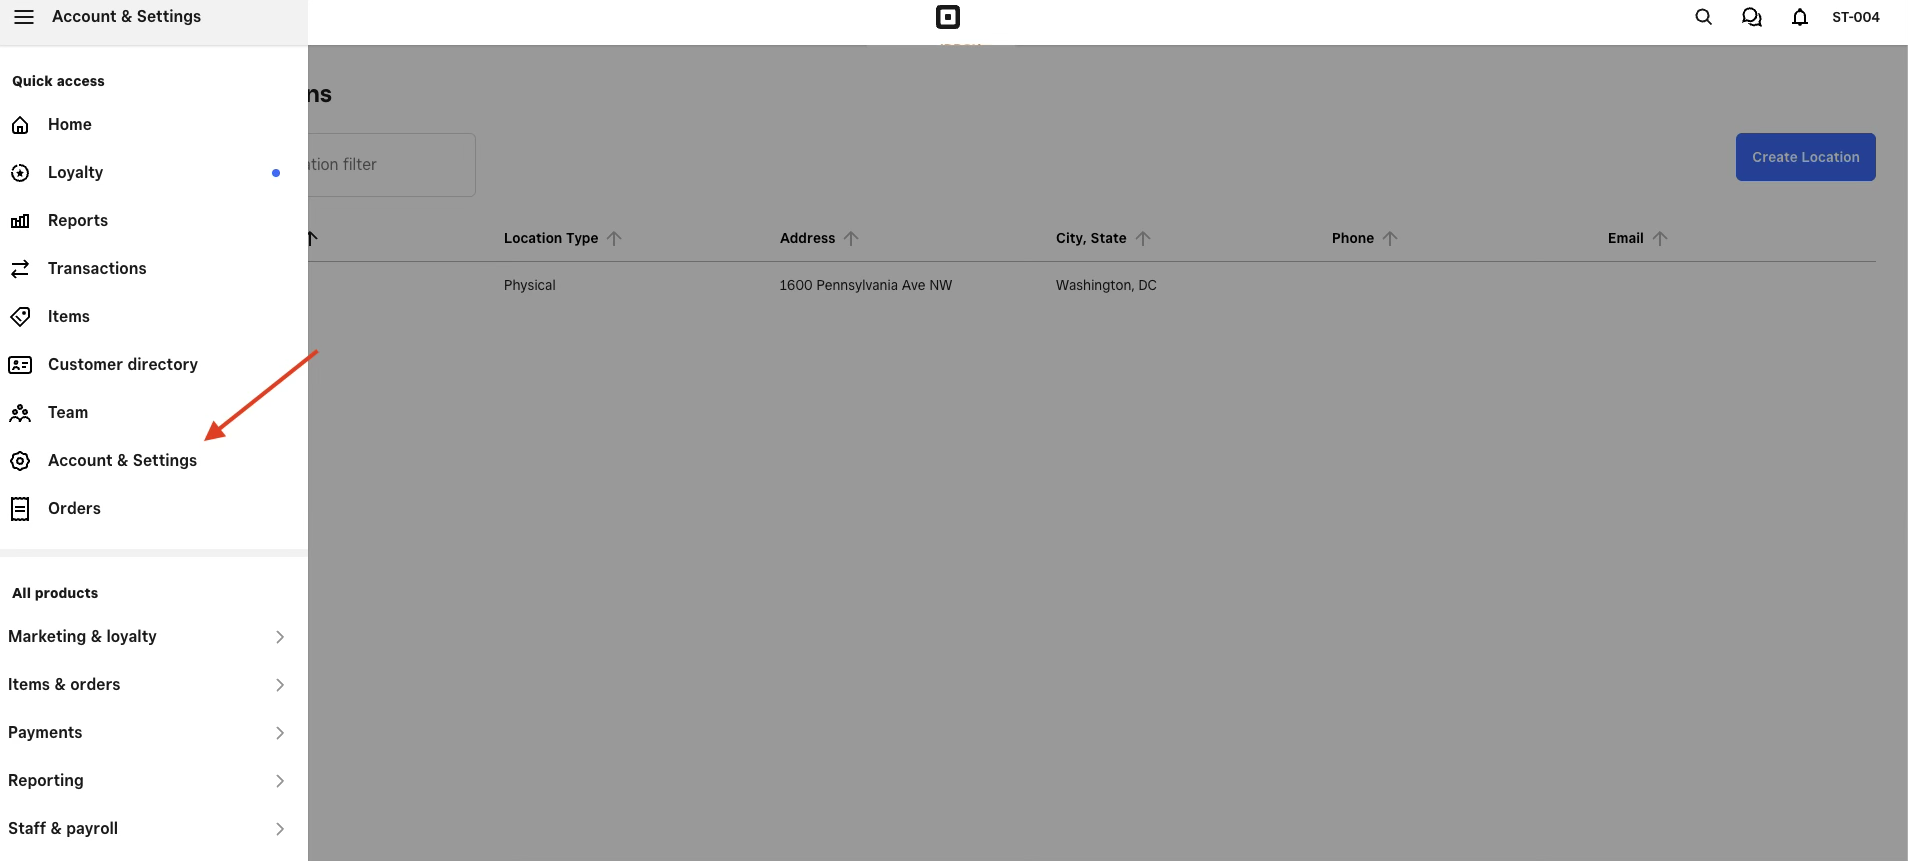
2. Log in to: https://developer.squareup.com/console/en/appsin Application tab, click + to add.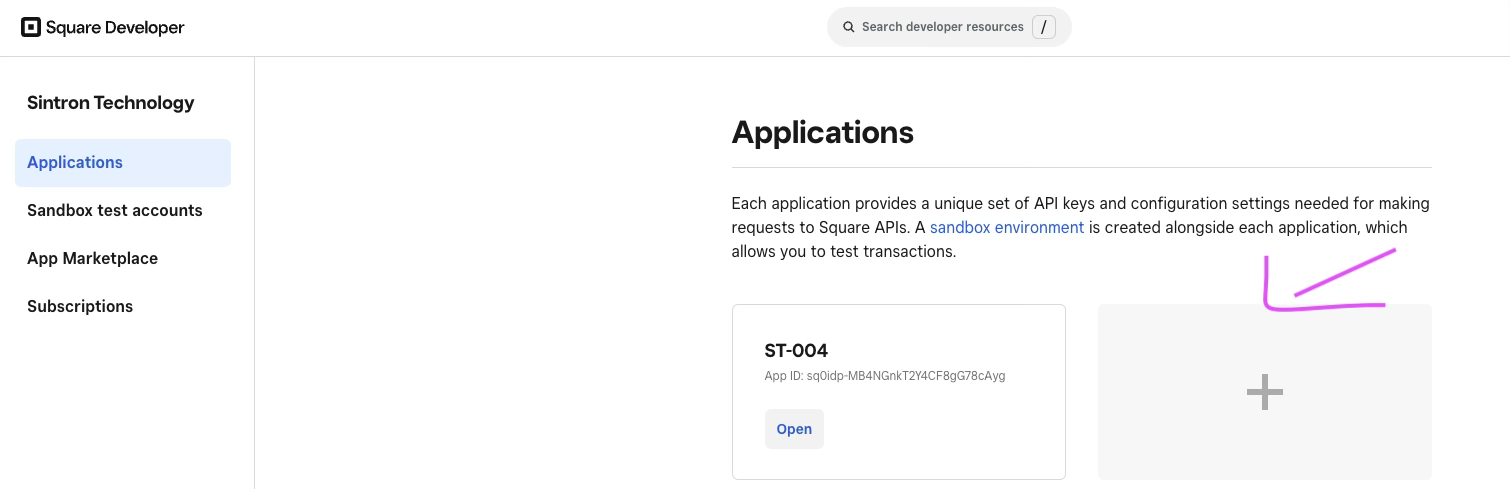
3. Fill in the name you prefer, for example, ST-004 and complete the rest.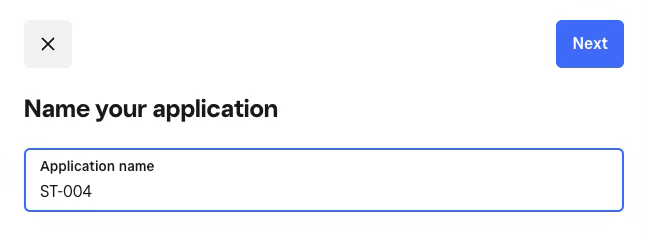

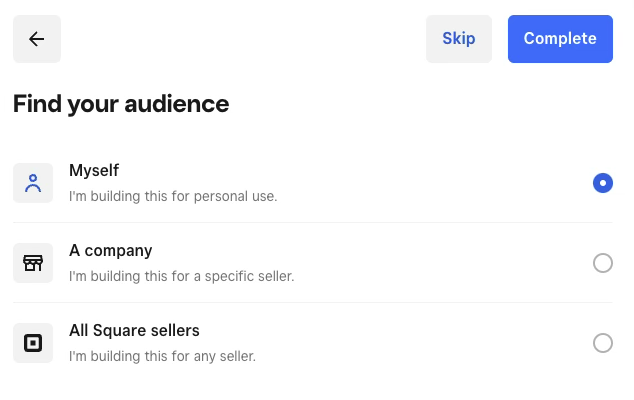
3. Click to Production Tab. And you can see your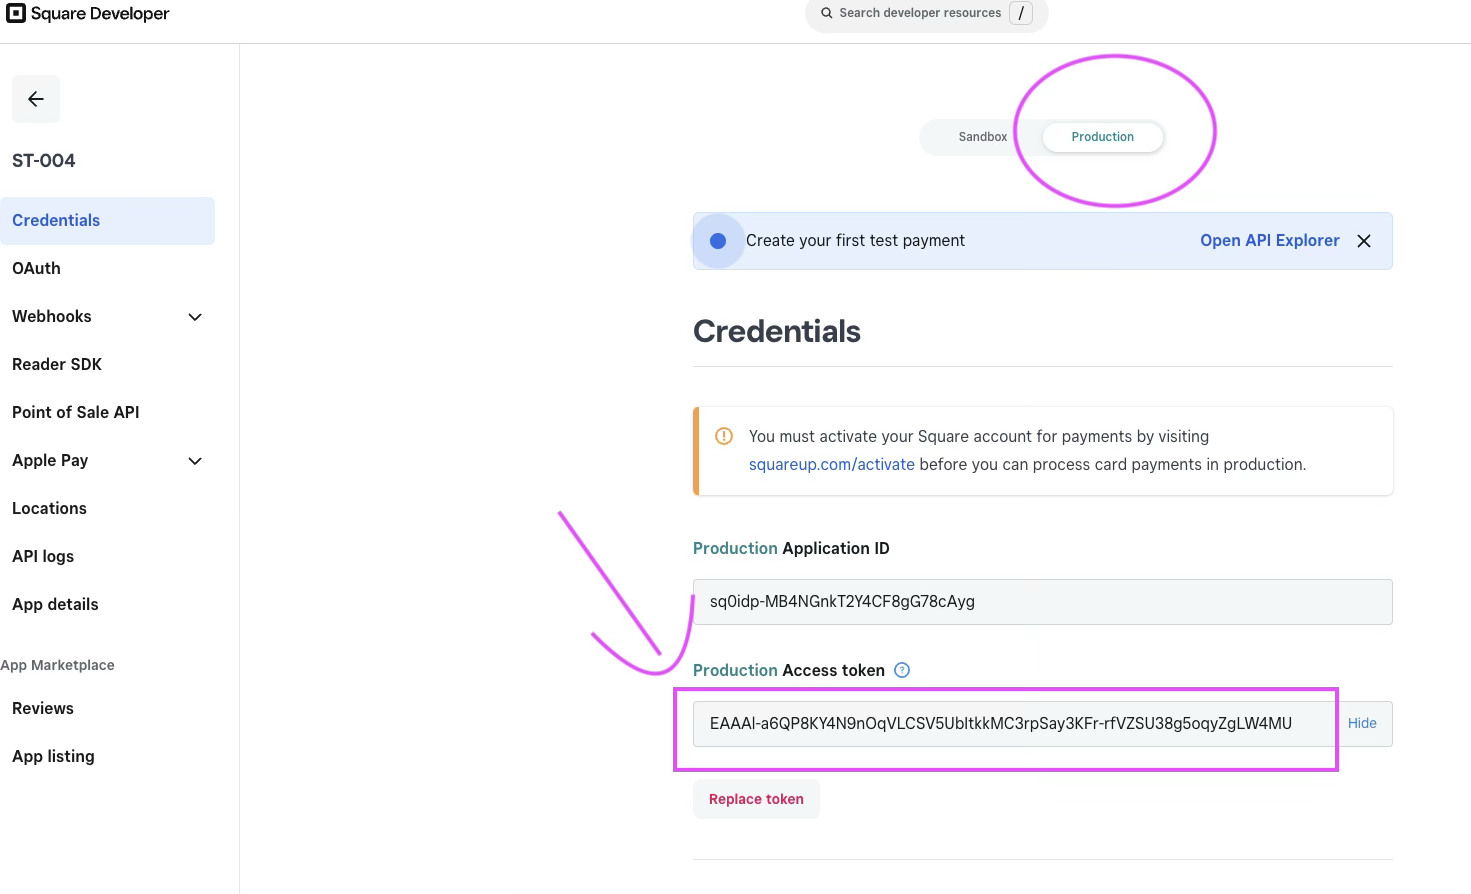 token.Watch Video - Get Square API Key
Then you can copy and paste to the Square API Key from Part 1 Timer settings.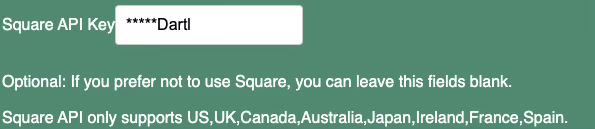
after that you can start to test by clicking the Payment button.
If the QR code is displayed, then it is working!
Part 4: Extra Function (Optional).
(from ②)
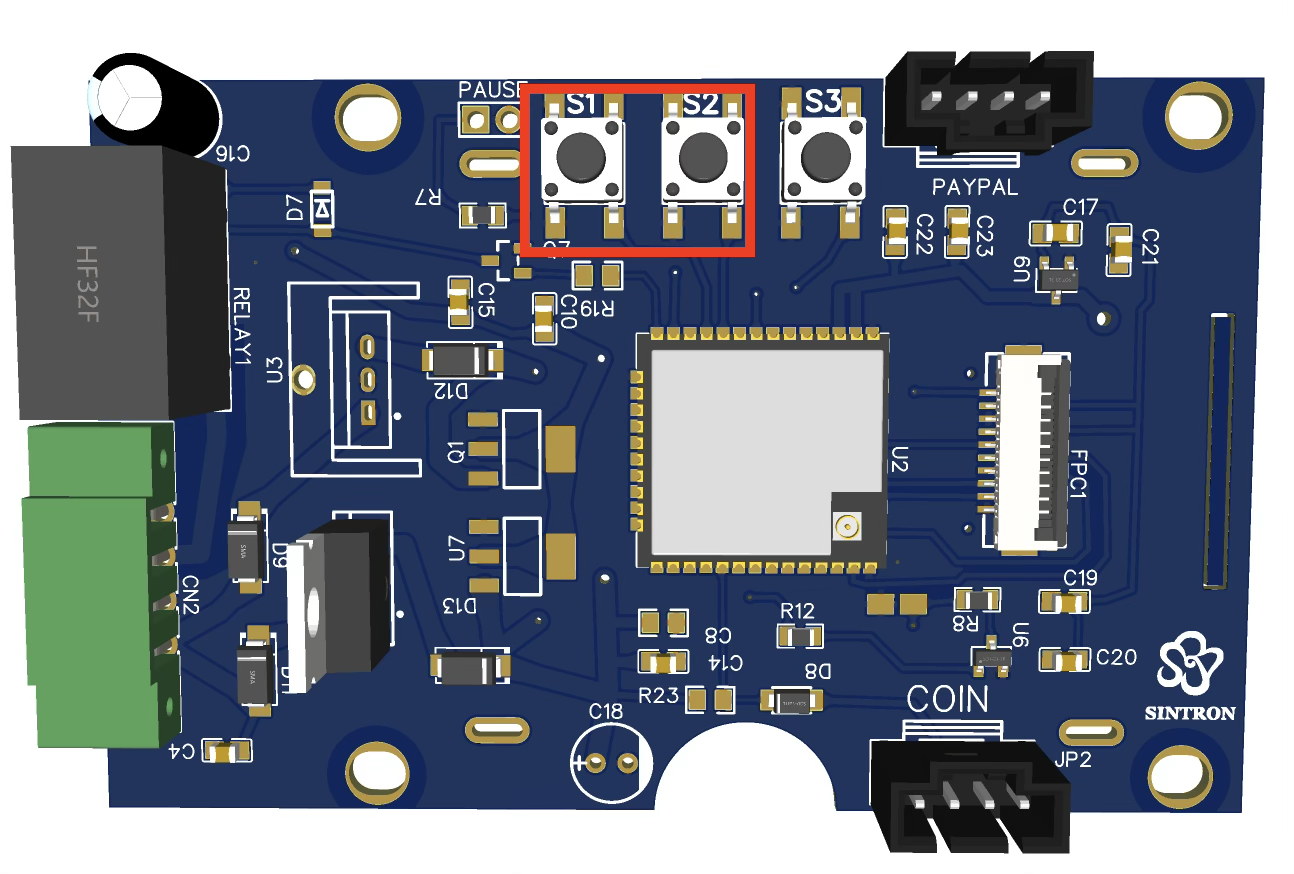
S1 button: Counter - Check how many coins received.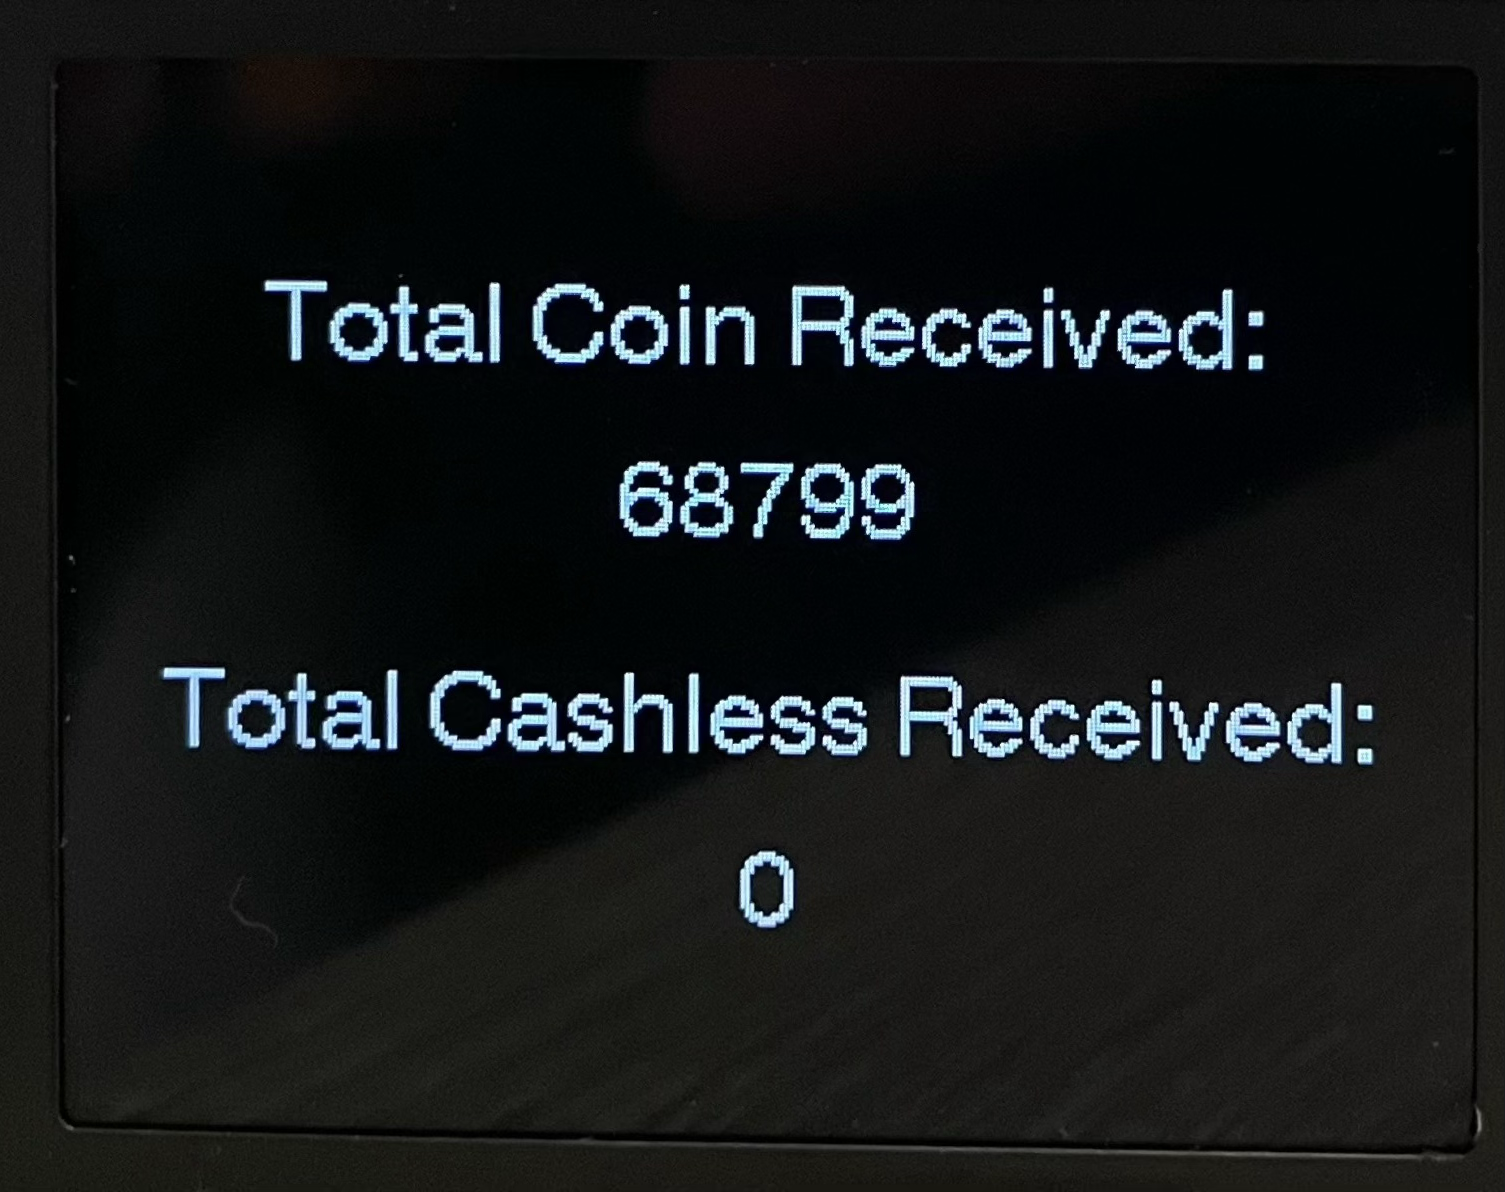
S2 button: Hold for over 5 seconds to clear the timer and counter.
OTA firmware update
note: 2025-10-31 firmware:V4.1
The Sintron ST-004 also supports OTA (Over-The-Air) firmware updates. Should you require a firmware update, kindly reach out to us at sales@sintron-hk.com.
Additionally, we offer B2B services to tailor the functionality to your specific needs. Please don't hesitate to get in touch with us for further customization options.
FAQ
Q: No Power after using a while?
A: usually it is fuse got blown to protect the machine. You can check the fuse first.locate the fuse for ST-004.check the fuse for ST-005.
Q: Can I use tokens instead of coins?
A: Yes. The coin acceptor can be trained to accept tokens in the same way as coins. You can also get tokens click here.Q: How do I reset the coin acceptor to factory defaults?
A: Hold the Setup button on the ST-001 coin acceptor for more than 5 seconds. The acceptor will reset to factory settings and you will need to re-train it with your coin types.
Q: How do I reset the timer to factory defaults?
A: there is a factory reset function from webpage setup.
Q: How do I extend my warranty?
A: You can extend your warranty by 1 year (total 2 years) by submitting the Sintron Warranty Request Form. Q: The coin acceptor is accepting coins it shouldn't accept.
A: The sensitivity is set too high. Adjust the sensitivity setting down until only the correct coin types are accepted. See the sensitivity adjustment video.
You can print this instruction for your customer. If you need the word file for this one, please contact: sales@sintron-hk.com
|
How to Pay Option A – Coin Payment Insert coin(s) → timer starts automatically.
Option B – Mobile Payment (QR Code) 1. Open your phone camera and scan the QR code on the display. 2. Tap the icon & open with Browser. 3. Complete payment using Apple Pay, Google Pay, or card. |