
SINTRON
Smart Coin & Cashless Payment Timer
Instruction Manual
INTRODUCTIONCoin and cashless payment, in one box
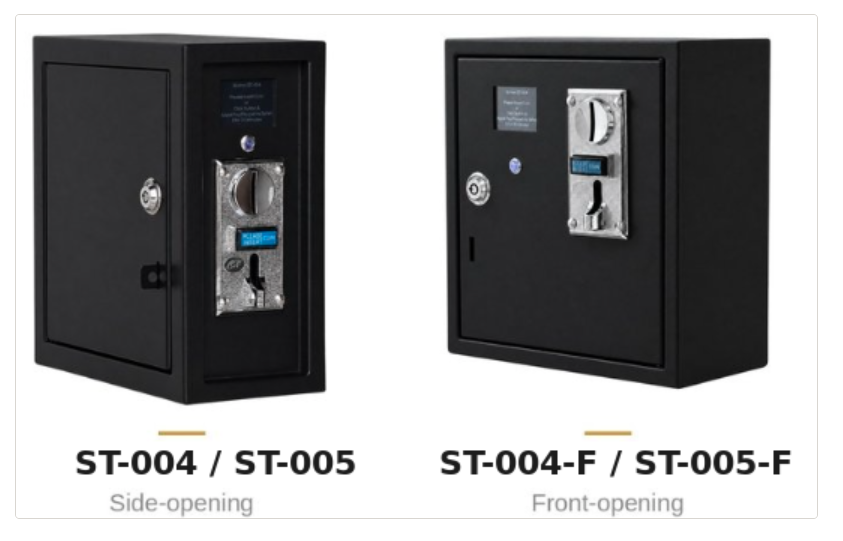
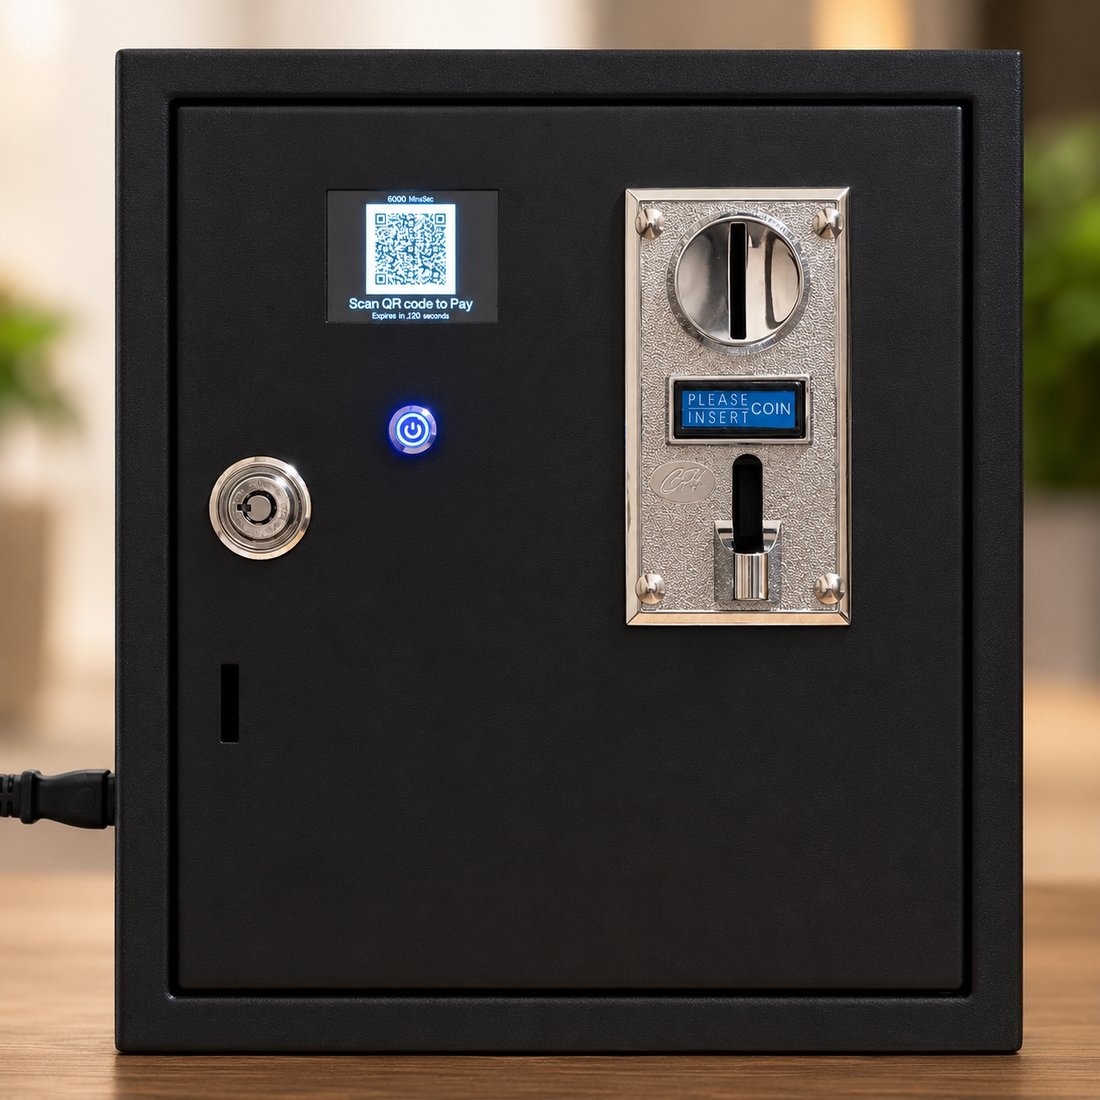
The Sintron ST-004/ST-005 ST-004-F / ST-005-F is an upgraded version of our renowned model, the ST-002/ST-003 coin operated box. Equipped with an LCD and Mobile Payment functionality, it serves as a power timer control for seamless operation. This timer box allows you to effortlessly connect your machine, enabling users to make payments through Apple Pay, Google Pay, Paypal, Venmo, Debit & Credit Cards…(not limited), or Coins. Enjoy the flexibility of setting up time, price, and text displayed on LCD Screen. It is particularly well-suited for 110V~240V Washer & dryers, as well as any machines requiring a timer.
SPECIFICATIONTechnical data
ST-004 and ST-004-F are identical apart from the enclosure, and the same is true of ST-005 and ST-005-F. From here on, this manual uses ST-004 to mean both ST-004 and ST-004-F, and ST-005 to mean both ST-005 and ST-005-F, except where the enclosure itself is the topic.
| Dimensions |
ST-004: 26 × 28 × 13 cm ST-005: 34.5 × 28 × 13 cm |
| Voltage range |
ST-004: AC 110V–120V (North America) ·
AC 220V–240V (UK, EU, AU) ST-005: AC 220V-240 V (North America) |
| Maximum load current | ST-004: 16A · ST-005: 30A |
| Plug type |
ST-004: household plug (US / UK / EU / AU) ST-005: NEMA 10-30 or NEMA 14-30 |
| Relay | Solid-state relay, no moving contacts |
| Coin acceptor | Sintron ST-001 coin acceptor, up to 8 coin types at the same time |
| Maximum setting time | 99:99 |
| Maximum accumulative time | 999:99 |
| Timer mode | Hour:Minute or Minute:Second |
| Connectivity | Wi-Fi and Bluetooth (BLE) for the ScanPay app |
| Firmware | OTA (over-the-air) update supported |
IN THE BOXWhat ships with your unit
| Timer box | Power cord | Keys×2 | Spare fuses×2 | Hasp kit | Manual |
- Power cord — supplied with the plug type for your region.
- Hasp kit — a Z hasp with two lock nuts. On the ST-004 and ST-005 the hasp is already fitted to the door. The ST-004-F ships with it as a separate kit, to be installed as required.
- Manual — supplied as a digital copy.
QUICK STARTFirst, identify the parts
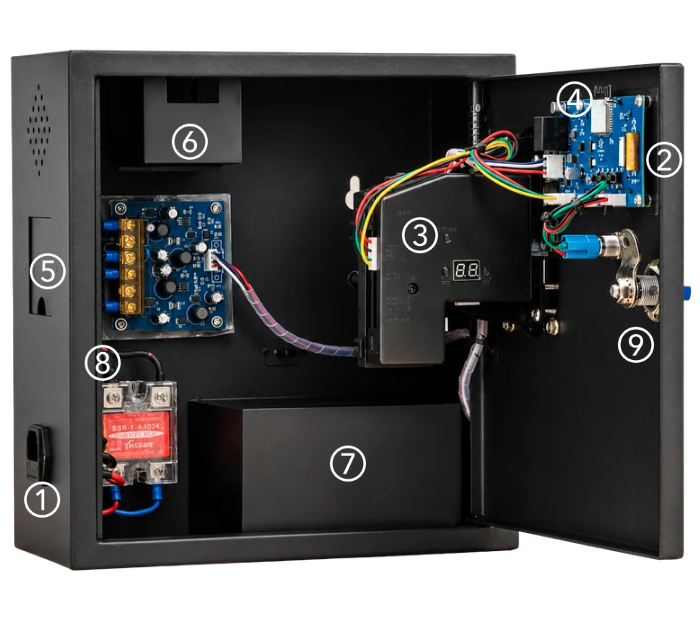
| 1Power inlet with fuse | 2LCD screen — front of the control module | 3Coin acceptor (ST-001) |
| 4Setting buttons — back of the same module (ST-07) | 5Cable entry | 6Output socket |
| 7Coin tray | 8Hasp kit install | 9Cam lock |
- Plug the power cord into the fused inlet (No. 1), then into a standard household outlet. The LCD (No. 2) should light up and show text.
- Set up the coin acceptor (No. 3) following Part 1.
- Set the price and run time using the buttons on the control module (No. 4) following Part 1 and Part 2.
- Insert a coin. The timer should start counting. If it does not, check steps 2 and 3 again.
- Power off your machine, then feed its power cord through (No. 5) and into the output socket (No. 6). This may take some force — a snug fit is recommended for safety.
- Your machine will now run after payment.
- Keep the unit from touching your washer or dryer. Vibration from the machine can damage the unit over time.
- ST-005 (30A): this current generates significant heat. Install it in a well-ventilated area, away from heat sources such as a dryer.
Technical support:
sales@sintron-hk.com
You can extend the warranty by one more year, for two years in
total. Apply with the
Sintron Warranty Request Form
(a signed-in Google account is required).
What you need to set up
When you receive the ST-004/ST-005, you will need to configure four settings:
PART 1Coin acceptor and timer settings
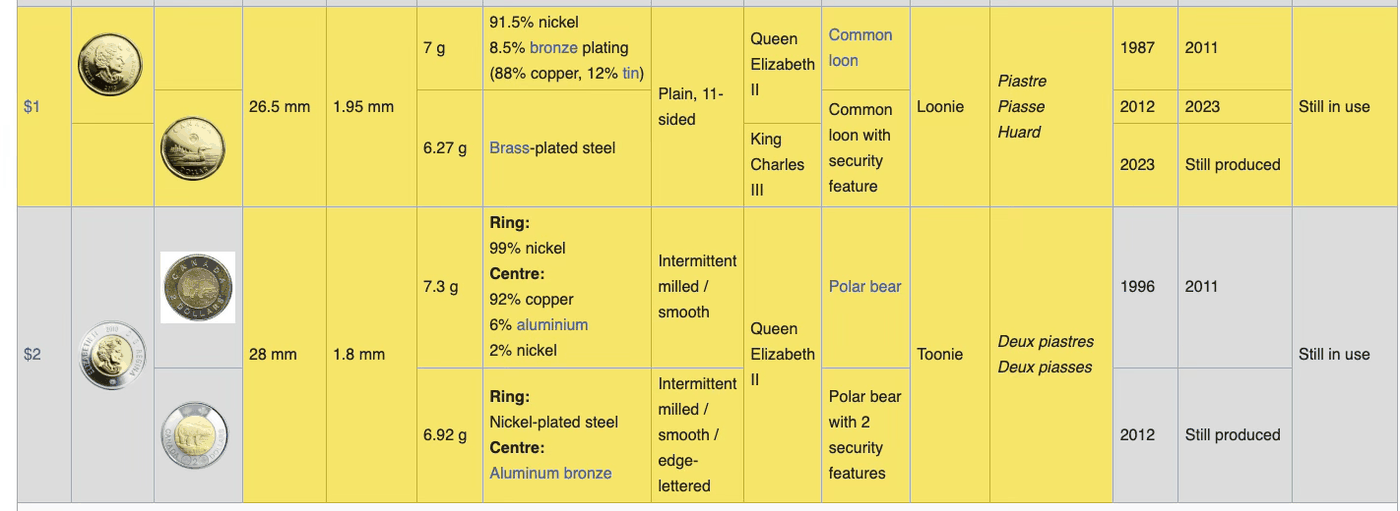
$1 and $2 coins minted before and after 2011 have different physical characteristics, so they are pre-configured as separate coin channels:
- L1 — $0.25 coins
- L2 — $1 coins minted in 2011 or earlier
- L3 — $1 coins minted after 2011
- L4 — $2 coins minted in 2011 or earlier
- L5 — $2 coins minted after 2011
To stop the machine taking one of these coins, set that channel’s value to 0 — see Step 1.2.
💡 Using tokens instead of coins? See token details.
Sintron ST-001 coin setup
The box is equipped with a coin acceptor model: Sintron ST-001, a multi-coin selector that accepts up to 8 different coin types at the same time. This type of selector is widely used in vending machines, massage chairs and other self-service systems.
You will use three buttons on the side of the acceptor: Setup, ADD and MINUS. The two-digit display between ADD and MINUS shows which channel you are on and what value it holds.
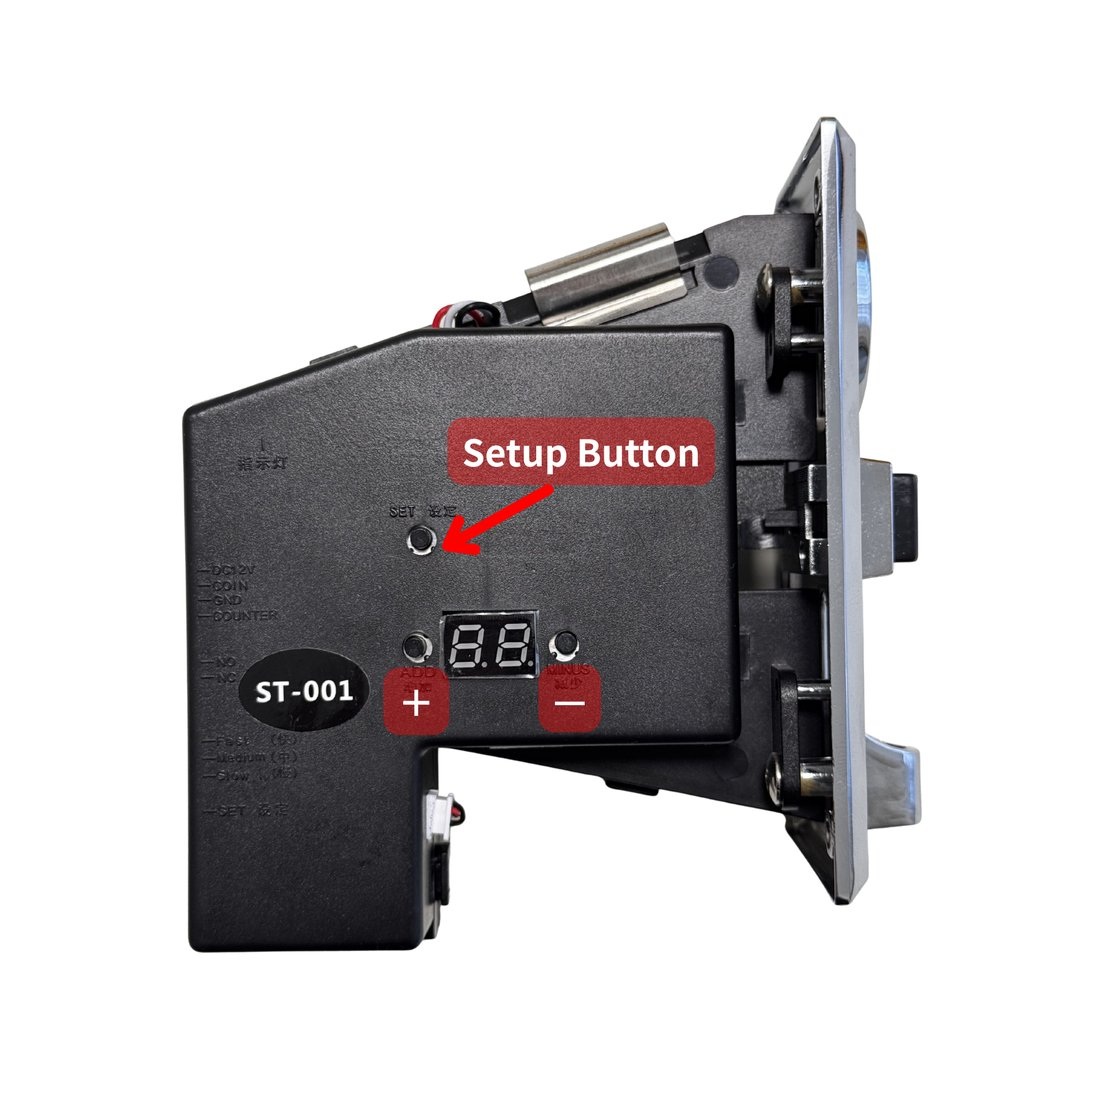
1.1 coin sampling → 1.2 set the coin value → 1.3 set the price and run time.
Steps 1.1 and 1.2 are done on the acceptor itself. Step 1.3 is done on the control module. A video is also included below.
Step 1.1 — Coin sampling
Teaching the acceptor which coins to take.
-
In standby, press Setup once. The display shows
L1, steady. L1 is the first of the eight coin
channels.
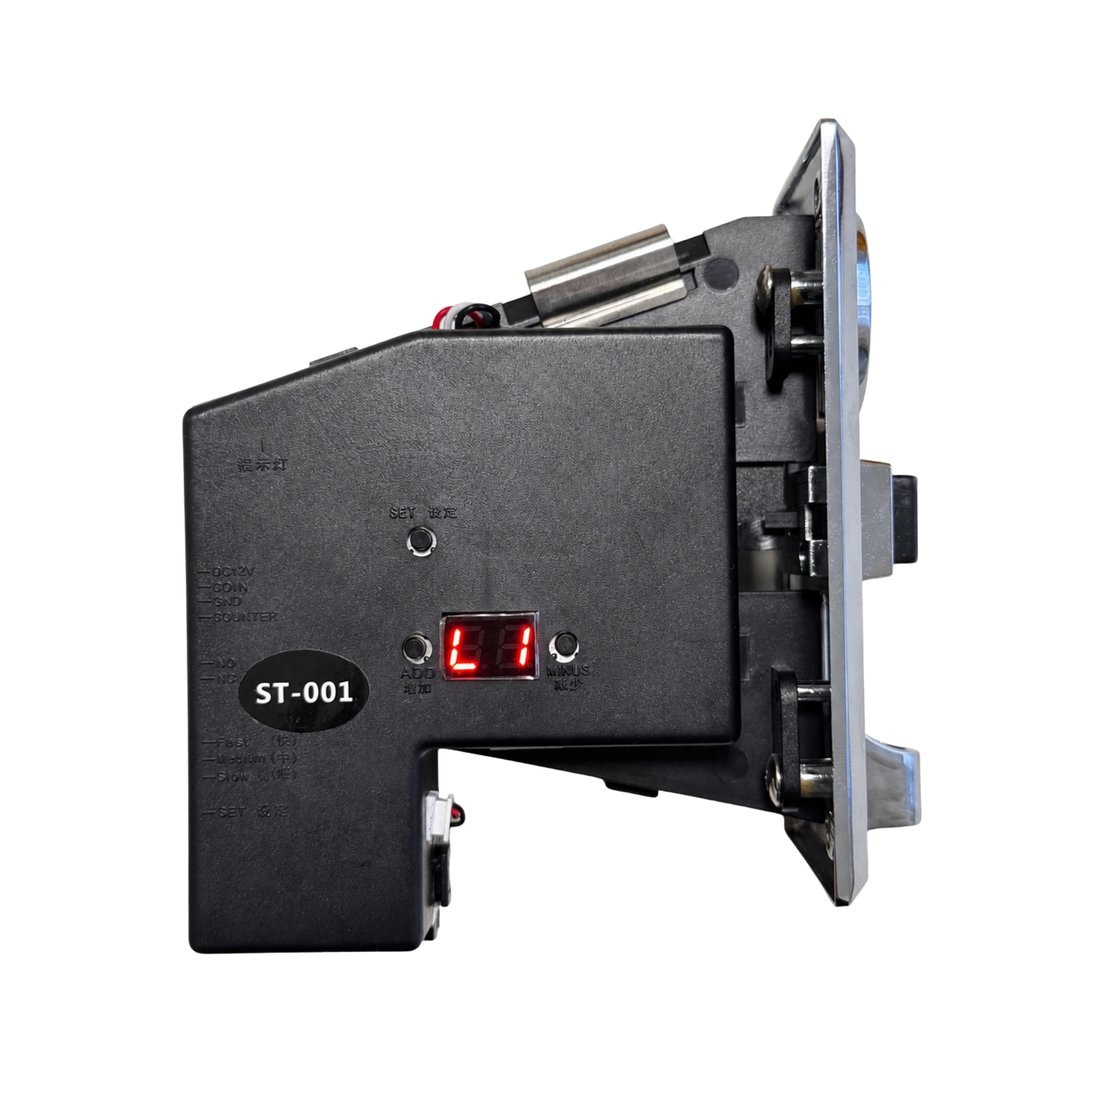
L1 — Channel 1 of the acceptor is ready to learn the first coin. There are 8 channels in total, from L1 to L8. - Prepare at least five coins of the same value (ten is better) and insert them one at a time, ten times in total.
- After the tenth coin, the display flashes 10 and you will hear a beep. Sampling for that coin is complete.
Step 1.2 — Set the coin value
Telling the unit what each coin is worth.
- While 10 is flashing, press Setup again to enter value setting.
-
Use ADD and MINUS to set the
value.
The value is what the coin is worth in your own currency
— 0.25 for a quarter, 1 for a one-dollar coin, 2 for a
two-dollar coin.
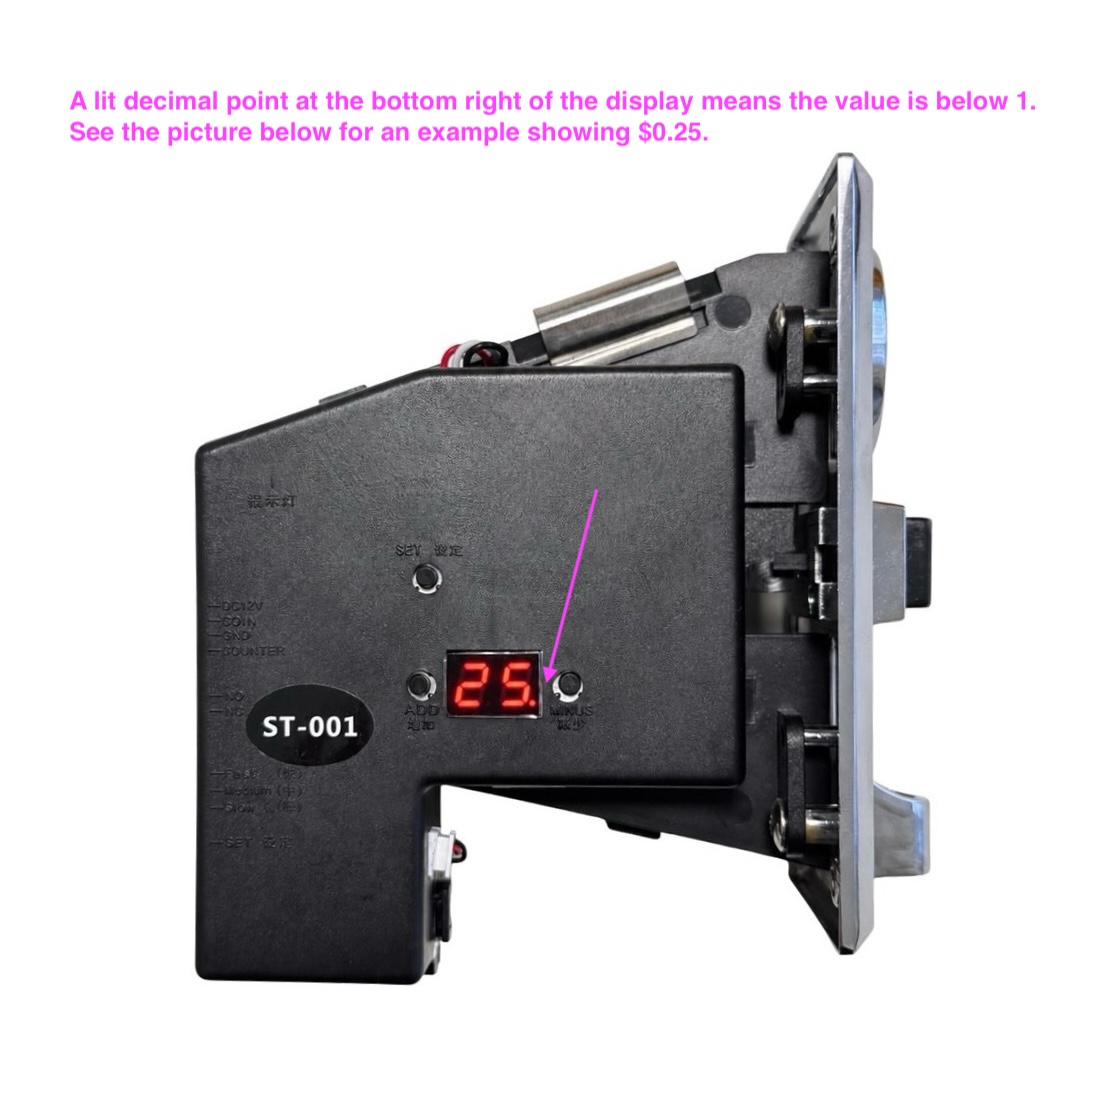
A lit decimal point at the bottom right of the display means the
value is below 1. See the picture below for an example showing
$0.25.
-
Press Setup again to save.
L1 (channel 1) is now done — repeat the
process for channels L2 to L8 if you have more than
one kind of coin.
PS. If there is a coin you no longer want the machine to accept, set that channel’s value to 0 and it will be rejected.
- Keep pressing Setup until the display goes dark. The acceptor restarts and beeps — that beep is your confirmation that the settings are stored.
Factory reset: with the acceptor powered, hold Setup for 5 seconds and release after the beep. All learned coins and values are erased.
Step 1.3 — Set the price and run time
- Press SET once. The screen shows the browser setup instructions — that is the other route, described below. To carry on here, press SET again.
- Timer Setup appears. Use + and − to change the digit you are on, and SET to move to the next digit.
- When the time is set, keep pressing SET until Coin Amount Setup appears. Set the amount the same way.
- Press SET once more. The screen repeats back what you set and shows settings saved. You are done.
These videos show the same 3 steps on a real unit. Worth a look if anything above is unclear.
If the machine only needs to take coins, you're all set — it is ready to use, and nothing beyond this point is required. Everything that follows is optional: Part 2 is the setup page (mobile payment, screen text, off hours, email reports), Part 3 the payment gateways, and Part 4 how to read what the machine has taken.
To take mobile payments as well, carry on to Part 2.
PART 2The setup page
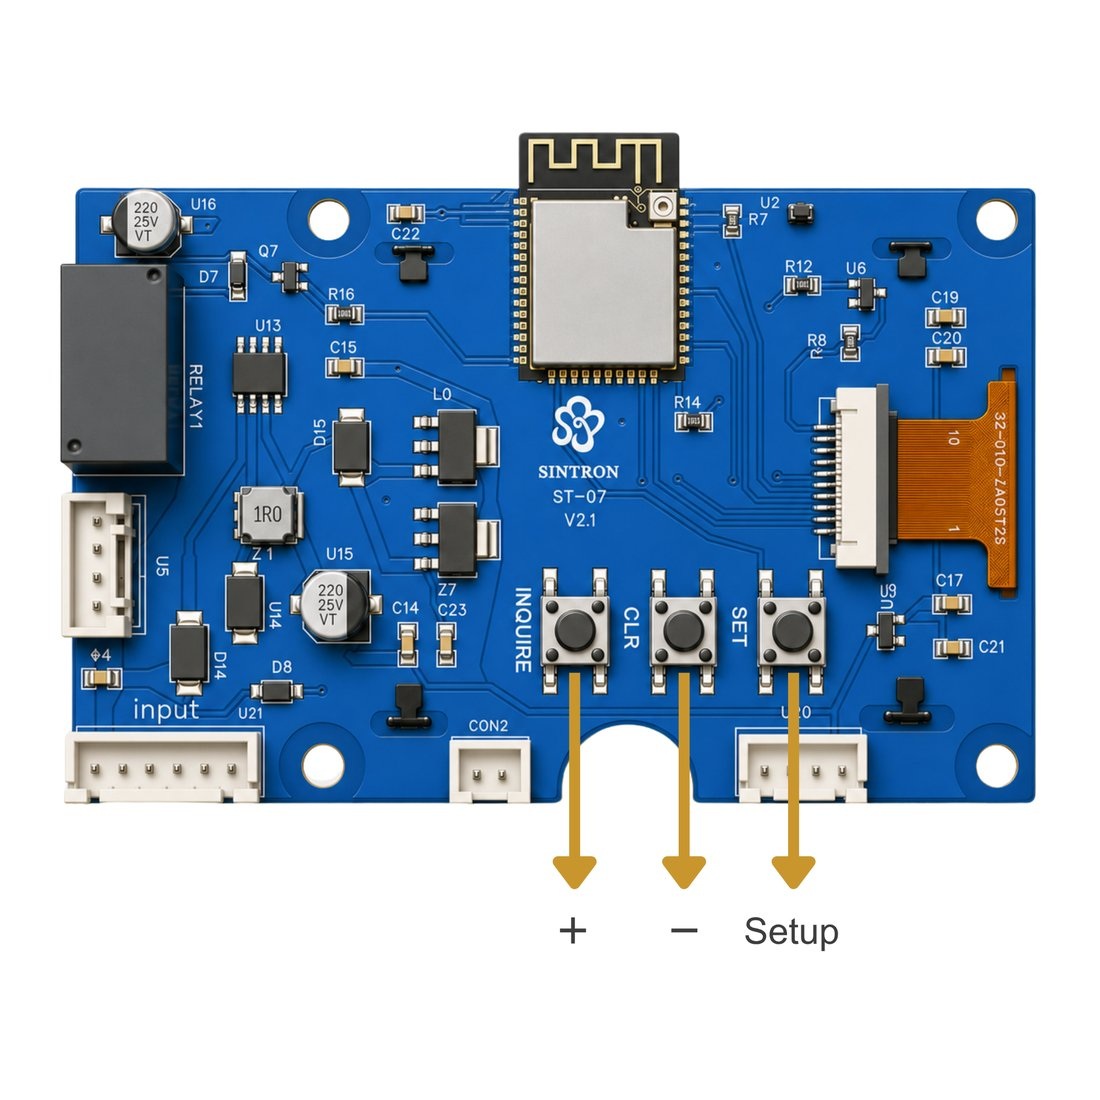
Locate the three buttons as mentioned from Step 1.3 on the back of the control module (No. 4). Please wear a glove before pressing them.
- Press SET to enter setup mode. The screen shows the setup instructions.
- Follow the on-screen instructions to open the settings page in your browser.
- You will enter the setup page.
2. Connect Wifi SSID: ST-004
3. Open Web Browser then
go to: 192.168.4.1
Below are only some of the settings. For the full explanation of all settings, click here.
Page Setting — Wi-Fi and Bluetooth
The top of the setup page holds three things: the device name, which connection the unit uses, and the Wi-Fi details of your own router. You can enable a Wi-Fi connection, Bluetooth for the app, or both.
Note: It is recommended to avoid using mesh networks. Certain mesh routers, such as the TP-Link Deco AC1200, have known compatibility issues. Please note that this is an issue with the TP-Link router, not our device.
This name will appear in the app as your device name.
Connection:
✓WIFI BLE (for APP)
PS. Replace to your WIFI router’s SSID and Password to connect to Internet, only supports 2.4G Frequency Wifi. Please Don’t Use 5G or above Frequency wifi. You can ignore this if you only want to use Coins or App Payment
The setup page as it appears in your browser.
Your Wi-Fi details
You can connect the device to your payment network in two ways:
- Wi-Fi (recommended): If your installation location has internet access, use Wi-Fi. Customers do not need to download any app — they simply scan the QR code and pay.
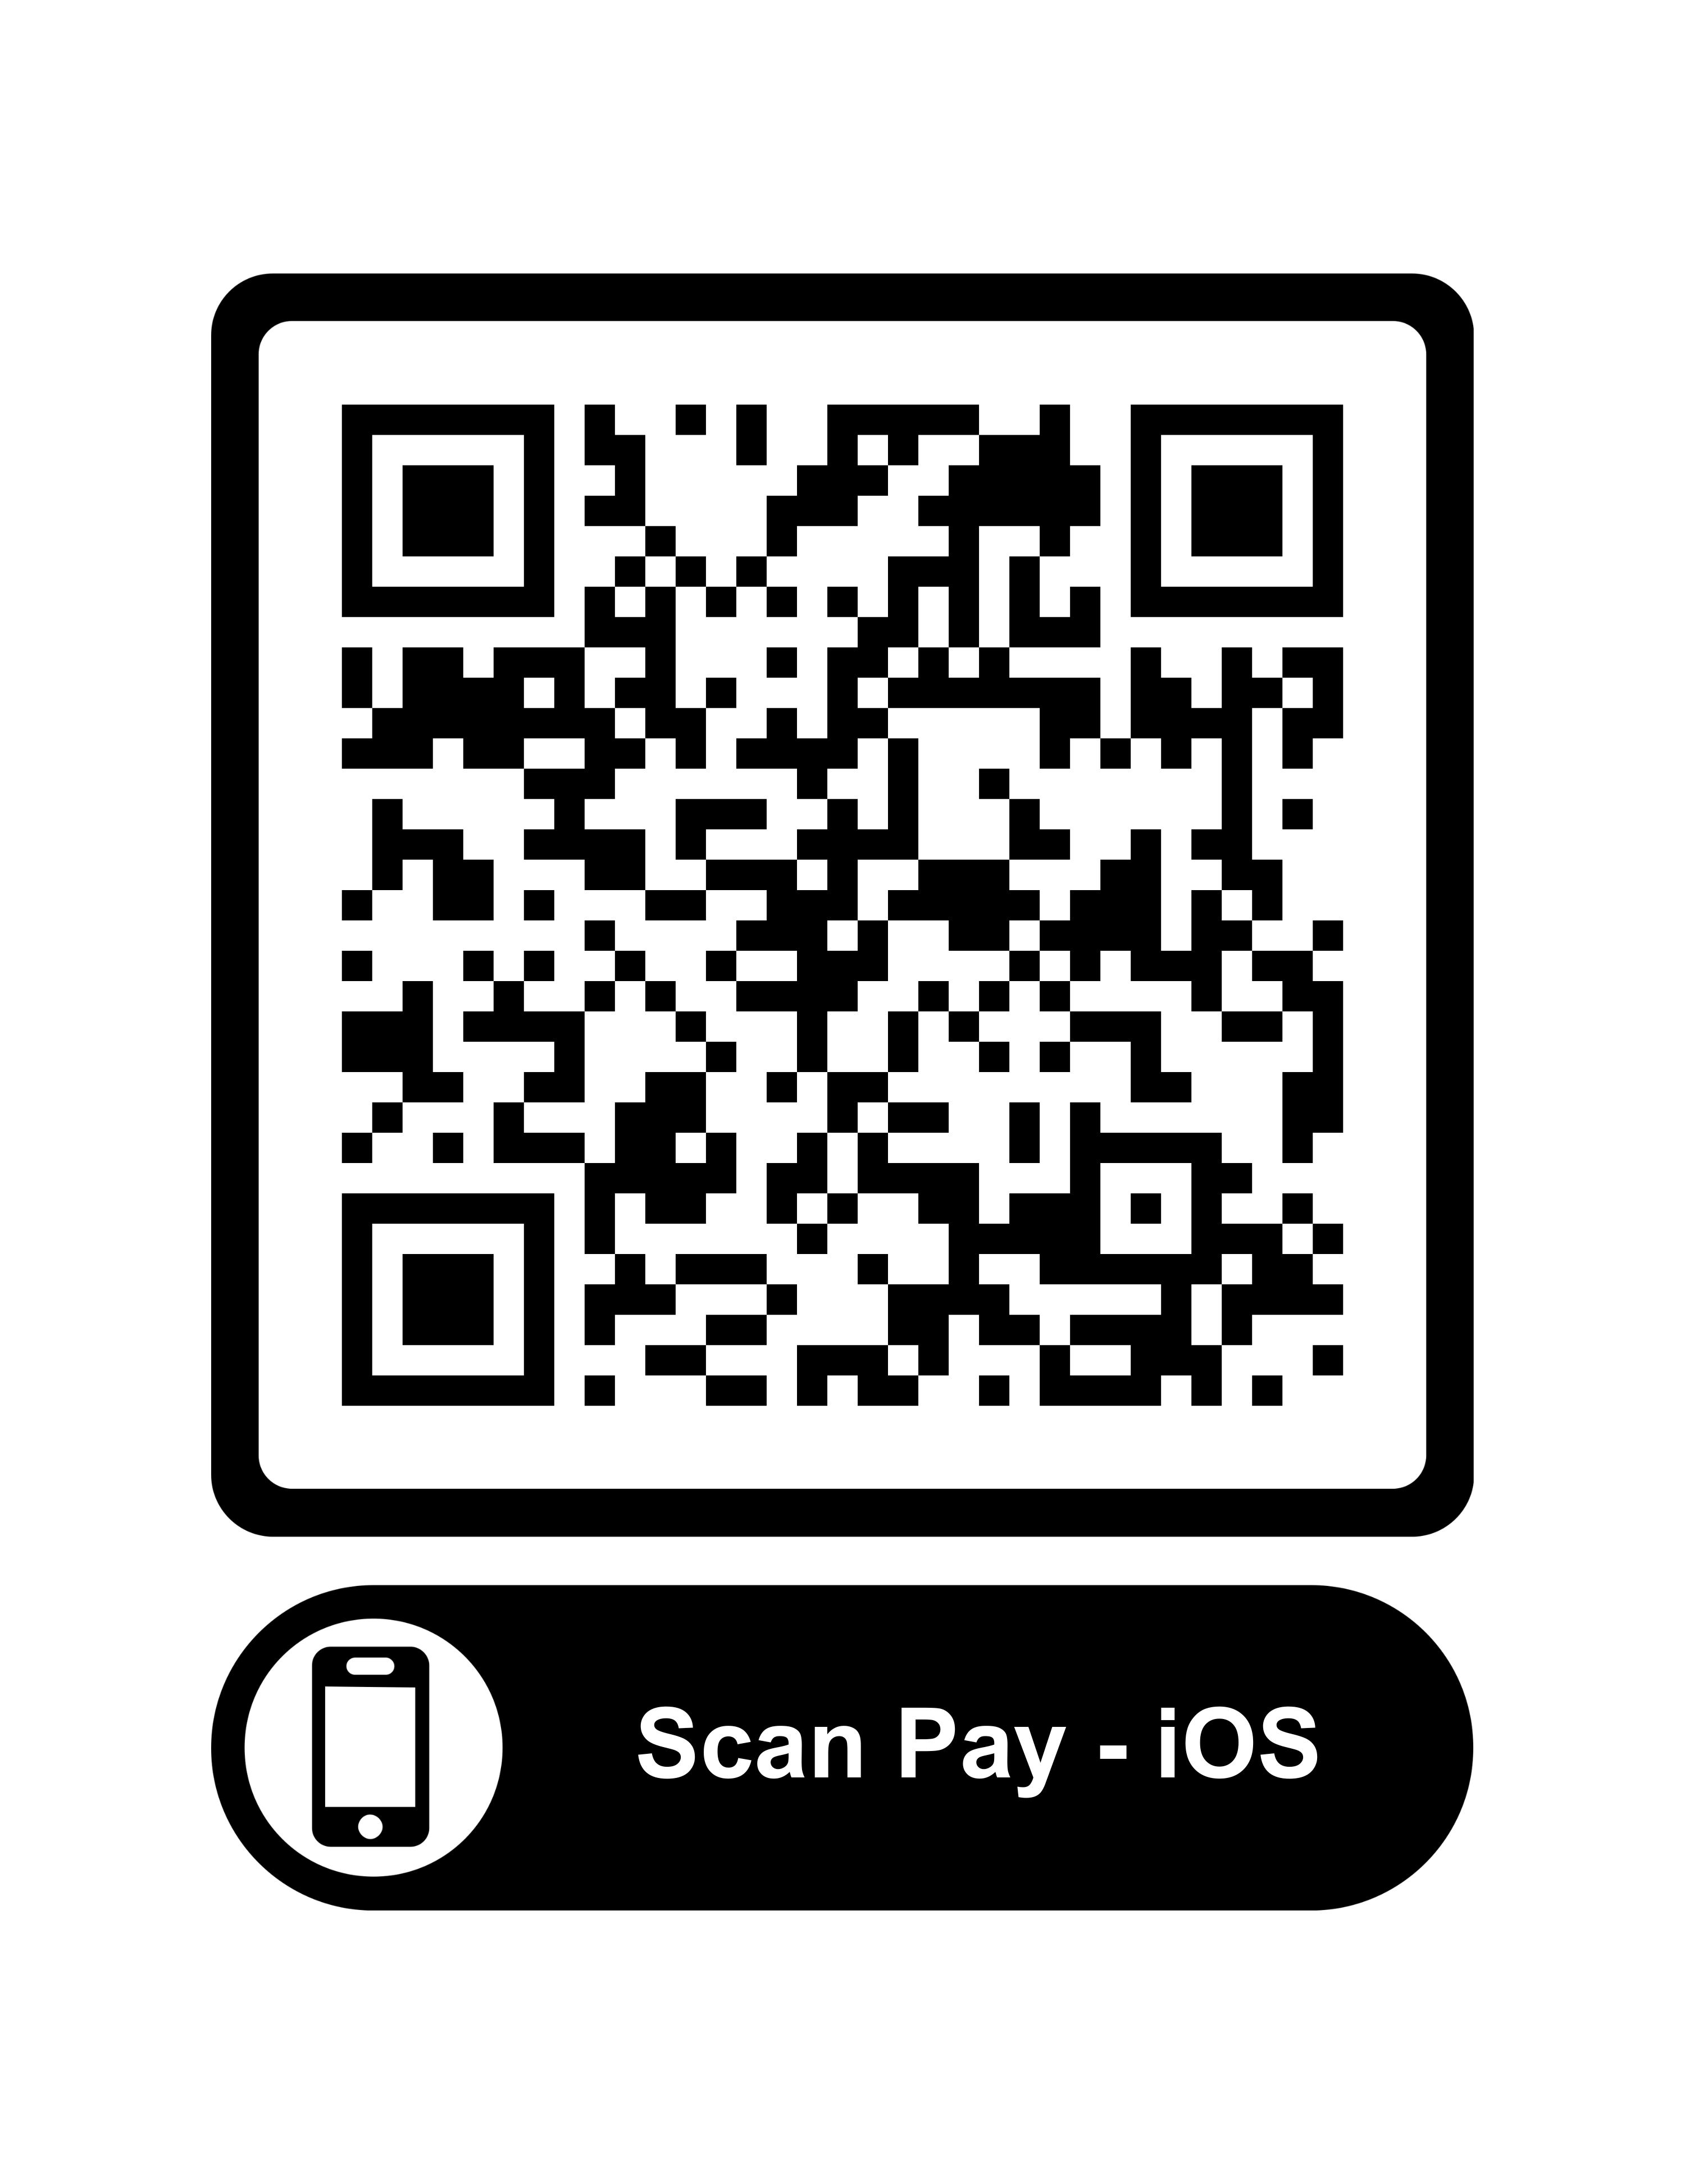
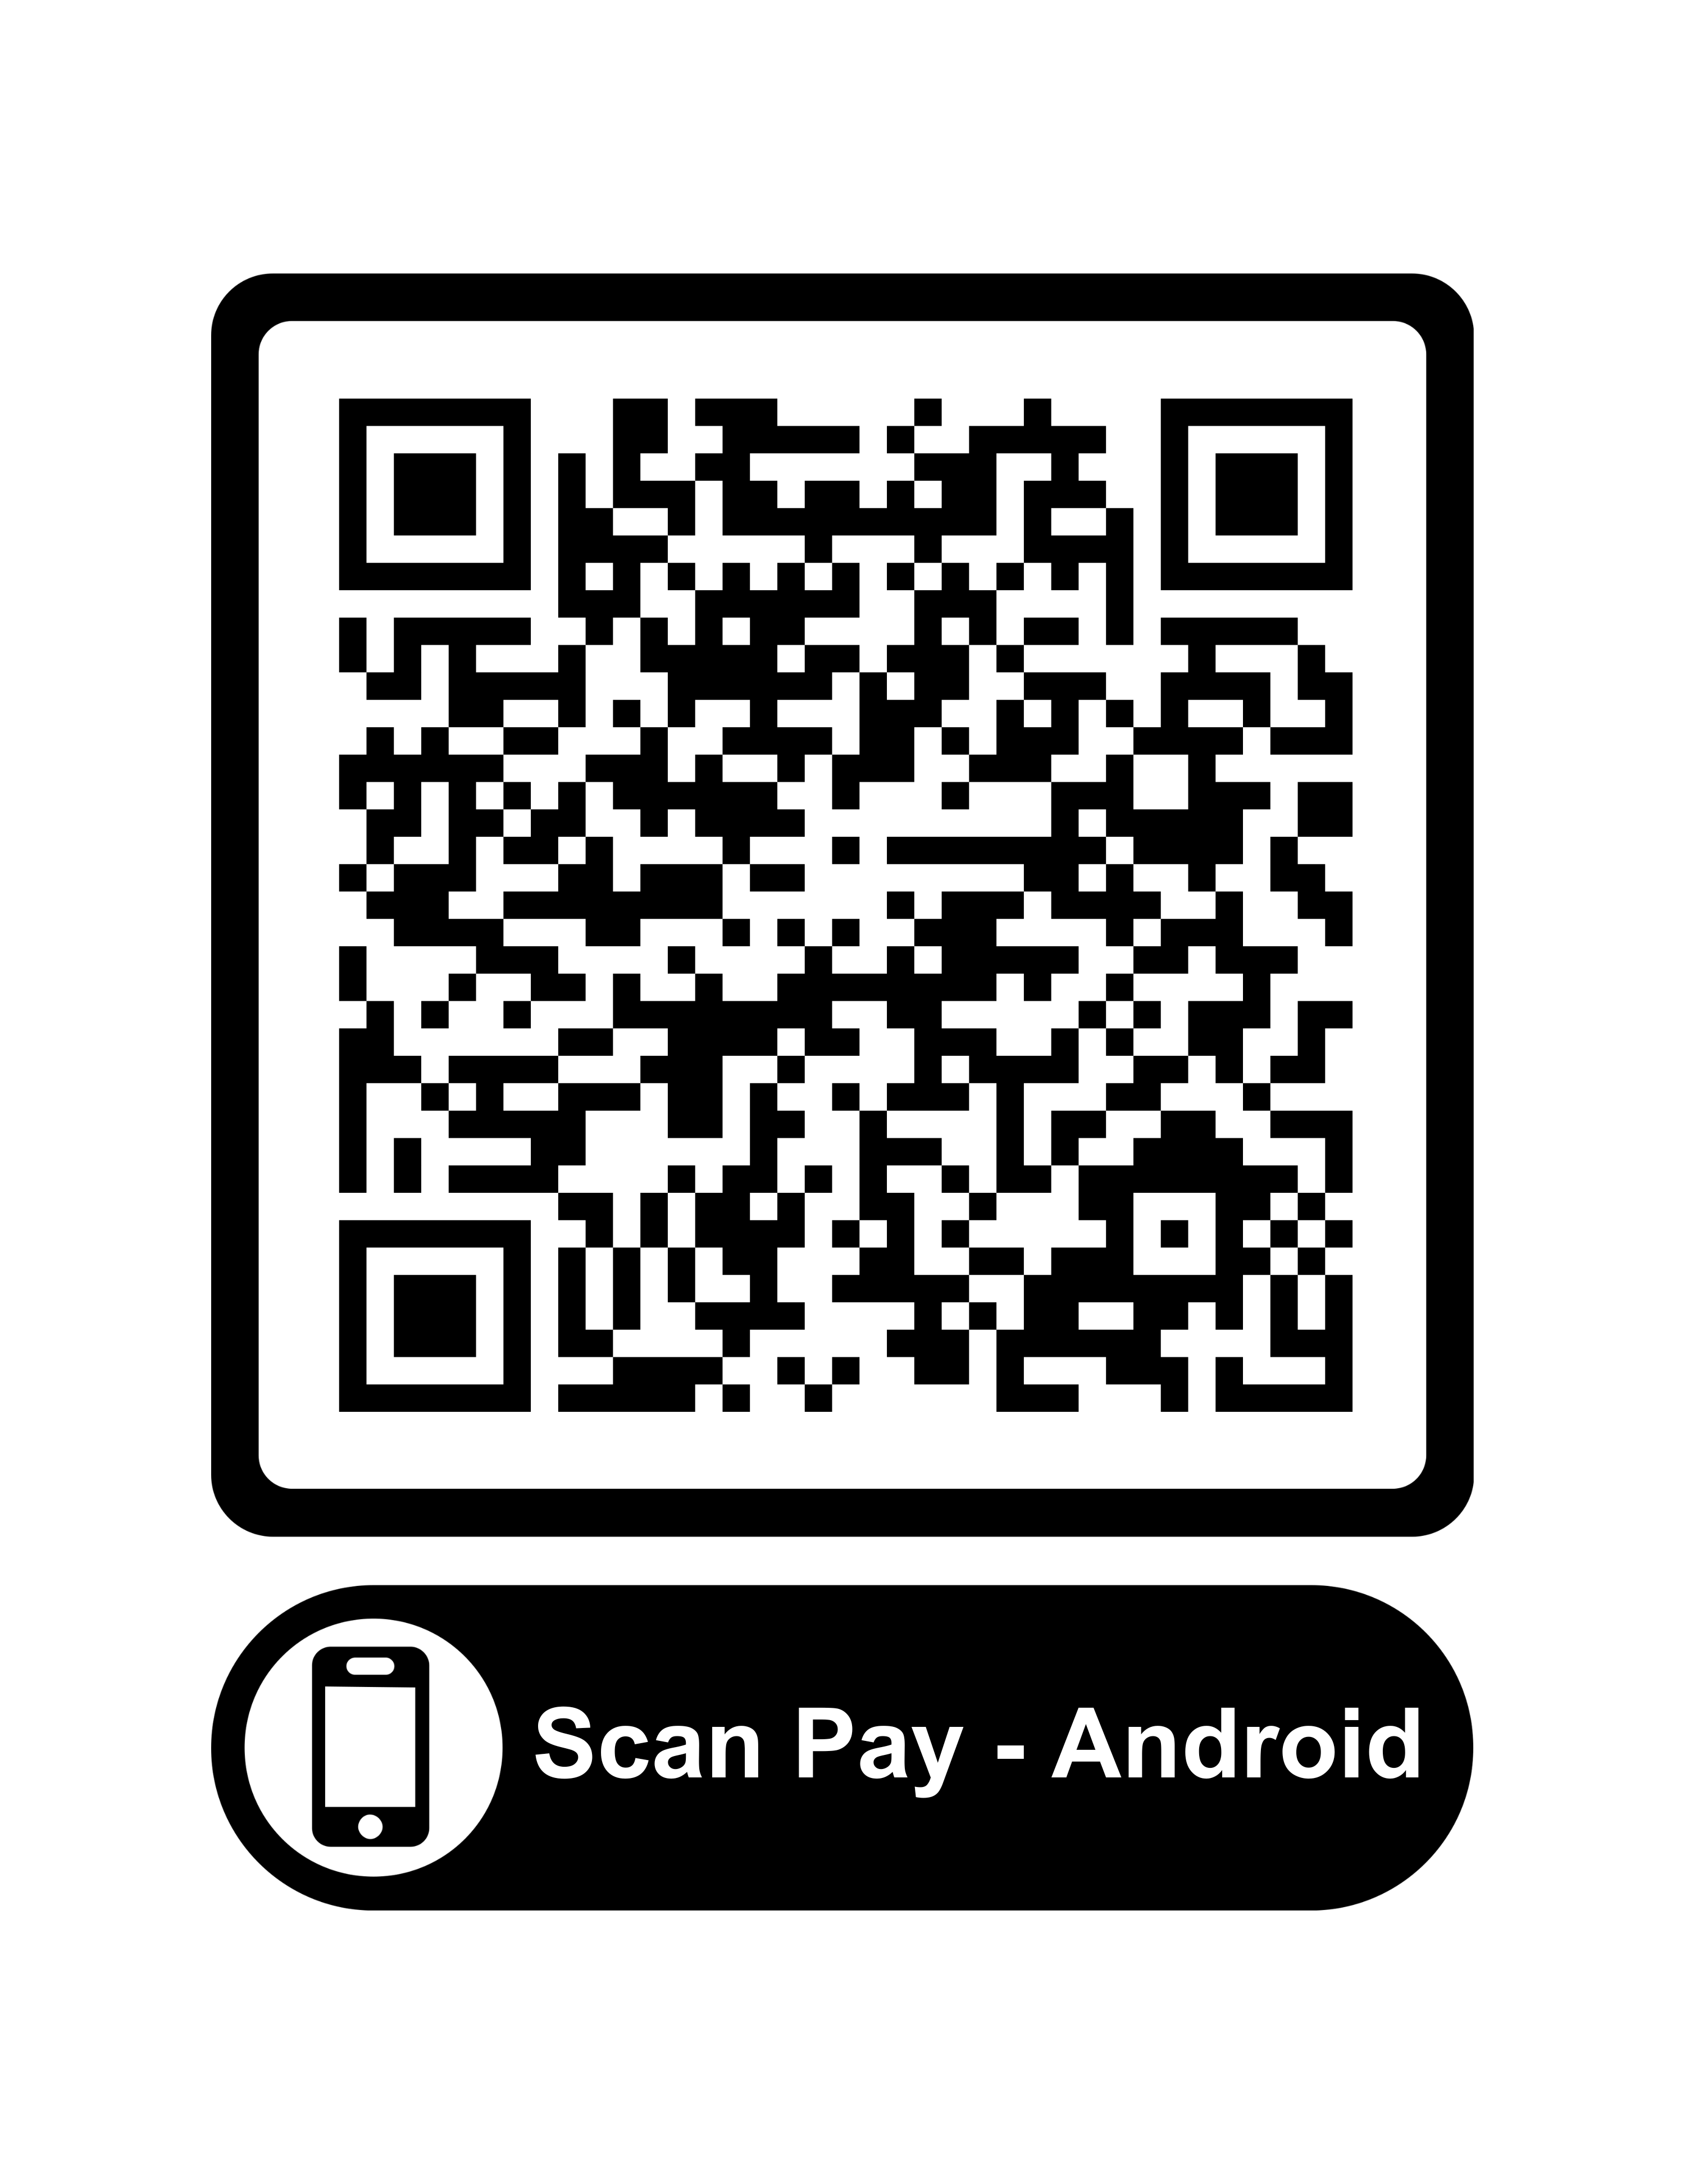
- Bluetooth / ScanPay App: If there is no internet access at the location, use the ScanPay app via Bluetooth. Download from the Apple App Store or Google Play Store by searching “ScanPay”.
You can also enable both Wi-Fi and Bluetooth if you wish to support both options.
Video: Wi-Fi mobile payment demo Video: ScanPay app demo
Page Settings — Custom LCD text
This is the screen a customer sees before they pay — the billboard, as the product listing calls it. For most customers it is the only instruction they will ever read. You write it yourself, as seven separate lines. Whatever you type goes straight onto the display, top to bottom.
Display on Main Screen: This information will be displayed on the screen while waiting for payment.
PART 3Payment Gateway Settings (Optional, Need WI-FI internet or Use APP)
Info for you (Owner): the first step is to decide which payment gateway you would like to use, then the second step is to check which payment methods it supports — that is, the ways your customers can actually pay, such as Apple Pay, Google Pay, PayPal, Venmo, or a debit/credit card. Not every gateway supports every method, so this determines what your customers will see at checkout.
Setting Page — Choosing your gateway
Mobile Payment Gateway Options:
PayPal Stripe Square revolut mypos
PS. for Mobile Payment, it needs to connect to Internet. make sure to connect to WIFI router first or use APP.
None (only use coins)
A payment gateway is the platform you use to receive money when customers pay with Apple Pay, Google Pay, PayPal, Venmo and so on. Payments go straight into your own account — Sintron does not sit in the middle and does not hold funds.
First decide which gateway you want to use, then check which payment methods it supports.
PayPal Stripe Square Revolut myPOS
Need a gateway that is not listed? Contact sales@sintron-hk.com. The firmware can be updated to add support if the gateway would be useful to other users too.
Payment Gateway Compare
| Gateway | Payment methods supported | Transaction fees | Micropayment rate | International | Chargeback fee | Monthly fee |
|---|---|---|---|---|---|---|
| PayPal | Credit/debit cards, PayPal account, Venmo, Apple Pay, Google Pay | Varies by country and transaction type | 5% + $0.05 per transaction (payments under $10 USD) | Supported, with currency conversion fees | $20 per chargeback | None (standard payments) |
| Stripe | Credit/debit cards, Apple Pay, Google Pay, more methods | 2.6% + $0.30 per transaction (US, pricing) | Not applicable | Supported, multi-currency | $15 per chargeback | None (standard payments) |
| Square | Credit/debit cards, Apple Pay, Google Pay, gift cards (more) | 2.6% + $0.30 per transaction (US, pricing) | Not applicable | Limited, USD only | $0 (Square covers the cost) | None (standard payments) |
Fees are set by the payment providers and may change. Check the provider’s own pricing page for current rates. Revolut and myPOS are not listed above — see their own pricing pages.
Part 3-1 — How to set up PayPal
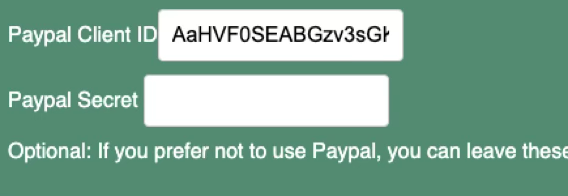
PayPal needs two values on the setup page:
Video: How to Obtain PayPal Keys
- You need a PayPal Business account. You do not need a registered company or a business licence — any individual can upgrade a personal PayPal account to a Business account for free. Go to your PayPal account settings → Upgrade Account Type → choose Business → follow the steps. It takes about two minutes.
- For payments under $10 USD, contact PayPal customer support and request the micropayment rate (5% + $0.05 per transaction). This rate is not applied automatically — you have to request it. Reference: PayPal merchant fees.
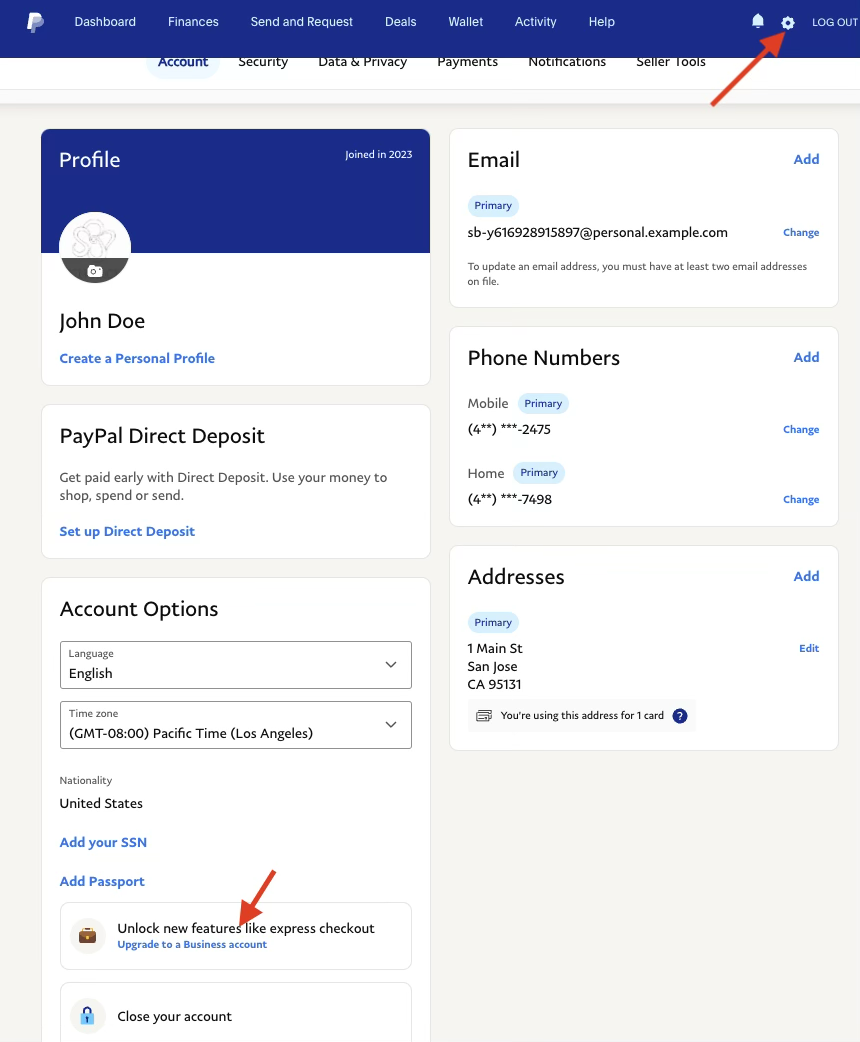
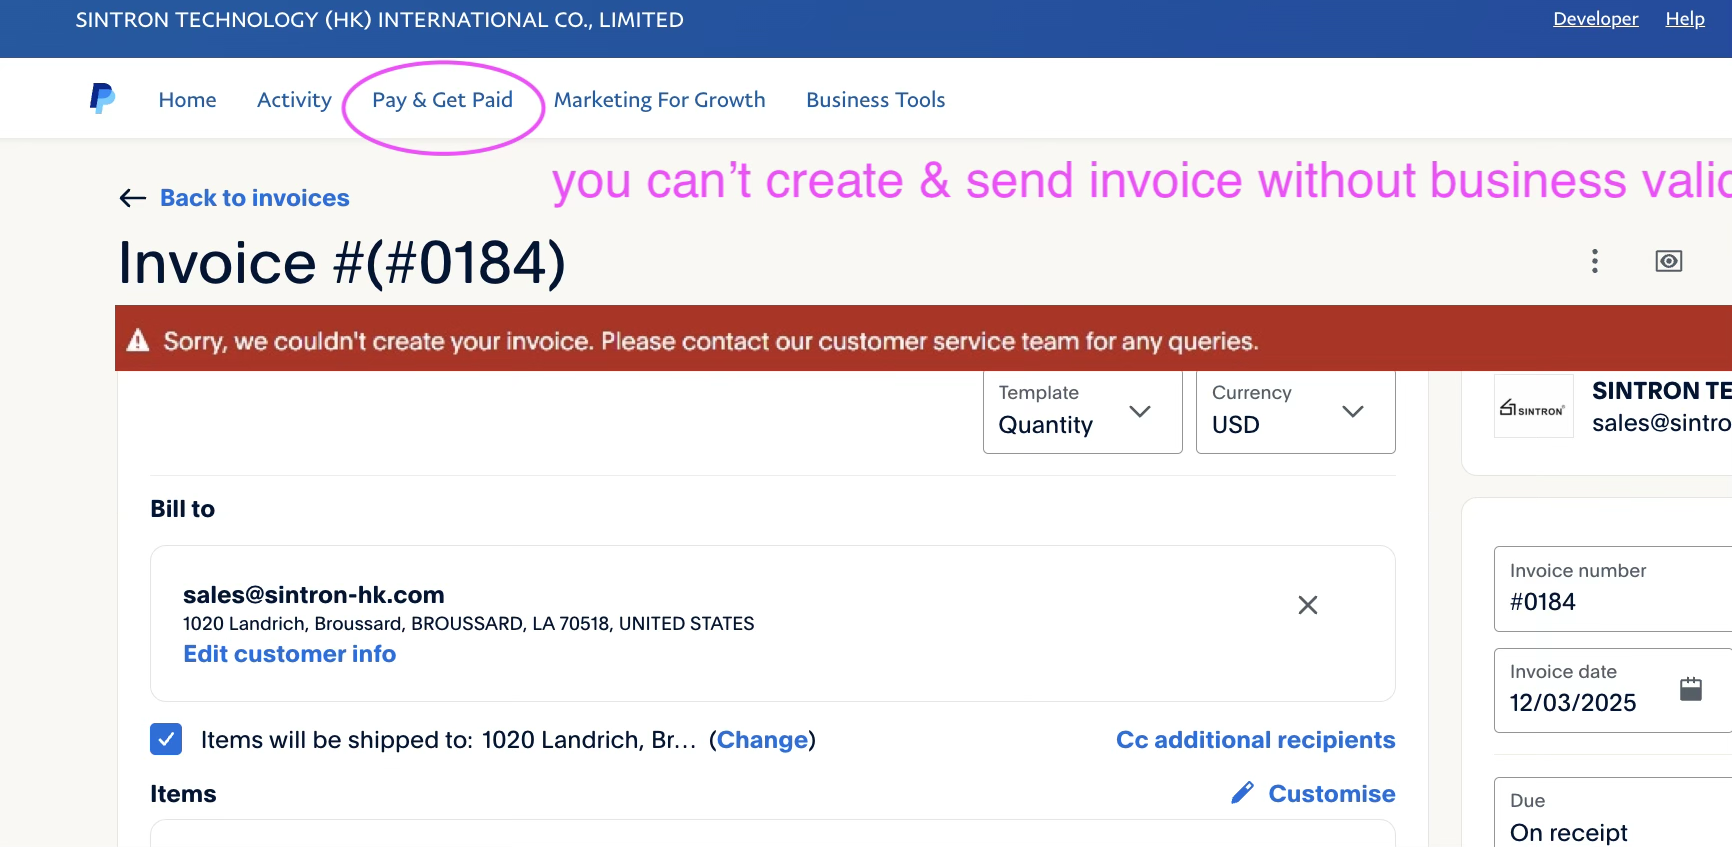
Log in to your PayPal Business account and check that you can manually create an invoice. If you cannot, your account is not yet verified — complete verification before going further.
Video: check if you can create a PayPal invoice
Get your PayPal Client ID and Secret
Video: get Client ID and Secret
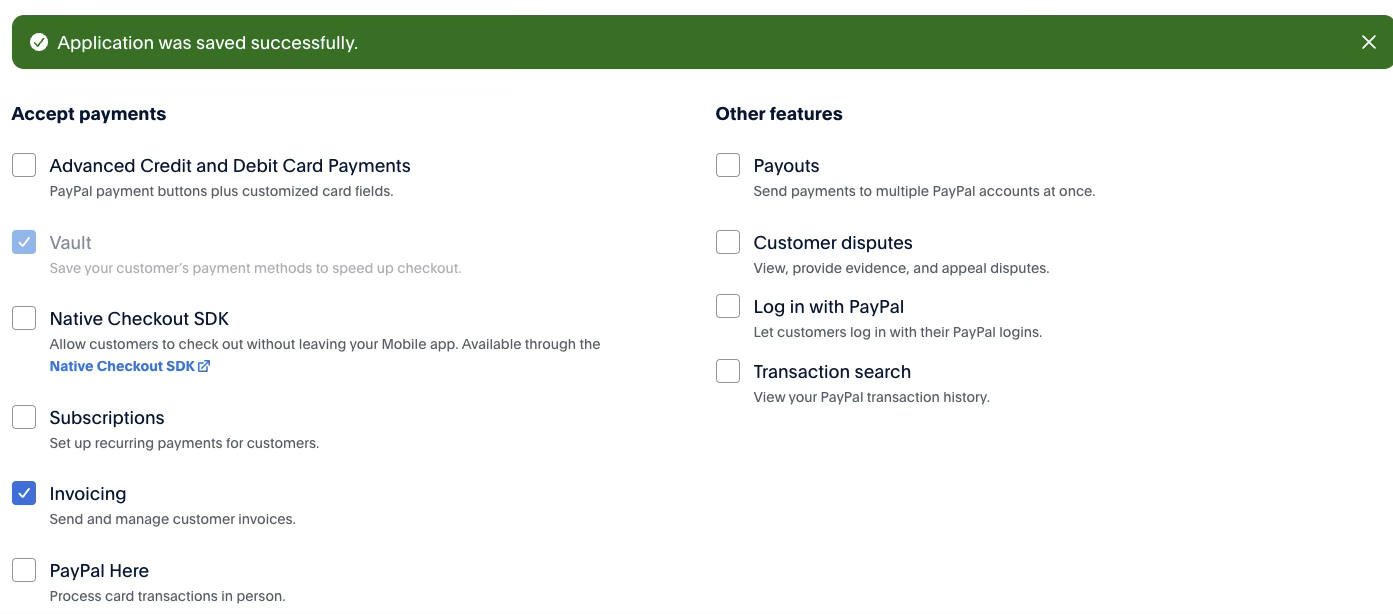
- Make sure you are in the Live environment (shown in green), not Sandbox.
- On the last page, tick Vault and Invoicing only. This is the safer option — no other permissions are granted to the application.

Copy and paste the Client ID and Secret into the PayPal fields on the setup page from Part 2.
Then test by pressing the payment button. If the QR code appears, it is working.
Final test
Video: PayPal & coin payment test Video: Apple Pay test
The QR code appears for one second and then disappears.
Cause: your PayPal Business account verification is not
complete, so the account cannot issue invoices for customers to
pay.
Solution: complete PayPal Business verification, then try
again.
Part 3-2 — How to set up Stripe
Stripe needs one value on the setup page:
Video: How to Obtain Stripe API Key
-
Log in to
dashboard.stripe.com
and click Developer.
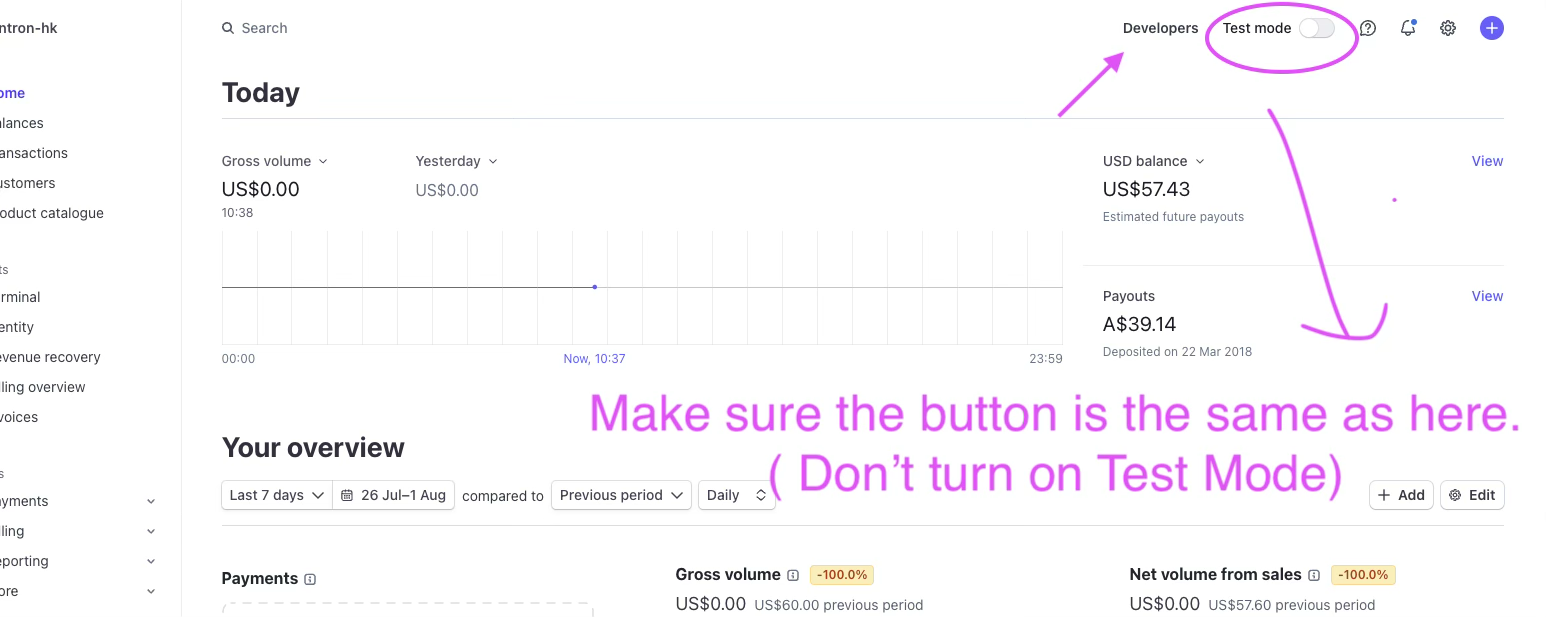
-
Click the API Key tab, then
Create Secret. You will be asked to verify —
choose whichever method you prefer (Touch ID is recommended).
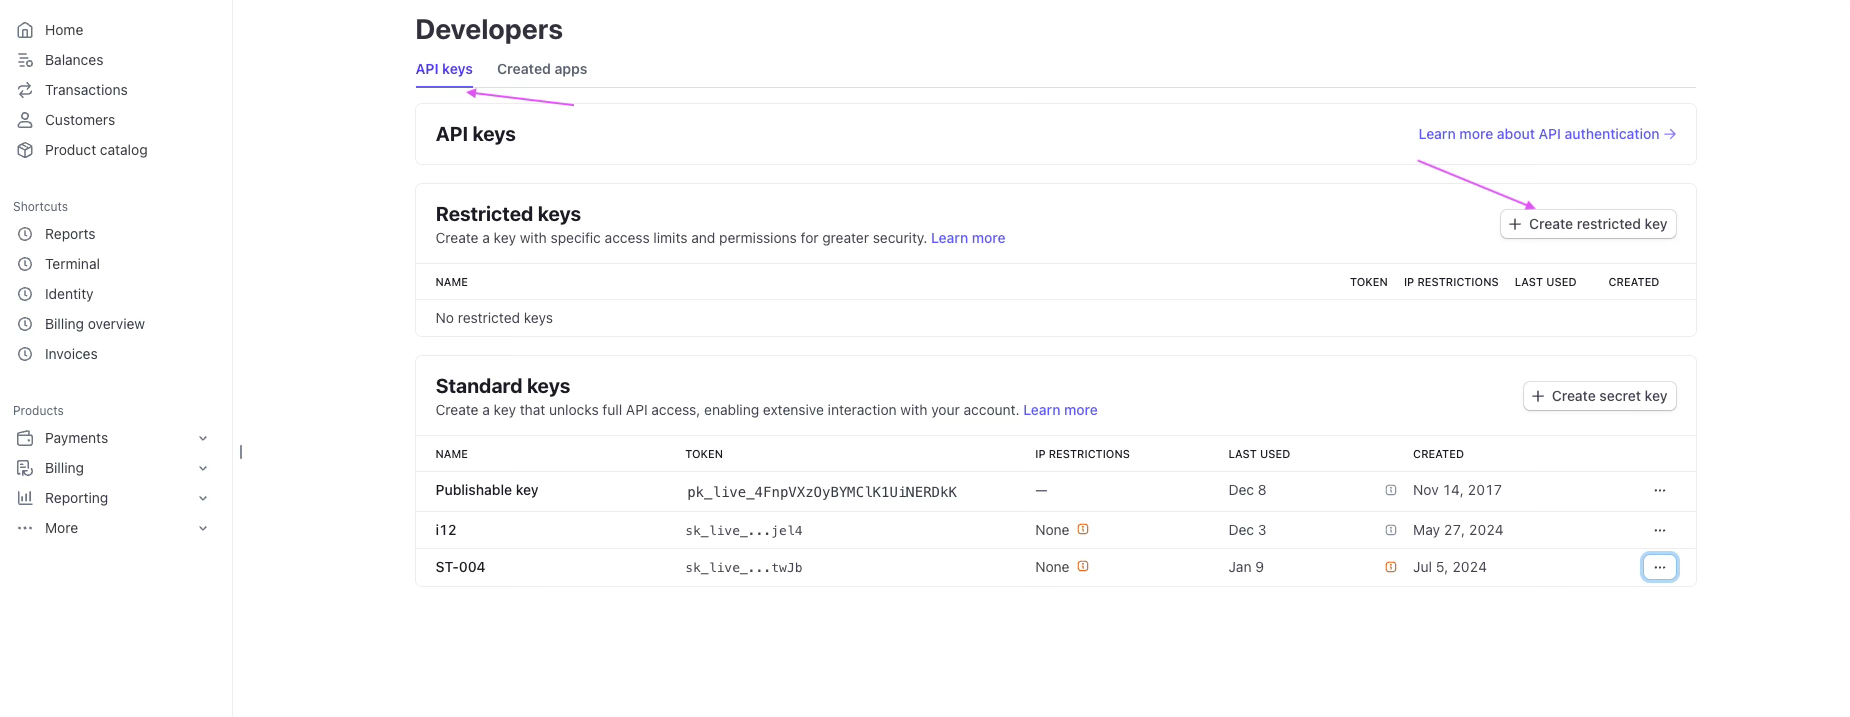
-
Fill in the API name and URL as you wish, for example
ST-004 and
https://sintron-hk.com. The URL does not matter.
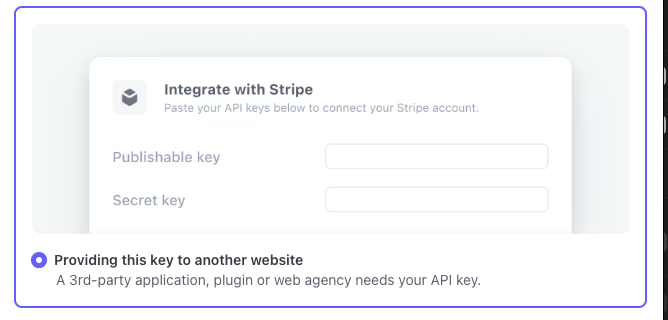
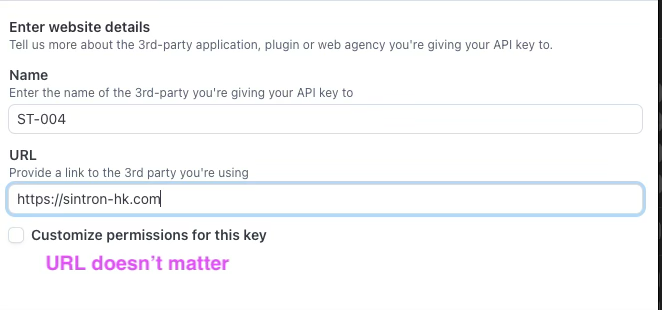
- You will then get your API key. Copy and save it.
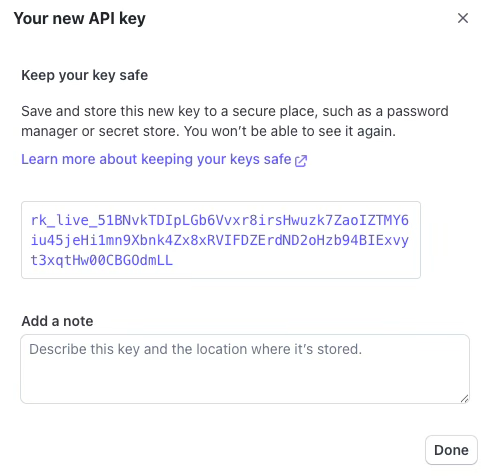
Video: get your Stripe API key
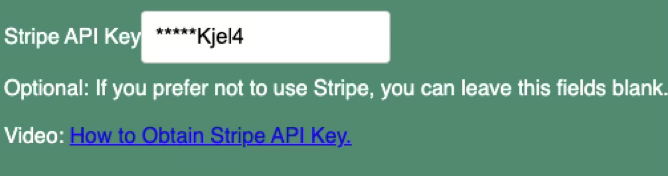
Copy and paste the key into the Stripe field on the setup page from Part 2, then test with the payment button. If the QR code appears, it is working.
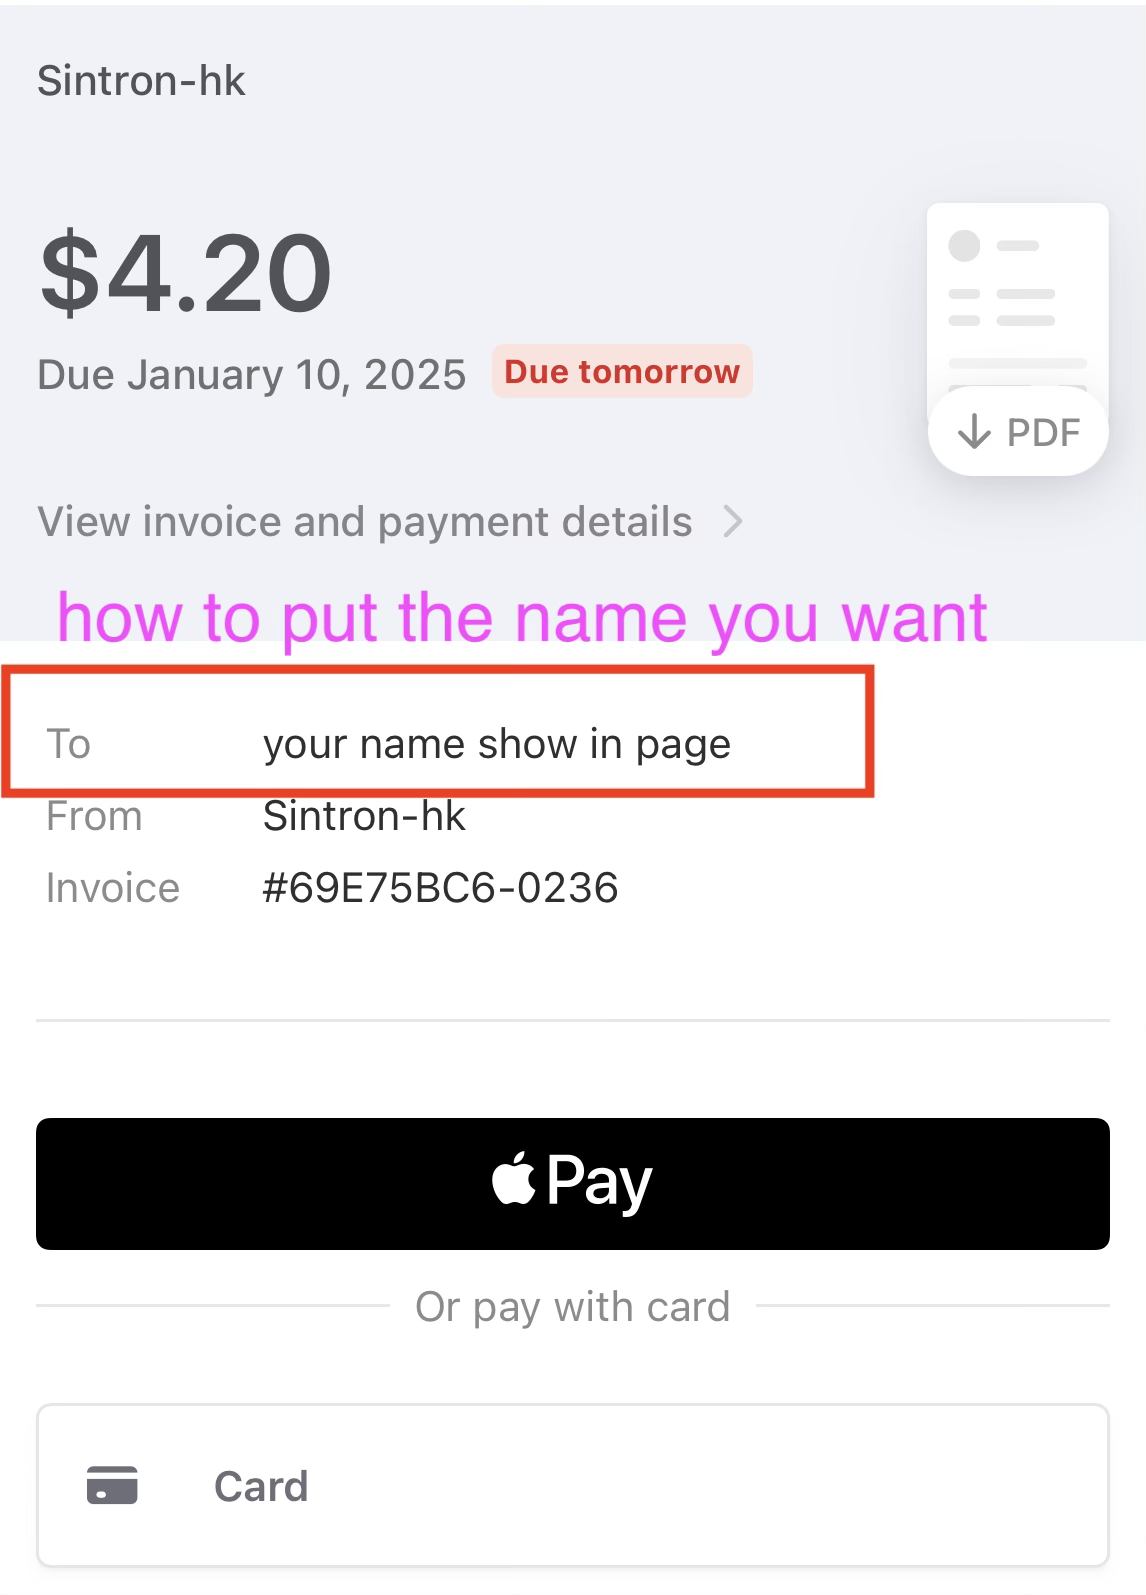
💡 Tip: to change the name shown on the payment page, see Video: revise the name
Part 3-3 — How to set up Square
Square needs one value on the setup page:
The Square API only works in the US, UK, Canada, Australia, Japan, Ireland, France and Spain.
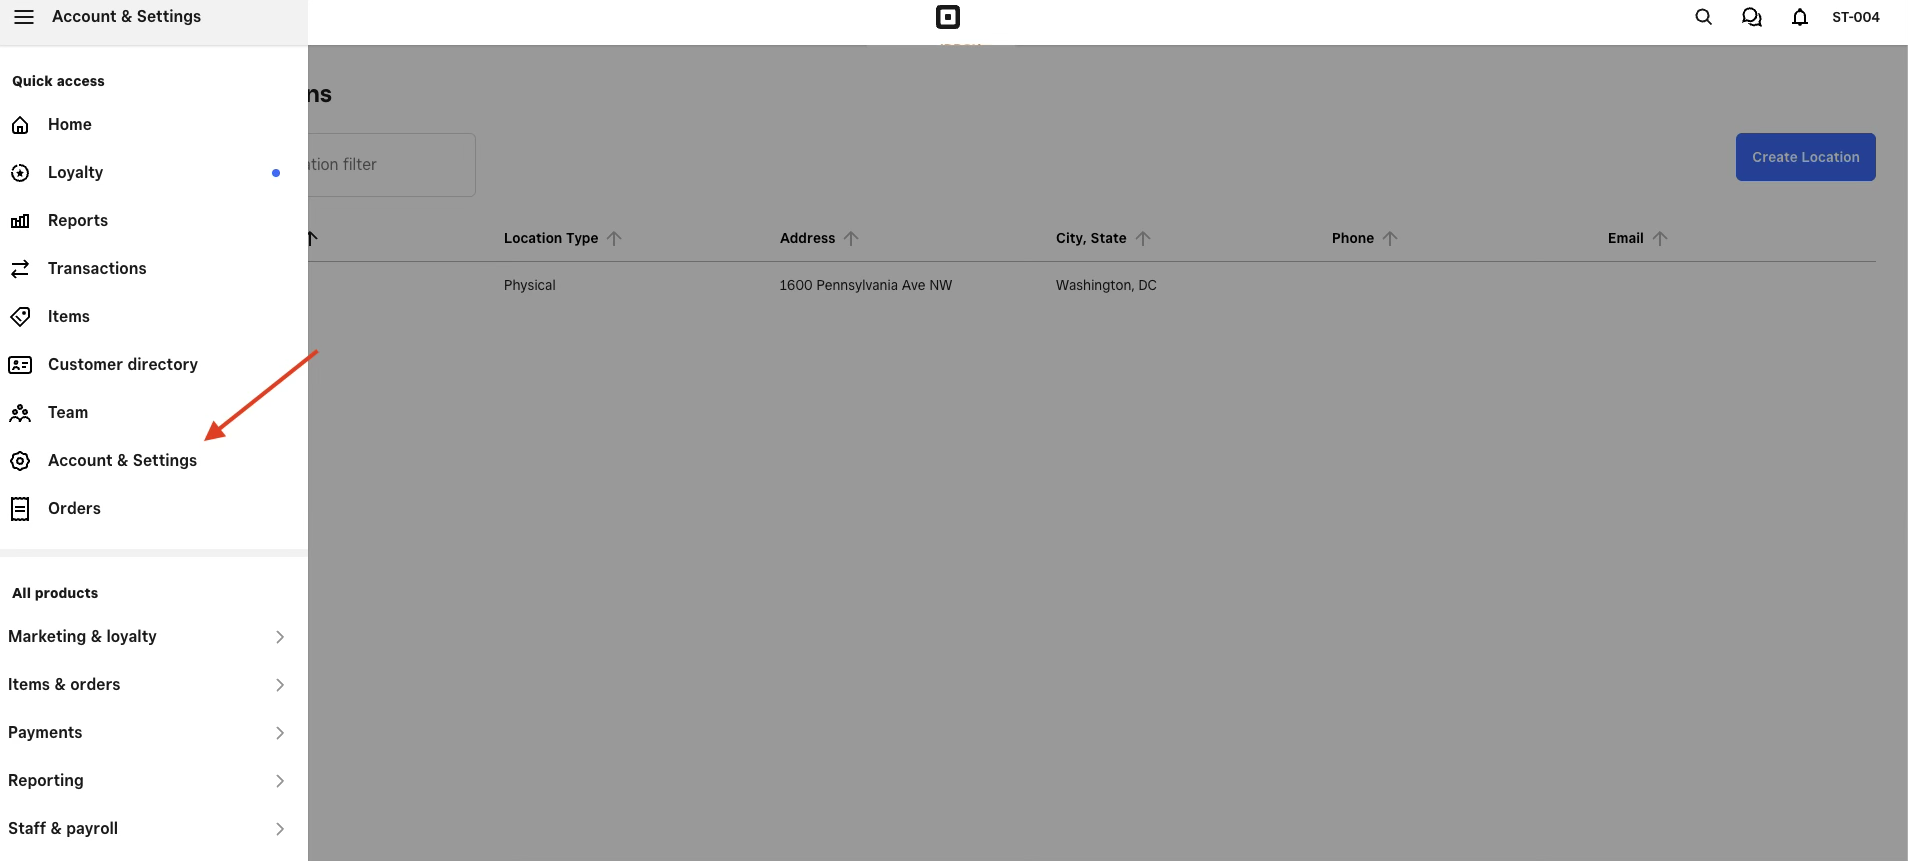
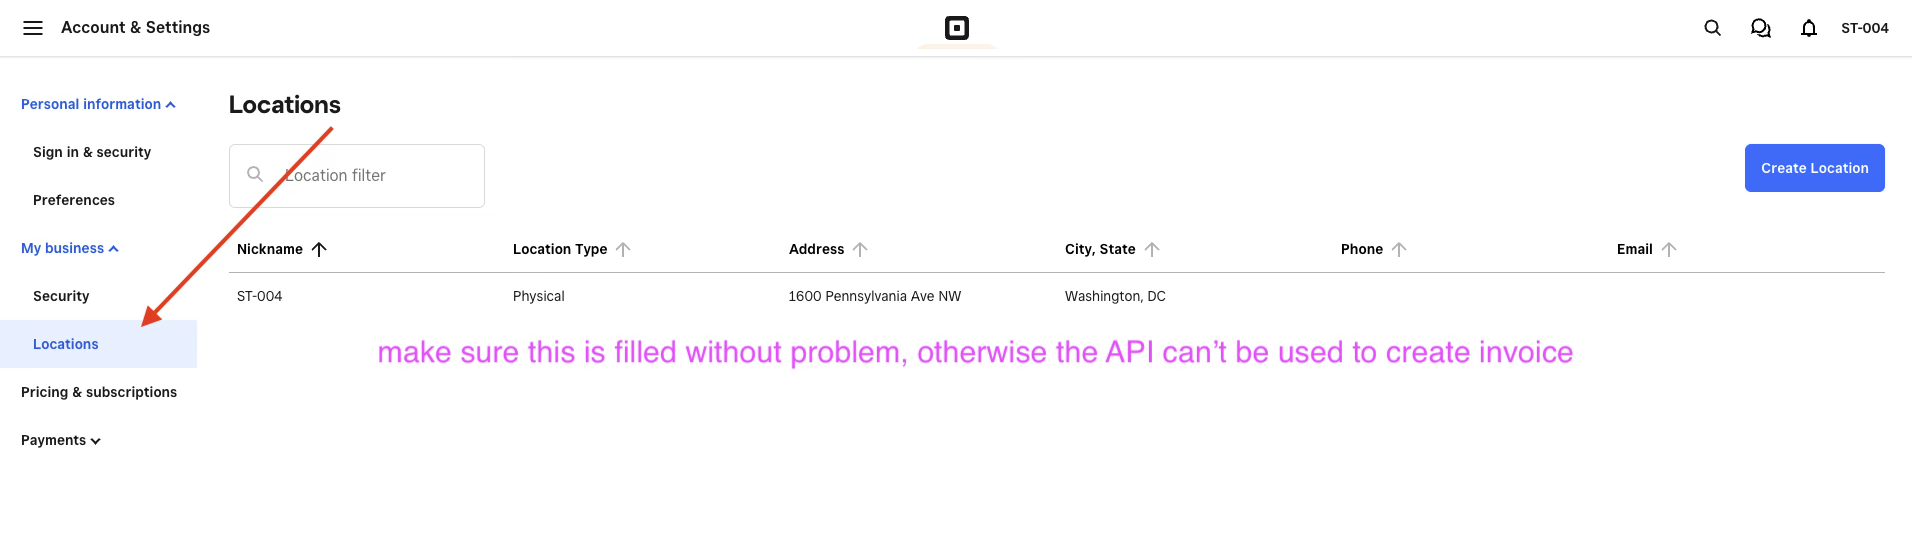
Before you start, go to Account & Settings and add a Location. If no location is set, Square will block the connection.
-
Add your Location in Square’s Account & Settings.
-
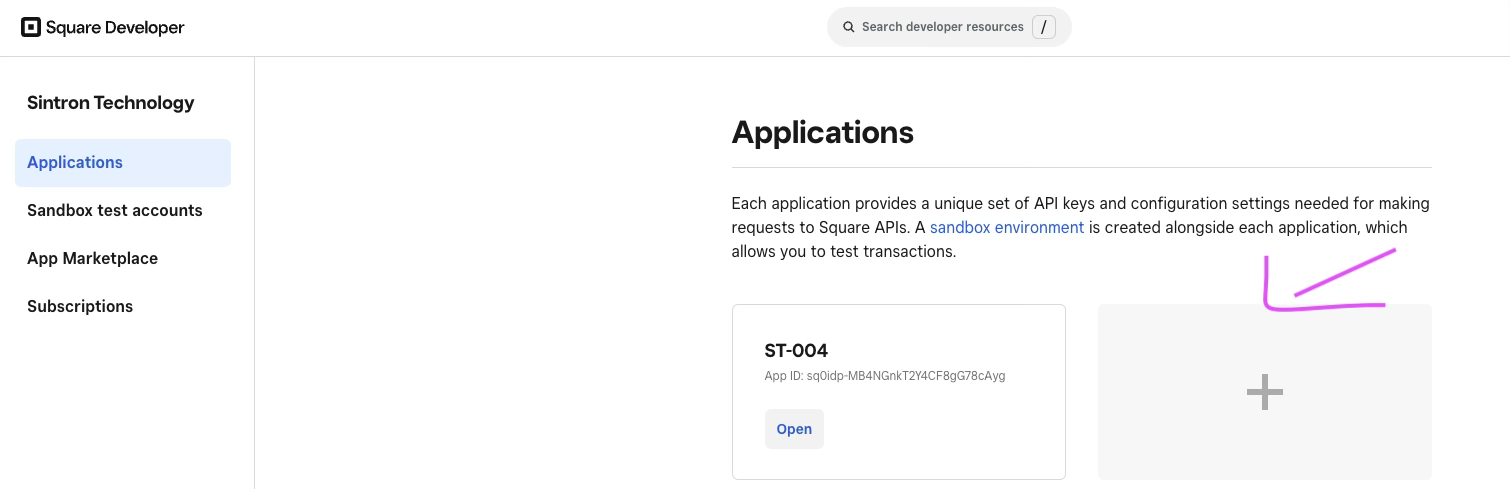
Log in to
developer.squareup.com, open the Applications tab and click
+ to add one.
-
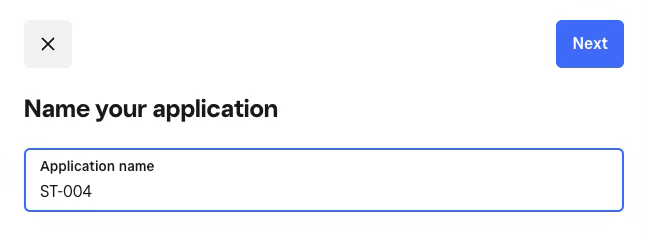
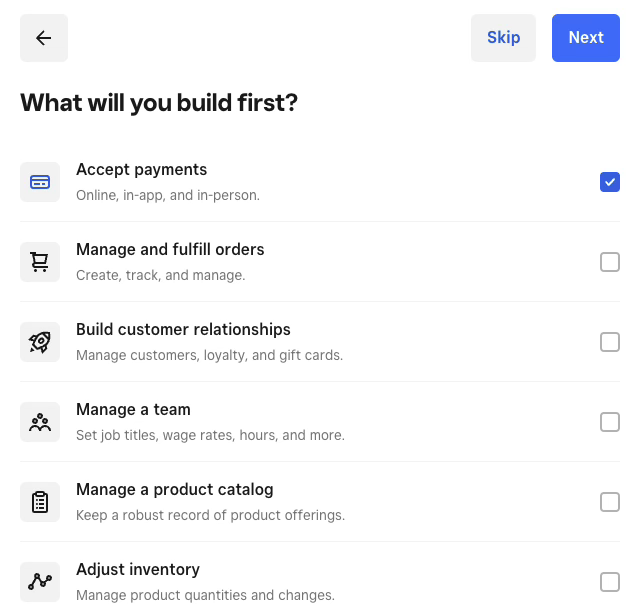
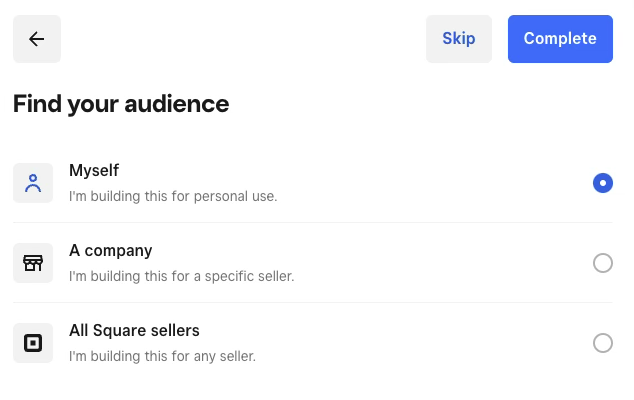
Fill in a name, for example ST-004, and complete the rest.
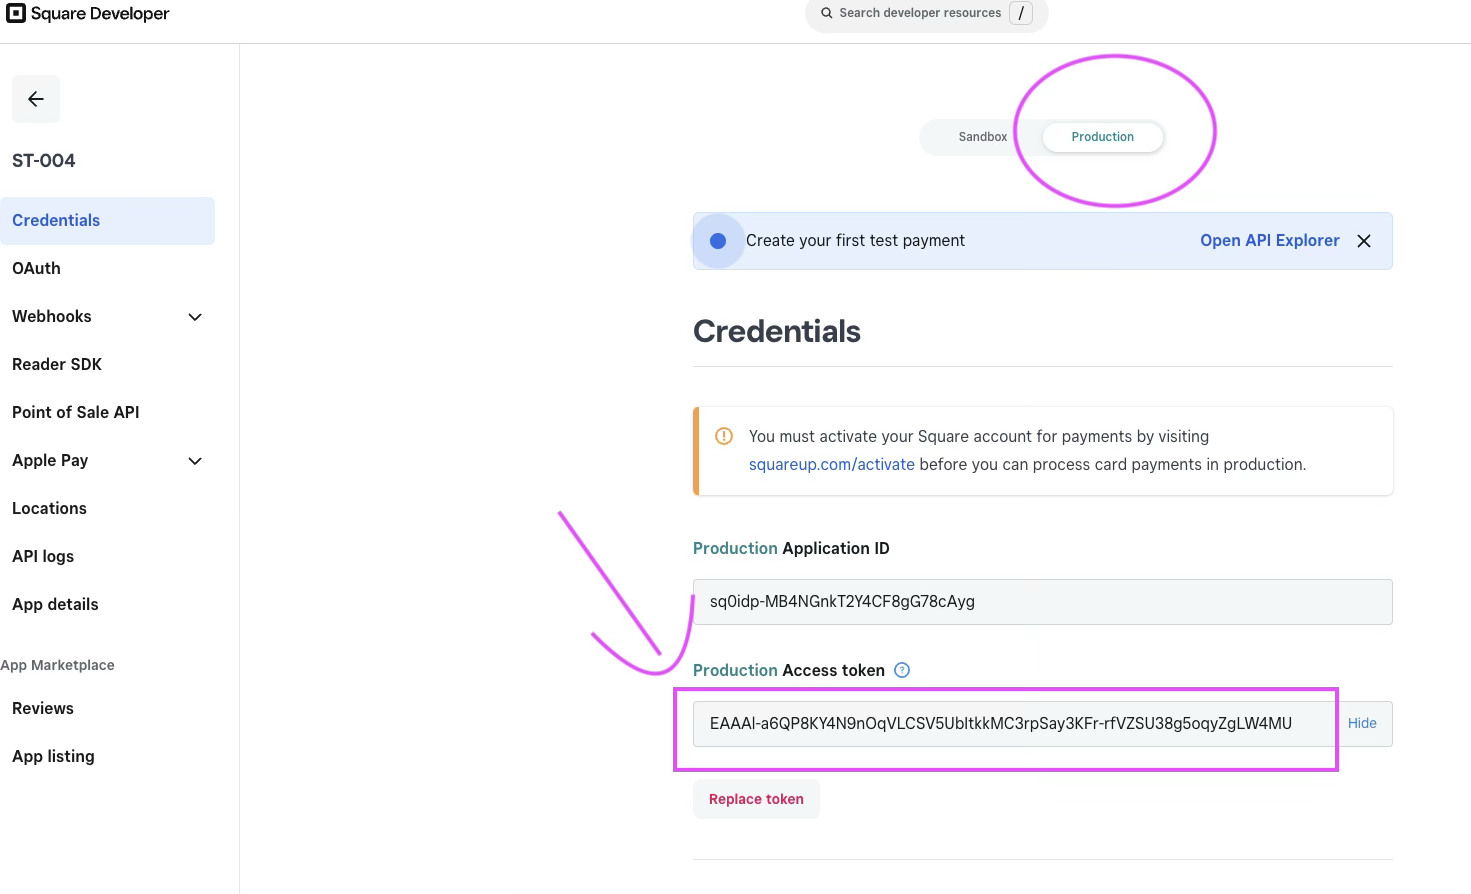
- Open the Production tab to see your token.
Video: get your Square API key
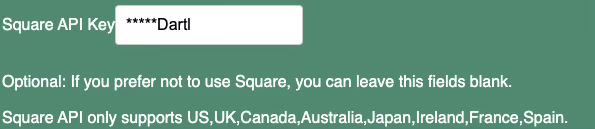
Copy and paste the token into the Square field on the setup page from Part 2, then test with the payment button. If the QR code appears, it is working.
Part 3-4 — Revolut and myPOS
Both are supported by the firmware and both have their own fields on the setup page — Revolut asks for one key, myPOS for a pair:
The pattern is the same as the gateways above: create the API credentials in your provider account, then paste them in here and save.
For the current step-by-step guide for these two gateways, contact sales@sintron-hk.com.
PART 4Extra functions
4.1 — Counter and reset buttons
Outside setup mode, two of the three buttons on the back of the control module (No. 4) do this work.
Inside setup mode the same three buttons become +, − and Setup. The board itself is pictured in Step 1.3.
- INQUIRE (+) — press once to read the totals. The screen shows how much money the unit has taken, with coins and cashless payments counted separately.
- CLR (-) — hold for more than 5 seconds, then release. This clears both totals and stops any time currently running.
Cleared
The figures keep adding up until you clear them, so they are not a daily or monthly figure. Clearing them each time you empty the coin box makes the number read as “since the last collection”. If the unit is online you can have the same totals emailed to you — see Part 2.5.
FIRMWAREOTA update
2026-08-04 firmware: V5.33
The unit supports OTA (over-the-air) firmware updates. If you need an update, contact sales@sintron-hk.com.
We also offer B2B services to tailor the functionality to your needs. Get in touch for customisation options.
MAINTENANCEReplacement parts
Something broke? There is no need to replace the whole unit. These components are available separately:
- Solid state relay
- Fuse & Fuse Holder
- Coin acceptor ST-001
- Control board ST-07 module
- Power cord
- Output socket
- Input socket
Contact sales@sintron-hk.com for availability.
FAQCommon questions
No power after using it for a while?
Usually the fuse has blown to protect the machine. Check the fuse first. Locate the fuse on the ST-004 · Check the fuse on the ST-005. Two spare fuses are included in the box.
Can I use tokens instead of coins?
Yes. The coin acceptor can be trained to accept tokens in the same way as coins. Tokens are available here.
How do I reset the coin acceptor to factory defaults?
Hold the Setup button on the ST-001 coin acceptor for more than 5 seconds. The acceptor resets to factory settings and you will need to train it again with your coin types.
How do I reset the timer to factory defaults?
There is a factory reset at the bottom of the browser setup page. It clears everything you set on that page, so read the warning there first.
Do customers need to install an app?
Not if the unit is on Wi-Fi — they scan the QR code on the screen and pay in their phone browser. The ScanPay app is only needed where the location has no internet and the unit is running over Bluetooth.
Does the machine still work without internet?
Yes. Coin payment runs fully offline with no network. With no internet at the location, customers can still pay by phone through the ScanPay app over Bluetooth.
The coin acceptor is accepting coins it should not accept.
The sensitivity is set too high. Adjust it down until only the correct coin types are accepted. See the sensitivity adjustment video.
How do I extend my warranty?
You can extend it by one year, for two years in total, by submitting the Sintron Warranty Request Form.
What is the difference between the ST-004 and the ST-004-F?
The ST-004-F is front-opening, while the ST-004 is side-opening. Other specs are the same.
FOR YOUR CUSTOMERSHow to Pay
Option A — Coins
Put your coins in. The timer starts on its own.
Option B — Scan the code on the screen
1. Point your phone camera at the code on the display.
2. Tap the link that appears.
3. Pay with Apple Pay,
Google Pay or a card.
No app needed for this one.
Option C — No code on the screen? Use the free app
1. Install the app — scan the code below for
your phone.
2. Stand within 3 metres (10 feet) of this
machine.
3. Open the app and tap Scan. It looks for machines
nearby.
4. Pick this machine from the list, check the amount, and pay.
iPhoneApp Store
AndroidGoogle Play
If a code will not scan, search your app store by name: on iPhone search Scan->Pay, on Android search ScanPay. Both are published by Sintron.